Tag: DIY

  • The Ultimate DIY: Insemination After a Tubal Ligation Without Medical Intervention

    Blog Post:

    When a woman decides to undergo a tubal ligation, also known as “getting her tubes tied,” she may believe that it is the end of her fertility journey. However, life circumstances change, and she may find herself wanting to conceive again. In these situations, many women assume that the only option is to undergo a costly and invasive procedure to reverse the tubal ligation or to pursue in vitro fertilization (IVF). However, with the rise of the do-it-yourself (DIY) movement, there is a lesser-known option that allows women to inseminate themselves at home without medical intervention. This ultimate DIY method is becoming more popular and accessible for women who have had a tubal ligation but still want to conceive. In this blog post, we will explore the process, potential risks, and benefits of insemination after a tubal ligation without medical intervention.

    The Process:

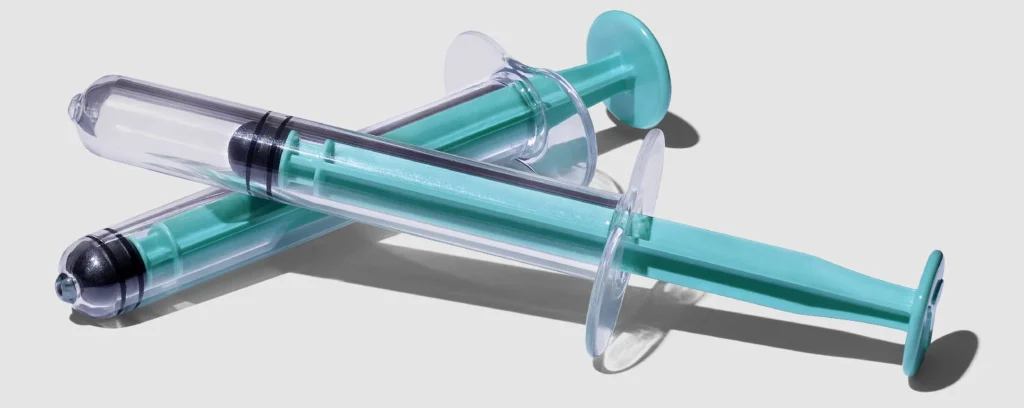
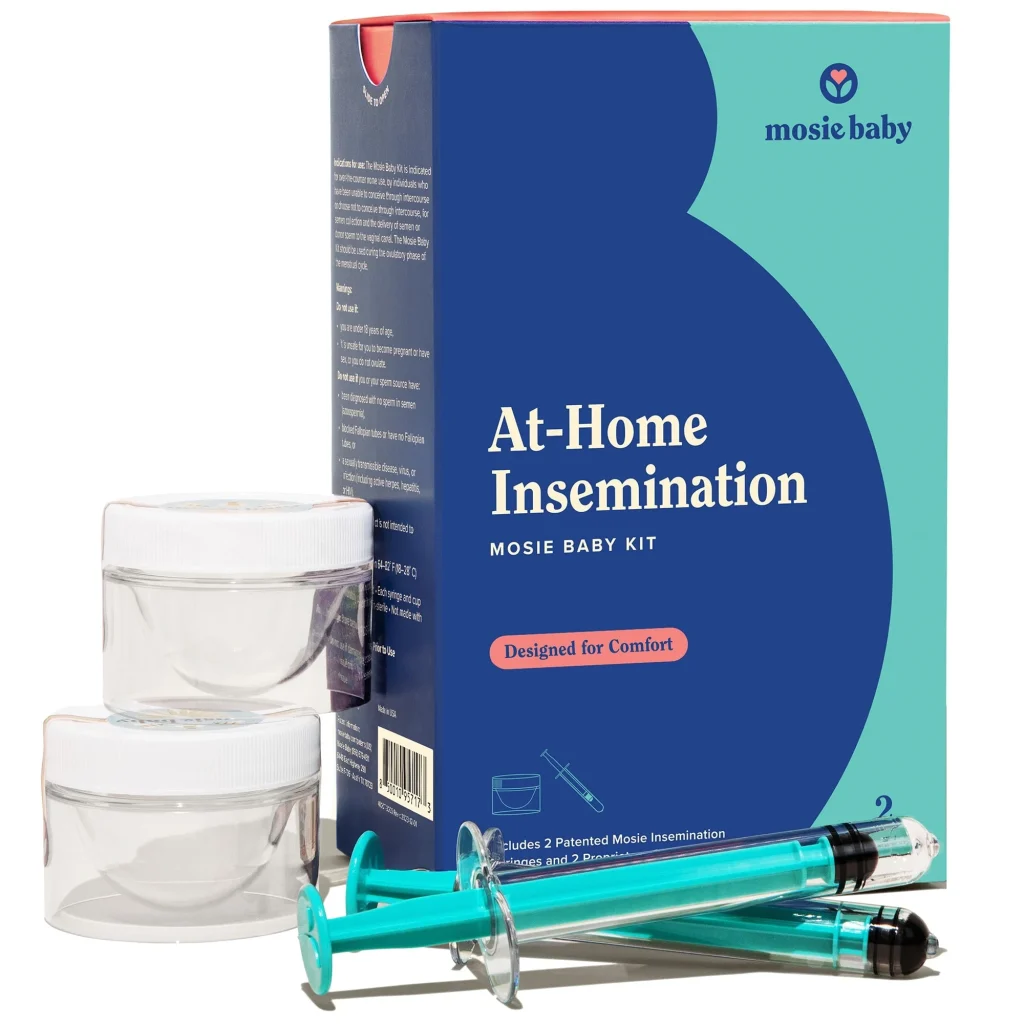
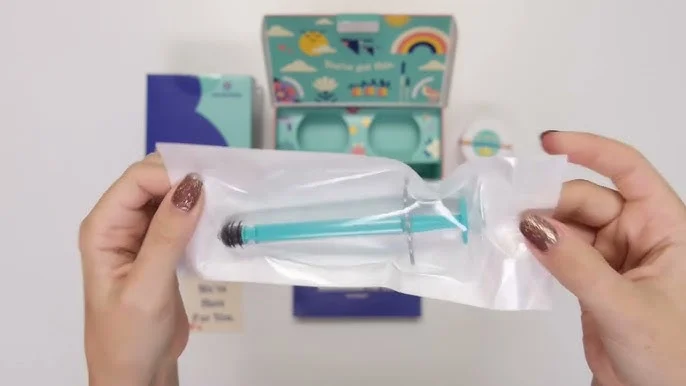
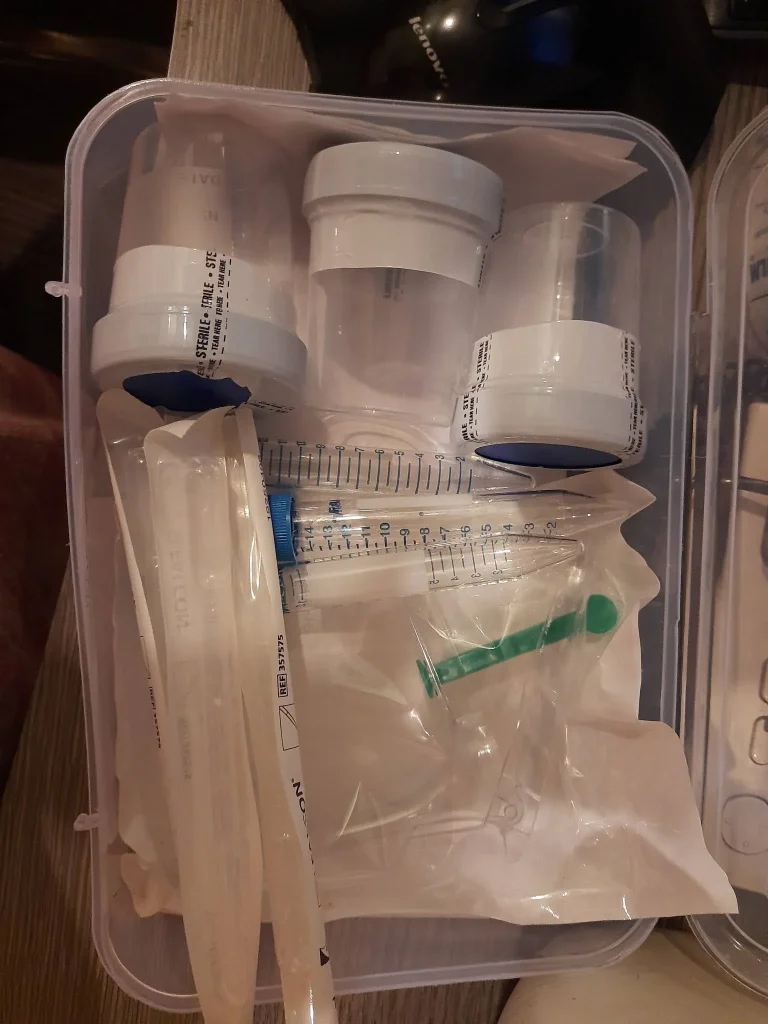
    The first step in this process is to confirm that the tubal ligation was successful. A woman can do this by having a hysterosalpingogram (HSG), a procedure that uses X-ray and dye to check the fallopian tubes’ status. If the tubes are indeed blocked, the next step is to purchase a home insemination kit. These kits typically include a syringe, a catheter, and instructions on how to use them. It is crucial to follow the instructions carefully to ensure success and minimize the risk of infection.

    The next step is to collect semen from a partner or a donor. This can be done either through self-stimulation or with the use of a collection condom. The semen is then transferred into the syringe and attached to the catheter. The woman then inserts the catheter into her vagina, navigating it to the cervix, and slowly releases the semen. After the procedure, the woman should remain lying down for at least 20 minutes to allow the sperm to swim towards the egg. If the woman has a regular menstrual cycle, it is recommended to perform the insemination during her most fertile window, which is typically between days 10-18 of the cycle.

    Potential Risks:

    At-home insemination kit packaging featuring syringes and collection cups, labeled for comfort and ease of use.

    The Ultimate DIY: Insemination After a Tubal Ligation Without Medical Intervention

    As with any medical procedure, there are potential risks involved in DIY insemination after a tubal ligation. The biggest risk is the possibility of introducing bacteria into the reproductive tract, which can lead to infections such as pelvic inflammatory disease (PID). It is crucial to follow sterile techniques and use clean equipment to minimize this risk. It is also essential to use only fresh semen and to check the donor’s health history for any potential sexually transmitted infections (STIs).

    Another risk to consider is the success rate of DIY insemination. While there are many success stories of women conceiving through this method, it is not a guarantee. Factors such as age, overall health, and the quality of the sperm can all affect the chances of conception. It is essential to have realistic expectations and be prepared for the possibility of multiple attempts before achieving pregnancy.

    Benefits:

    One of the significant benefits of DIY insemination after a tubal ligation is the cost. Compared to other fertility treatments, such as IVF or tubal ligation reversal, DIY insemination is relatively inexpensive. The home insemination kits can be purchased for as little as $50, and the process can be done in the comfort and privacy of one’s home, eliminating the need for costly medical procedures.

    Another benefit is the autonomy and control that this method provides. Women who choose to use this method have complete control over the process, from selecting the donor to timing the insemination. This can be empowering for women who have previously felt like their reproductive choices were limited after their tubal ligation.

    Summary:

    In conclusion, DIY insemination after a tubal ligation can be a viable option for women who want to conceive but have had their tubes tied. The process involves confirming the success of the tubal ligation and then using a home insemination kit to transfer semen into the cervix. While there are potential risks involved, such as introducing bacteria and the success rate not being guaranteed, the benefits of this method include cost-effectiveness and autonomy. As with any medical decision, it is essential to do thorough research and consult with a healthcare professional before embarking on this journey.

  • Taking the DIY Route: Inseminating with a Surrogate at Home

    Summary:

    In recent years, more and more couples and individuals have turned to surrogacy as a way to start or grow their families. However, the traditional route of using a fertility clinic and medical professionals can be expensive and daunting. This has led many to consider taking the DIY route and inseminating with a surrogate at home. While this may seem like a risky and unconventional option, it is actually a viable and legal option for those who are well-informed and prepared. In this blog post, we will explore the process of taking the DIY route for surrogacy, including the legal considerations, medical procedures, and emotional aspects involved.

    First and foremost, it is important to understand the legalities of DIY surrogacy. In most countries, surrogacy is a highly regulated process and may not be legal for everyone. It is crucial to consult with a lawyer who specializes in surrogacy laws to ensure that all parties involved are protected and have a clear understanding of their rights and responsibilities. Additionally, it is important to have a thorough and detailed surrogacy agreement in place to outline the expectations and arrangements between the surrogate and intended parents.

    Once the legal aspects are taken care of, the next step is to choose a surrogate. This can be a friend or family member, or someone found through a surrogacy agency. It is important to take the time to get to know the surrogate and establish a strong and trusting relationship before moving forward with the insemination process. This will not only make the experience more comfortable for all parties involved, but it will also help to ensure a successful and positive outcome.

    The next step is to decide on the method of insemination. There are two options for DIY surrogacy: traditional insemination and at-home insemination. Traditional insemination involves the surrogate and intended father having sexual intercourse, while at-home insemination involves using a syringe or cervical cap to transfer the sperm directly into the surrogate’s cervix. Both methods have similar success rates, but at-home insemination may be a more comfortable and controlled option for all parties involved.

    syringe kit with a screw top lid and non-tip safety wall, designed for sperm insemination.

    Taking the DIY Route: Inseminating with a Surrogate at Home

    Before the insemination process, the surrogate will need to undergo medical screening to ensure she is in good reproductive health. This may include blood tests, ultrasounds, and a physical examination. Once she is deemed medically fit, the timing of the insemination is crucial. It is important to track the surrogate’s menstrual cycle and determine the most fertile days for the insemination. This can be done using ovulation predictor kits or by monitoring basal body temperature.

    When the timing is right, the insemination process can take place. If using at-home insemination, the surrogate will lie on her back with her hips elevated for 20-30 minutes after the insemination to increase the chances of success. It is important to follow all instructions carefully and to have a backup plan in case the first attempt is not successful.

    After the insemination, the surrogate will undergo a pregnancy test to determine if the procedure was successful. If the test is positive, it is important to continue to monitor the pregnancy closely and to provide support and care for the surrogate throughout the entire pregnancy.

    While DIY surrogacy may seem like a less expensive and more intimate option, it is important to consider the emotional aspects involved. As with any surrogacy arrangement, there may be feelings of attachment and responsibility towards the baby, which can be challenging for both the surrogate and intended parents. It is important for all parties to communicate openly and regularly and to seek support if needed.

    In conclusion, DIY surrogacy may not be the traditional or most popular option, but it is a viable and legal option for those who are well-informed and prepared. It is important to carefully consider all aspects involved, from the legal considerations to the medical procedures and emotional aspects. With thorough research and proper preparation, taking the DIY route for surrogacy can be a fulfilling and successful experience for all parties involved.

  • Budget-Friendly Options for Home Insemination Supplies

    Budget-Friendly Options for Home Insemination Supplies: A Guide for Couples Trying to Conceive

    For many couples, trying to conceive can be an expensive and daunting process. The cost of fertility treatments, doctors’ appointments, and medications can quickly add up, making it difficult for some to afford. However, there are budget-friendly options for couples who are looking to start a family through home insemination. With a little research and some creativity, you can find affordable home insemination supplies that can help you on your journey towards parenthood.

    In this blog post, we will explore some of the best and most affordable options for home insemination supplies. From sperm donors to ovulation kits, we will cover everything you need to know to successfully conceive at home without breaking the bank. So, let’s dive in and discover how you can make your dream of starting a family a reality without breaking the bank.

    1. Sperm Donor Banks

    The most crucial aspect of home insemination is obtaining high-quality sperm. While sperm donor banks may seem expensive at first glance, they are actually more affordable than other fertility treatments. These banks offer a wide selection of sperm from carefully screened donors, making it a safe and reliable option for couples. Plus, sperm donor banks often offer discounts or promotions, making it an even more budget-friendly option.

    2. Natural Donor Options

    For those looking for a more affordable option, a known or natural donor may be a good choice. This can be a friend or acquaintance who is willing to donate sperm for your insemination process. It’s important to note that natural donors do not go through the same screening process as those from sperm donor banks. So, it’s crucial to have open and honest communication with your donor and to get tested for any potential health risks.

    3. At-Home Insemination Kits

    At-home insemination kits are a convenient and cost-effective option for couples trying to conceive. These kits typically include everything you need for the insemination process, such as syringes, cups, and ovulation tests. They can be purchased online or at your local pharmacy, and often come with detailed instructions for proper use. While they may not offer the same level of quality control as sperm donor banks, at-home insemination kits are a great option for those on a budget.

    hands holding a syringe above a collection cup with instructions for using a home insemination kit

    Budget-Friendly Options for Home Insemination Supplies

    4. Ovulation Kits

    Timing is crucial when it comes to home insemination. Ovulation kits are a budget-friendly option for tracking your ovulation and determining the best time to inseminate. These kits can be found at most drugstores and are relatively inexpensive. They work by detecting the hormone surge that occurs right before ovulation, giving you a better idea of when to inseminate. This can increase your chances of conception and save you money in the long run by avoiding unnecessary insemination attempts.

    5. DIY Insemination Supplies

    If you’re feeling crafty and want to save even more money, you can make your own insemination supplies at home. For instance, you can use a menstrual cup or a turkey baster as an alternative to a syringe. These items can be easily sterilized and offer a more affordable option for home insemination. However, it’s essential to do thorough research and follow proper instructions when using DIY insemination supplies to ensure safety and effectiveness.

    6. Repurposing Household Items

    Another budget-friendly option for home insemination is repurposing household items. For instance, a soft cervical cap or a female condom can be used as a makeshift insemination cup. These items can be found at your local drugstore and are relatively inexpensive. Again, it’s crucial to do thorough research and follow instructions carefully to ensure a successful insemination process.

    7. Free Fertility Apps

    In today’s digital age, there are many free fertility apps available that can help you track your ovulation and increase your chances of conception. These apps use your menstrual cycle data to predict your fertile days and provide helpful tips and insights. While they may not offer the same level of accuracy as ovulation kits, they are a great budget-friendly option for those looking to conceive at home.

    Summary:

    Starting a family through home insemination can be a more affordable option for couples than traditional fertility treatments. With the right resources and a little creativity, you can find budget-friendly options for home insemination supplies. From sperm donor banks to DIY insemination supplies, there are many affordable options available to help you on your journey towards parenthood. By doing thorough research and following proper instructions, you can successfully conceive at home without breaking the bank.

  • The Dos and Don’ts of DIY Donor Sperm Storage at Home

    Summary:

    In recent years, there has been an increase in the number of people using donor sperm to start or expand their families. With the rising costs of fertility treatments, many individuals and couples are turning to DIY donor sperm storage at home as a more affordable option. However, there are several dos and don’ts that must be followed to ensure the safety and effectiveness of this process. In this blog post, we will discuss the important things to keep in mind when storing donor sperm at home, including proper storage methods, legal considerations, and potential risks.

    The Dos:

    1. Choose a reputable sperm bank or donor: When it comes to donor sperm, it is crucial to choose a reputable sperm bank or donor to ensure the quality and safety of the sperm. Look for a sperm bank that follows strict guidelines for donor screening, testing, and storage. If you are using a known donor, make sure they have undergone thorough medical testing and are willing to sign a legal agreement regarding the use and storage of their sperm.

    2. Follow proper storage methods: Donor sperm should be stored in a liquid nitrogen tank or freezer at a temperature of -196°C (-320°F). This temperature is necessary to maintain the viability of the sperm. Make sure to carefully read and follow the storage instructions provided by the sperm bank or donor.

    3. Keep accurate records: It is essential to keep accurate records of the donor’s information, including their name, donor number, and any medical history provided. This information may be needed for legal or medical purposes in the future. It is also helpful to keep a log of when the sperm was collected and any other relevant details.

    4. Consider legal implications: DIY donor sperm storage at home may have legal implications, especially if you are using a known donor. It is crucial to consult with a lawyer and have a legal agreement in place to protect the rights of both the donor and the recipient. This agreement should outline the intended use of the sperm and any parental rights or responsibilities.

    5. Regularly check and maintain the storage container: It is essential to regularly check the storage container for any signs of damage or malfunction. If using a liquid nitrogen tank, make sure to monitor the level of liquid nitrogen and refill as needed. If using a freezer, check the temperature regularly to ensure it is staying at -196°C (-320°F).

    The Don’ts:

    1. Do not store sperm in the refrigerator: Sperm should never be stored in a refrigerator as it can damage the sperm and reduce its viability. The temperature in a refrigerator is not low enough to maintain the quality of the sperm.

    at-home insemination kit with syringes and containers on a white background, featuring a holiday gift promotion.

    The Dos and Don'ts of DIY Donor Sperm Storage at Home

    2. Do not thaw and refreeze sperm: Thawed sperm should never be refrozen as it can cause damage to the sperm. If you have extra thawed sperm, it is best to discard it and use fresh sperm for insemination.

    3. Do not use expired sperm: Always check the expiration date of the donor sperm before using it for insemination. Expired sperm may have reduced viability and may not result in a successful pregnancy.

    4. Do not forget to label the storage container: It is essential to label the storage container with the donor’s name, donor number, and the date the sperm was collected. This will help avoid any confusion or mix-ups with different donors’ sperm.

    5. Do not share the sperm without a legal agreement: It is crucial to have a legal agreement in place before sharing the sperm with anyone else, including a partner or friend. This agreement should outline the intended use of the sperm and any parental rights or responsibilities.

    Risks of DIY Donor Sperm Storage:

    While DIY donor sperm storage at home can be a cost-effective option, there are some potential risks to consider. These include:

    1. Risk of contamination: If proper storage methods are not followed, there is a risk of contamination, which can lead to the sperm being unusable for insemination.

    2. Risk of legal issues: Without a legal agreement in place, there is a risk of legal issues arising in the future, such as disputes over parental rights or responsibilities.

    3. Risk of sperm quality deterioration: Improper storage methods or thawing and refreezing of sperm can lead to a decrease in sperm quality, reducing the chances of a successful pregnancy.

    In conclusion, DIY donor sperm storage at home can be a viable option for those looking to start or expand their families. However, it is crucial to follow the dos and don’ts outlined in this blog post to ensure the safety and effectiveness of the process. Proper storage methods, accurate record-keeping, and legal considerations are key to a successful DIY donor sperm storage experience. By following these guidelines, individuals and couples can increase their chances of a successful pregnancy while also protecting the rights of both the donor and recipient.

  • DIY Donor Sperm Storage: Tips for Success at Home

    Blog Post Title: DIY Donor Sperm Storage: Tips for Success at Home

    Summary:

    DIY donor sperm storage is becoming an increasingly popular option for those looking to start a family. Whether you are a same-sex couple, a single parent, or someone struggling with fertility issues, storing donor sperm at home can offer a convenient and cost-effective solution. However, proper storage and handling are crucial to maintaining the viability and quality of the sperm. In this blog post, we will discuss the steps and tips for successfully storing donor sperm at home.

    Step 1: Choosing the Right Donor Sperm

    The first and most crucial step in DIY donor sperm storage is choosing the right donor sperm. It is essential to choose a donor from a reputable sperm bank or fertility clinic that screens donors for infectious diseases, genetic disorders, and other health issues. Also, consider the donor’s physical characteristics, such as height, weight, and ethnicity, to ensure a better match with the intended parent.

    Step 2: Understanding the Storage Requirements

    Before you start the process, it is essential to understand the storage requirements for donor sperm. Sperm can survive for a limited period outside the body, so it must be stored at the right temperature to maintain its viability. Ideally, sperm should be stored at a temperature between -196°C to -176°C. It is recommended to use a liquid nitrogen tank to store the sperm, which can maintain the required temperature for up to 30 days.

    Step 3: Preparing the Storage Container

    Once you have chosen the right sperm donor and have a liquid nitrogen tank, it is time to prepare the storage container. The container should be made of a material that can withstand extreme temperatures and is airtight. A stainless steel or glass container with a screw-top lid is ideal for storing donor sperm. Before adding the sperm, make sure to sanitize the container and allow it to dry completely.

    Step 4: Transferring the Sperm

    hands using a syringe to extract contents from a clear container, showcasing a home insemination kit.

    DIY Donor Sperm Storage: Tips for Success at Home

    Transferring the sperm from the original container to the storage container can be a delicate process. It is crucial to ensure that the sperm stays at the right temperature throughout the transfer. Use a sterile syringe to transfer the sperm, and make sure to work quickly to minimize exposure to room temperature.

    Step 5: Labeling and Storing the Container

    Proper labeling of the storage container is crucial for maintaining the integrity of the sperm. Include the donor’s name, date of collection, and any other relevant information on the label. Place the container in the liquid nitrogen tank and make sure to keep the tank in a well-ventilated, cool, and dark place.

    Tips for Success:

    1. Regularly Monitor the Temperature: It is essential to monitor the temperature of the liquid nitrogen tank regularly. A temperature alarm can be helpful in alerting you if the temperature drops below the recommended range.

    2. Plan for Backup Storage: In case of a power outage or any other emergency, it is always a good idea to have a backup storage plan. Consider storing the sperm at a second location or investing in a generator to keep the liquid nitrogen tank running.

    3. Keep Records: Keep a record of the storage dates, location, and any other relevant information to ensure proper tracking and monitoring of the sperm.

    4. Have a Backup Plan for Shipping: If you plan to use the sperm for fertility treatments, have a backup plan in case there are any issues with shipping or transportation. Consider using a courier service that specializes in transporting frozen goods.

    5. Don’t Overstock: It is essential to only store the amount of sperm you will need. Overstocking can lead to unnecessary expenses and wastage of sperm.

    DIY donor sperm storage can be a successful and convenient option for starting a family. However, it is crucial to follow the proper steps and tips to ensure the viability and quality of the sperm. With careful planning and monitoring, you can have a successful DIY donor sperm storage experience.

  • The Ultimate Guide to DIY Insemination with a Friend at Home

    SUMMARY:

    Insemination is a method of fertilization that involves the placement of sperm into the reproductive tract of a female. While it is often associated with medical procedures, it is possible to do insemination at home with the help of a friend. Whether you are trying to conceive or simply want to explore alternative methods of fertilization, DIY insemination with a friend can be a viable option. In this ultimate guide, we will provide you with all the information you need to know about DIY insemination with a friend at home.

    First, we will discuss the basics of insemination and how it works. This will include information on the different types of insemination, the success rates, and the risks involved. Next, we will cover the legal and ethical considerations of DIY insemination with a friend, as well as the importance of open communication and consent between both parties. We will also provide a step-by-step guide on how to prepare for DIY insemination, including tips on selecting a sperm donor and tracking ovulation.

    Two transparent syringes with teal accents positioned diagonally on a light gray background.

    The Ultimate Guide to DIY Insemination with a Friend at Home

    Then, we will delve into the actual process of DIY insemination, covering the various methods and techniques that can be used. This will include information on how to collect and prepare the sperm, as well as how to insert it into the female’s reproductive tract. We will also discuss the importance of timing and positioning, as well as tips for making the process as comfortable and successful as possible.

    Additionally, we will address common concerns and questions about DIY insemination, such as the safety and effectiveness of the process, as well as the potential emotional and legal implications. We will also provide tips on how to handle the aftermath of DIY insemination and what to do in case of an unwanted pregnancy.

    Finally, we will discuss alternative options for those who are not comfortable with DIY insemination with a friend, including at-home insemination kits and seeking professional medical assistance. We will also provide resources and references for further information and support.

    In conclusion, DIY insemination with a friend can be a safe, affordable, and empowering option for those who are looking to conceive or explore alternative methods of fertilization. With proper research, preparation, and communication, this process can be a positive and successful experience. We hope that this ultimate guide has provided you with all the information you need to make an informed decision about DIY insemination with a friend at home.

  • From DIY to Baby: A Guide to Home Insemination

    From DIY to Baby: A Guide to Home Insemination

    For many couples, the process of conceiving a child can be a long, frustrating, and expensive journey. But with the rise of do-it-yourself home insemination methods, more and more people are turning to at-home methods to start their families. While the idea of home insemination may seem daunting at first, it can be a safe, affordable, and intimate way to conceive a child. In this guide, we will explore everything you need to know about home insemination, from the basics to the more advanced techniques. So whether you are just starting your journey to parenthood or are looking for an alternative to traditional methods, read on to learn more about DIY home insemination.

    Understanding Home Insemination

    Home insemination, also known as self-insemination, is the process of using a syringe or similar device to inject sperm into the vagina in order to fertilize an egg. This can be done with or without the help of a medical professional, and can be performed using fresh or frozen sperm. The procedure is typically done around the time of ovulation, when a woman’s body releases an egg for potential fertilization.

    DIY home insemination is often seen as a more natural and intimate way to conceive a child, as it allows couples to be in control of the process and can be done in the comfort of their own home. However, it is important to note that home insemination does not come without risks and it is important to educate yourself on the proper techniques and precautions before attempting the procedure.

    Tools and Supplies Needed

    Before attempting home insemination, it is important to gather all the necessary tools and supplies. Some of the basic items you will need include a sterile syringe, ovulation predictor kits, and a collection cup for the sperm. In addition, you may also want to purchase a fertility-friendly lubricant and a cervical cap, which can help keep the sperm near the cervix.

    It is important to note that the sperm used for home insemination should be obtained from a reputable sperm bank or fertility clinic. This ensures that the sperm is of high quality and has been properly screened for any potential health risks.

    Timing is Everything

    Timing is crucial when it comes to home insemination. It is important to track your menstrual cycle and use ovulation predictor kits to determine when you are most fertile. This will increase your chances of success by ensuring that the sperm is introduced into the body at the optimal time for fertilization.

    Preparation and Procedure

    Before beginning the insemination process, it is important to properly prepare the sperm. If using frozen sperm, it will need to be thawed according to the instructions provided by the sperm bank or clinic. Fresh sperm should be collected in a sterile cup and allowed to liquefy for about 20 minutes before use.

    at-home insemination kit by Mosie Baby, featuring syringes and storage containers for comfort and convenience.

    From DIY to Baby: A Guide to Home Insemination

    Once the sperm is ready, the next step is to insert it into the vagina using a syringe. It is recommended to use a syringe with a soft, flexible tip to avoid any discomfort during the procedure. The sperm should be inserted near the cervix, as this is the optimal location for fertilization.

    After the sperm has been inserted, it is important to remain lying down for at least 20 minutes to allow the sperm to travel towards the egg. It is also recommended to use a cervical cap or soft cup to help keep the sperm near the cervix for a longer period of time.

    Potential Risks and Precautions

    As with any medical procedure, home insemination comes with potential risks. The most common risk is the introduction of bacteria or infections into the reproductive system. It is important to use sterile equipment and follow proper hygiene practices to minimize this risk.

    It is also important to note that home insemination may not be suitable for everyone. Couples with known fertility issues or certain medical conditions may not be good candidates for home insemination and should consult with a medical professional before attempting the procedure.

    Alternative Techniques

    While the traditional method of home insemination involves injecting sperm into the vagina, there are also alternative techniques that can be used. These include intracervical insemination (ICI) and intrauterine insemination (IUI). ICI involves placing the sperm near the cervix, while IUI involves inserting the sperm directly into the uterus. These techniques may be recommended for couples with certain fertility issues or for those who have not been successful with traditional home insemination methods.

    Seeking Professional Help

    While home insemination can be a great option for many couples, it is important to remember that it is not a substitute for professional medical advice. If you have been trying to conceive for a significant amount of time without success, it may be worth consulting with a fertility specialist. They can provide personalized guidance and help determine the best course of action for your individual situation.

    In conclusion, home insemination is a viable option for couples looking to start a family through an intimate and affordable process. With proper education, preparation, and timing, it can be a successful method for conceiving a child. However, it is important to remember to always seek professional guidance and to prioritize safety and hygiene when attempting any at-home medical procedures.

    Summary:

    Home insemination is a growing trend for couples looking to conceive a child in a more natural and intimate way. This process involves using a syringe to inject sperm into the vagina during ovulation. Proper preparation, timing, and hygiene are crucial for success, and there are alternative techniques available. However, it is important to seek professional guidance and prioritize safety when attempting home insemination.

  • DIY Fertility: Exploring Non-Conventional Insemination Methods

    Summary:

    Fertility is a topic that is often associated with traditional methods of conception, such as natural intercourse or medical interventions like in vitro fertilization (IVF). However, for those who are unable or prefer not to use these methods, there are alternative ways to try and conceive. DIY fertility, also known as non-conventional insemination, is a term used to describe a variety of at-home methods for attempting pregnancy without traditional medical assistance.

    In this blog post, we will explore some of the most common DIY fertility methods, including home insemination, cervical cap insemination, and self-insemination. We will also discuss the potential risks and benefits of these methods, as well as tips for increasing the chances of success. Whether you are a same-sex couple, single individual, or simply looking for a more natural approach to conception, DIY fertility may be a viable option for you.

    Home Insemination:

    Home insemination is a term used to describe the process of placing sperm into the vagina or cervix without medical assistance. This can be done using a variety of methods, such as using a syringe, turkey baster, or fertility kit. The most common method involves collecting sperm from a donor, either through a sperm bank or through a known donor, and then using a syringe or baster to insert it into the vagina or cervix.

    One of the main benefits of home insemination is that it can be done in the comfort and privacy of your own home, without the need for medical appointments or procedures. It can also be a more affordable option compared to medical interventions like IVF. However, there are some risks involved, such as the potential for infection if proper sterilization techniques are not followed, and the possibility of using sperm from an unhealthy donor.

    Cervical Cap Insemination:

    Cervical cap insemination is a method that involves using a cervical cap, which is a small rubber or silicone device that is placed over the cervix to block sperm from entering the uterus. This method is similar to home insemination, but it offers the added benefit of providing a barrier between the sperm and the cervix, which can help increase the chances of conception.

    To perform cervical cap insemination, the cap is filled with sperm and then inserted into the vagina, similar to a tampon. It is recommended to leave the cap in place for at least six hours, or overnight, to allow the sperm to reach the cervix and potentially fertilize an egg. This method can also be done at home, but it may require more practice and precision than other DIY fertility methods.

    hands holding a teal syringe in packaging, with a colorful kit box and other items in the background

    DIY Fertility: Exploring Non-Conventional Insemination Methods

    Self-Insemination:

    Self-insemination is a DIY fertility method that involves the individual manually inserting sperm into their cervix or vagina using their fingers or a device such as a menstrual cup. This method can be done alone or with a partner, and it allows for more control over the placement of the sperm.

    One of the main benefits of self-insemination is that it can be done without the need for a male partner or donor. This makes it a popular option for single individuals or same-sex couples. However, it may require more practice and experimentation to find the most effective method for each individual.

    Risks and Considerations:

    While DIY fertility methods may offer a more natural and affordable approach to conception, it is important to consider the potential risks involved. These methods do not guarantee success and may not be suitable for everyone. It is important to consult with a healthcare professional before attempting any DIY fertility methods, especially if you have any underlying medical conditions or concerns.

    It is also crucial to ensure that proper sterilization techniques are followed to avoid the risk of infection. Using sperm from a known donor also carries the potential risk of transferring genetic diseases or disorders. It is important to thoroughly screen any potential donors and consider the potential consequences before proceeding with DIY fertility methods.

    Increasing the Chances of Success:

    While there are no guarantees when it comes to conception, there are some tips that may help increase the chances of success when using DIY fertility methods. These include tracking ovulation and using ovulation predictor kits, ensuring proper timing of insemination, and maintaining a healthy lifestyle through diet and exercise.

    It is also important to have open and honest communication with your partner or donor, and to be patient and understanding throughout the process. DIY fertility methods may require multiple attempts before achieving pregnancy, and it is important to be prepared for any potential challenges or setbacks.

    In conclusion, DIY fertility offers a non-conventional approach to conception that may be suitable for those who are unable or prefer not to use traditional methods. However, it is important to consider the potential risks and consult with a healthcare professional before attempting any DIY fertility methods. With proper preparation and care, DIY fertility may offer a more natural and affordable option for those looking to start or expand their family.

  • From Frustration to Success: Managing Expectations during Home Insemination

    From Frustration to Success: Managing Expectations during Home Insemination

    Home insemination has become an increasingly popular option for couples or individuals trying to conceive. It offers a more affordable and private alternative to clinical insemination procedures. However, with this DIY approach comes a significant amount of pressure and expectations, which can lead to frustration if not managed properly. In this blog post, we will discuss the importance of managing expectations during home insemination and provide tips to help you navigate this journey successfully.

    Understanding the Process of Home Insemination
    Before delving into managing expectations, it is crucial to understand the process of home insemination. Home insemination involves the self-insertion of donor sperm into the vagina, cervix, or uterus during the woman’s fertile window. This process can be done with a syringe, a turkey baster, or a specialized device called an insemination kit.

    It is essential to note that home insemination does not guarantee pregnancy, and the success rates may vary depending on factors such as the quality of sperm and timing of insemination. Therefore, it is crucial to have realistic expectations and not put too much pressure on this method.

    Managing Expectations
    One of the most common mistakes people make when attempting home insemination is having unrealistic expectations. It is essential to have a positive mindset and believe that it can work, but it is equally important to be prepared for setbacks and have a backup plan.

    Here are some tips to help you manage your expectations during home insemination:

    1. Educate Yourself: The first step in managing expectations is understanding the process thoroughly. Research and consult with your healthcare provider to have a clear understanding of the steps involved and the success rates. This will help you set realistic expectations and avoid disappointment.

    Syringe kit containing various components for assisted baby feeding, including syringes and collection cups.

    From Frustration to Success: Managing Expectations during Home Insemination

    2. Have a Support System: Going through the journey of home insemination alone can be emotionally taxing. It is essential to have a support system, whether it is your partner, a friend, or an online support group. This will provide you with a safe space to share your frustrations and receive encouragement and advice from others who have gone through a similar experience.

    3. Track Your Cycle: Timing is crucial in home insemination. Tracking your menstrual cycle and identifying your fertile window will increase your chances of success. However, it is essential to remember that even with perfect timing, pregnancy is not guaranteed. Therefore, it is essential to have a backup plan and not solely rely on home insemination.

    4. Be Patient: The journey of trying to conceive can be a rollercoaster of emotions. It is essential to be patient and not get discouraged if it does not happen right away. Home insemination can take multiple attempts before achieving pregnancy, and it is crucial to be prepared for this possibility.

    5. Seek Professional Help: If you have been trying home insemination for a while without success, it may be time to seek professional help. A fertility specialist can evaluate your situation and provide you with personalized advice and treatment options that may increase your chances of conception.

    Celebrating Success
    Home insemination can be a long and emotional journey, but it can also be a beautiful and rewarding experience. It is essential to celebrate every little success along the way, whether it is identifying your fertile window, successfully completing an insemination, or receiving a positive pregnancy test. These small victories can help keep you motivated and positive throughout the process.

    In conclusion, managing expectations is crucial when it comes to home insemination. It is essential to have a positive mindset, but also be realistic and prepared for any setbacks. Educating yourself, having a support system, tracking your cycle, being patient, and seeking professional help when needed are all important factors in managing expectations and increasing your chances of success. Remember to celebrate every step of the journey and have faith that your efforts will eventually pay off.

    Summary: Home insemination is a popular option for couples or individuals trying to conceive, but it comes with a significant amount of pressure and expectations. To successfully navigate this journey, it is crucial to manage expectations and have a positive mindset while also being prepared for setbacks. This blog post provides tips on managing expectations and celebrating success during home insemination.

  • The Truth Behind the Success Rates of DIY Insemination

    DIY insemination, also known as at-home insemination, is a method of conceiving a child without the involvement of a medical professional. It involves using a donor’s semen to fertilize the egg either through sexual intercourse or using a syringe or cervical cap. With the rising costs of fertility treatments, more and more couples are turning to DIY insemination as a more affordable option. However, there is still a lot of misinformation and confusion surrounding the success rates of DIY insemination. In this blog post, we’ll explore the truth behind the success rates of DIY insemination and provide you with the necessary information to make an informed decision about this method of conception.

    First, let’s address the common misconception that DIY insemination is not as effective as medical insemination. While it is true that medical insemination, also known as artificial insemination, has a higher success rate, it does not mean that DIY insemination is not a viable option. According to a study published in the Journal of Obstetrics and Gynecology, the success rate for DIY insemination is around 10-15%, while the success rate for medical insemination is around 20-30%. This means that DIY insemination is not far behind in terms of success rates and can still be a successful method of conception for many couples.

    Another factor that affects the success rate of DIY insemination is timing. In order for insemination to be successful, it is crucial to time it correctly with ovulation. Ovulation is when the egg is released from the ovary and is ready to be fertilized. If insemination is not done during this window of time, the chances of conception decrease significantly. This is why it is important for couples to track their ovulation and plan the insemination accordingly. There are various methods for tracking ovulation, such as using ovulation predictor kits, tracking basal body temperature, and monitoring cervical mucus.

    One of the main advantages of DIY insemination is that it can be done in the comfort and privacy of one’s own home. This can be a more relaxing and intimate experience for couples, which can also increase the chances of conception. However, it is important to note that DIY insemination does not provide the same level of medical support and monitoring as medical insemination. This means that if there are any underlying fertility issues, they may not be detected or addressed through DIY insemination. It is recommended for couples to consult with a fertility specialist before attempting DIY insemination to ensure that there are no underlying issues that may affect the success rate.

    comparison of standard and Mosie syringe barrels for at-home insemination, highlighting design features

    The Truth Behind the Success Rates of DIY Insemination

    Another important factor to consider is the quality of the semen used for insemination. While using fresh semen from a known donor may seem like the most convenient option, it is not always the safest. There is a risk of sexually transmitted infections and diseases, which can have serious consequences for both the mother and the baby. It is recommended to use frozen donor semen from a reputable sperm bank, which has been thoroughly screened and tested for any potential risks.

    It is also important to note that DIY insemination may not be a suitable option for everyone. Couples with certain medical conditions or fertility issues may not be able to conceive through DIY insemination. It is important to consult with a fertility specialist to determine if DIY insemination is a safe and viable option for you.

    In conclusion, the success rates of DIY insemination may not be as high as medical insemination, but it is still a viable and affordable option for many couples. Timing, tracking ovulation, and using quality semen are important factors that can affect the success rate of DIY insemination. It is also important to consult with a fertility specialist to ensure that DIY insemination is a safe and suitable option for you. With the right information and guidance, DIY insemination can be a successful and fulfilling way to start a family.

    In summary, DIY insemination, also known as at-home insemination, is a method of conceiving a child without the involvement of a medical professional. While it may not have the same success rates as medical insemination, it is still a viable and affordable option for many couples. Factors such as timing, tracking ovulation, and using quality semen can affect the success rate of DIY insemination. It is also important to consult with a fertility specialist before attempting DIY insemination to ensure that it is a safe and suitable option for you.