Pregnancy storylines are everywhere right now—on TV, in celebrity chatter, and even in the “was this written into the show?” recaps. It can make trying to conceive feel like a plot twist you’re supposed to nail on the first take.
Real life is messier. But it can still be clear, planned, and safe.
This guide breaks down ICI at home with a home insemination kit—what to do, when to do it, and how to lower health and legal risk.
Overview: where at-home ICI fits (and why it’s trending)
At-home insemination (ICI, intracervical insemination) is a common option for solo parents and LGBTQ+ families, including couples using donor sperm. It’s also a path people explore when they want a lower-intervention starting point before moving to clinic-based care.
Pop culture loves a neat arc—meet-cute, montage, baby bump written into the season. In real life, family-building can be a series of small, thoughtful choices: timing, supplies, consent, and documentation.
ICI is not IVF. It’s also not “doing nothing.” It’s an intentional method that works best when you treat it like a process, not a vibe.
Timing: skip the “35 cliff” panic and focus on ovulation windows
You’ve probably seen headlines debating the idea of a hard fertility drop at 35. The more useful takeaway is simpler: fertility is individual, and timing still matters at every age.
What “good timing” means for ICI
- Aim for the fertile window: the few days before ovulation and the day of ovulation.
- Use an LH ovulation test: a positive can suggest ovulation is approaching soon.
- Notice cervical mucus changes: slippery/egg-white mucus often appears near peak fertility.
If cycles are irregular or hard to track, consider adding basal body temperature tracking or talking with a clinician for personalized guidance.
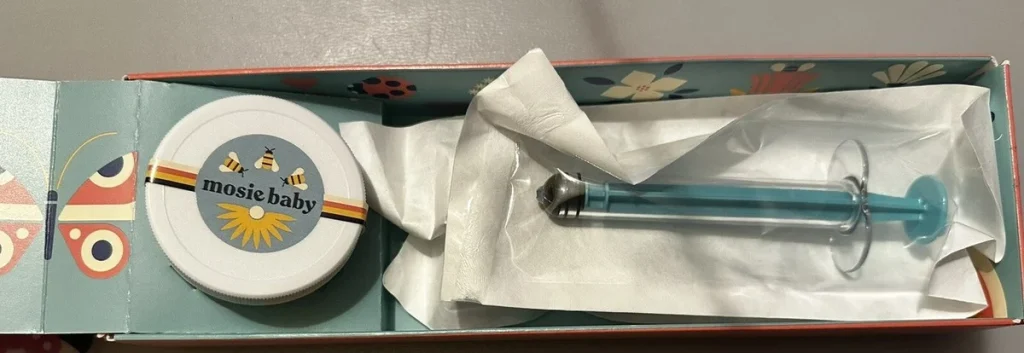
Supplies: what you actually need (and what to skip)
A home insemination kit should help you place sperm near the cervix with clean, body-safe tools. Keep it simple and sterile.
Core items
- Needleless syringe designed for insemination
- Collection container (if collecting at home)
- Clean, single-use gloves (optional but helpful)
- Unscented soap and clean towels for handwashing and setup
Nice-to-have items
- Ovulation tests
- Water-based, fertility-friendly lubricant (only if needed)
- A simple log for dates, timing, and notes
What to avoid
- Non-sterile or reused syringes
- Household lubricants that aren’t body-safe
- Any tools that could scratch tissue (pain and bleeding are not “normal” goals)
Step-by-step: at-home ICI with a home insemination kit
This is a practical overview, not medical advice for your specific body. If you have pain, unusual bleeding, fever, or a known medical condition, get clinician guidance.
1) Set up for cleanliness and calm
- Wash hands thoroughly.
- Choose a clean surface and lay out supplies.
- Check that packaging is intact and supplies are single-use.
2) Confirm timing
- Use your ovulation test results and/or fertile mucus signs.
- If using frozen donor sperm, follow the bank’s handling instructions exactly.
3) Collect and load (if using fresh sperm)
- Collect in a clean container.
- Follow kit instructions to draw the sample into the syringe.
- Work gently to reduce bubbles and mess.
4) Inseminate gently
- Get into a comfortable position (many people choose knees bent and hips supported).
- Insert the syringe slowly into the vagina, aiming toward the cervix without forcing.
- Depress the plunger steadily.
- Remove slowly and stay reclined for a short period if that feels comfortable.
5) Document the attempt
- Record date, time, ovulation test status, and any notes.
- If using a donor, keep relevant consent and screening documents together.
Mistakes that waste cycles (or raise risk)
Rushing the timing
Trying too early or too late is common. Build a simple plan around the LH surge and your typical cycle pattern.
Using the wrong materials
Improvised tools can irritate tissue and increase infection risk. Stick to sterile, body-safe supplies intended for insemination.
Skipping donor screening and consent
Health screening helps reduce STI risk. Clear consent and written agreements can reduce misunderstandings later. Parentage laws vary by location, so legal guidance can be worth it—especially with known donors.
Assuming you can “optimize” your way out of uncertainty
People love to talk about tracking apps and predictions—sometimes like they’re powered by magic. Some tools even borrow ideas from home insemination kit style pattern-matching. Useful? Sometimes. Guaranteed? No. Your best advantage is consistent timing, safer supplies, and good records.
FAQ: quick answers before you try
Is ICI painful?
It shouldn’t be. Mild discomfort can happen, but sharp pain or bleeding is a reason to stop and seek medical advice.
Can we use a known donor?
Many people do, but it adds legal and screening considerations. Written agreements and local legal guidance are smart steps.
How many cycles should we try at home?
It depends on age, cycle regularity, sperm source, and known fertility factors. If you’ve tried several well-timed cycles without success, consider a clinician consult.
Next step: choose a kit, then choose a system
If you want a straightforward setup, start with a purpose-built option like an at-home insemination kit for ICI and pair it with a simple tracking and documentation routine. The goal is repeatable attempts with lower risk—not perfection.
How does at-home insemination (ICI) work?
Medical disclaimer: This article is for general education and is not medical or legal advice. It does not diagnose or treat conditions. If you have symptoms, known fertility concerns, or questions about donor screening/parentage, talk with a qualified clinician and a local attorney familiar with family law.