Blog post:
Trying to conceive can be an exciting and emotional journey for many couples. However, for some, it may not come as easily as expected. In vitro fertilization (IVF) and intrauterine insemination (IUI) are two common fertility treatments that can help couples achieve their dream of becoming parents. While IVF is a more involved and expensive procedure, IUI can be done at home with minimal medical intervention. In this blog post, we will focus on home IUI and provide a timeline for those considering this method to increase their chances of conception.
Home IUI, also known as “artificial insemination at home,” involves placing sperm directly into the uterus using a catheter. Unlike IVF, which requires a woman to take fertility drugs to stimulate egg production, IUI can be done during a woman’s natural ovulation cycle. This makes it a more cost-effective and less invasive option for couples.
Days 1-5: Planning and Preparation
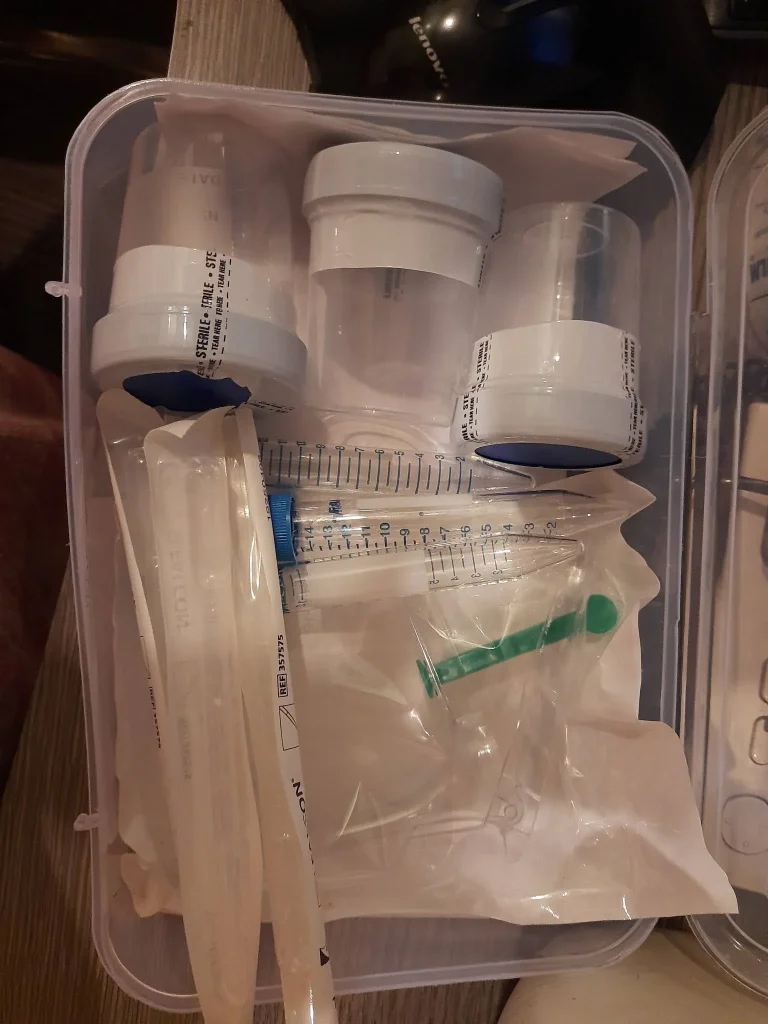
The first step in the home IUI process is to plan and prepare for the procedure. This includes choosing a donor or using the partner’s sperm, purchasing a home insemination kit, and scheduling the procedure around the woman’s ovulation cycle. It’s important to thoroughly research and understand the process before proceeding.
Days 6-8: Monitoring Ovulation
In order to increase the chances of conception, it’s crucial to monitor ovulation. This can be done by tracking ovulation signs such as basal body temperature, cervical mucus, and ovulation predictor kits. These methods can help pinpoint the most fertile days for IUI.
Days 9-10: Sperm Collection and Preparation
Days to Conception: A Timeline for Home IUI
On the day of ovulation, the sperm needs to be collected and prepared for insemination. If using a donor, the sperm can be purchased from a sperm bank and shipped to the home. If using the partner’s sperm, it can be collected at home and washed and prepared using a home insemination kit.
Day 11: Insemination Day
The day of insemination is typically the day after ovulation. This is when the sperm is inserted into the uterus using a catheter. It’s important to have a relaxed and comfortable environment for the procedure. Some women may experience mild cramping during or after the procedure, but this is normal.
Days 12-14: The Two-Week Wait
After the insemination, the waiting game begins. This is commonly referred to as the “two-week wait” because it takes about two weeks for a pregnancy test to accurately detect pregnancy. During this time, it’s important to stay positive and take care of oneself. Some women may experience mild spotting or cramping, but these symptoms may also be caused by the IUI procedure itself.
Day 15: Pregnancy Test Day
Once the two-week wait is over, it’s time to take a pregnancy test. If the test is positive, congratulations! If the test is negative, don’t lose hope. Home IUI may not work on the first try, and it may take a few cycles to achieve pregnancy. It’s important to discuss with a doctor or fertility specialist if multiple attempts are unsuccessful.
Summary:
Home IUI is a less invasive and more cost-effective option for couples trying to conceive. The timeline for home IUI involves planning and preparation, monitoring ovulation, sperm collection and preparation, insemination day, and the two-week wait. While it may take a few cycles to achieve pregnancy, home IUI can be a successful method for couples looking to start a family.
Leave a Reply