Blog Post:
Having a child is a dream for many couples, but for some, it may not be possible through traditional means. In such cases, surrogacy is a viable option where a woman carries and delivers a baby for another couple or individual. While traditional surrogacy involves artificial insemination at a fertility clinic, there is also the option of at-home insemination with a surrogate, which can be a more personal and intimate experience. In this blog post, we will provide a step-by-step guide to inseminating with a surrogate at home.
Step 1: Finding a Surrogate
The first step in this process is finding a surrogate who is willing to carry your child. This can be a family member, friend, or someone you find through an agency or support group. It is essential to establish a strong and trusting relationship with your surrogate, as she will be an integral part of your journey to becoming parents.
Step 2: Legal Process
Before proceeding with the insemination process, it is crucial to have a solid legal agreement in place. This agreement should outline the expectations, responsibilities, and rights of both parties. It should also include details on the financial arrangements, medical decisions, and the termination of the agreement if necessary. Consulting with a lawyer who specializes in surrogacy can be immensely helpful in creating a legally binding contract.
Step 3: Medical Screening
Once you have found a surrogate and have a legal agreement in place, the next step is to undergo medical screening. This process involves tests to ensure that both the surrogate and intended parent(s) are in good health and do not have any medical conditions or infectious diseases that could affect the pregnancy. It is essential to follow these medical protocols to ensure the safety and well-being of all parties involved.
Step 4: Choosing a Method of Insemination
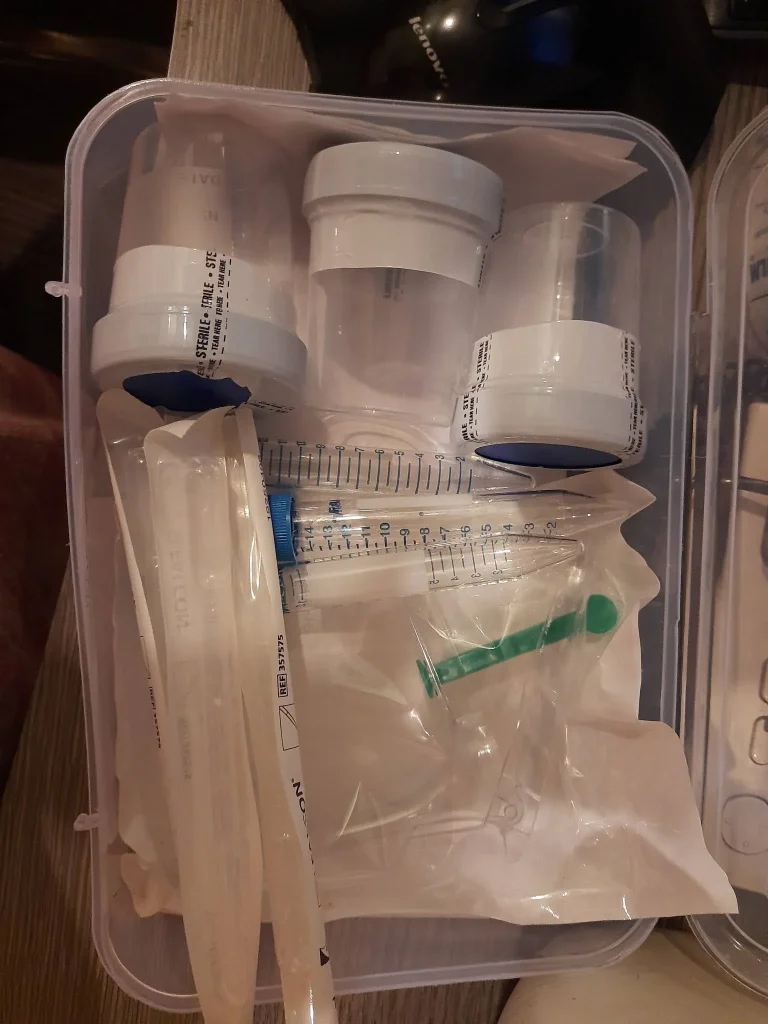
There are two methods of insemination that can be used at home – intrauterine insemination (IUI) and intracervical insemination (ICI). In IUI, the sperm is directly injected into the uterus, while in ICI, the sperm is placed near the cervix. IUI is considered to have a higher success rate, but it requires specialized equipment and medical training. ICI, on the other hand, is a more straightforward process that can be done at home with the help of a kit.
A Step-by-Step Guide to Inseminating with a Surrogate at Home
Step 5: Preparing for the Insemination
Before the insemination, it is essential to ensure that both the surrogate and intended parent(s) are relaxed and comfortable. This can be achieved by creating a calm and private environment, playing soothing music, and using relaxation techniques. The intended parent(s) can also help by reassuring the surrogate and providing emotional support throughout the process.
Step 6: The Insemination Process
For ICI, the process is relatively simple and can be done at home with a donor insemination kit. The kit includes a syringe, a cup for the sperm, and a sterile container to collect the sperm. The intended parent(s) can collect the sperm sample, usually through masturbation, and transfer it into the syringe. The surrogate can then insert the syringe into her vagina and release the sperm near the cervix. For IUI, the process is similar, except that it requires specialized equipment and medical training. It is usually done at a fertility clinic or with the help of a healthcare provider.
Step 7: After the Insemination
After the insemination, the surrogate should lie down for 20-30 minutes to allow the sperm to travel towards the cervix. It is also recommended for the surrogate to rest for the remainder of the day to increase the chances of successful fertilization. The surrogate should also avoid strenuous activities and sexual intercourse for a few days after the insemination.
Step 8: Pregnancy Testing
After two weeks, a pregnancy test can be taken to determine if the insemination was successful. If the test is positive, the surrogate will continue with regular prenatal care and will carry the baby to term. If the test is negative, the process can be repeated in the next menstrual cycle.
Summary:
Inseminating with a surrogate at home can be a beautiful and intimate journey for intended parent(s) who wish to have a child. The process involves finding a surrogate, creating a legal agreement, undergoing medical screening, choosing a method of insemination, and preparing for the insemination. While ICI can be done at home with a donor insemination kit, IUI requires specialized equipment and medical training. After the insemination, it is essential for the surrogate to rest and avoid strenuous activities. A pregnancy test can be taken after two weeks to determine the success of the insemination. With proper planning and preparation, the experience of inseminating with a surrogate at home can be a fulfilling and joyful one.
Leave a Reply