The Ultimate Guide to DIY Home Insemination: A Step-by-Step Process for Starting Your Family
Are you and your partner considering starting a family but are unable to conceive naturally? Or perhaps you are a single person who wants to become a parent? In either case, home insemination may be a viable option for you. Many couples and individuals have successfully used DIY home insemination as an affordable and convenient way to start their families. In this ultimate guide, we will walk you through everything you need to know about DIY home insemination, from the basics to the step-by-step process.
What is Home Insemination?
Home insemination is the process of manually inserting sperm into the vagina in hopes of achieving pregnancy. It is commonly used by same-sex couples, single individuals, or couples with fertility issues. The process can be done at home with minimal equipment and is often more affordable than other fertility treatments.
Step 1: Understanding Ovulation
The first step in home insemination is understanding ovulation. Ovulation is the process in which a mature egg is released from the ovary and is available for fertilization. For home insemination to be successful, it is crucial to determine when you are ovulating. There are several methods to track ovulation, such as using ovulation predictor kits, tracking basal body temperature, or monitoring cervical mucus changes.
Step 2: Collecting Sperm
The next step is to collect the sperm that will be used for insemination. There are a few options for obtaining sperm, including using a sperm donor or asking a male friend to donate. It is essential to discuss the legal and emotional implications of using a sperm donor or a known donor beforehand. Another option is to purchase pre-packaged donor sperm from a sperm bank. Whichever method you choose, make sure to follow proper safety precautions, such as using sterile containers and avoiding exposure to air or extreme temperatures.
Step 3: Preparing the Sperm
The Ultimate Guide to DIY Home Insemination
Once the sperm is collected, it needs to be prepared for insemination. The most crucial step in preparing the sperm is to keep it at the correct temperature. Sperm is sensitive to temperature changes, so it is best to keep it at room temperature before use. You can also warm the sperm by holding the container between your hands for a few minutes.
Step 4: Inserting the Sperm
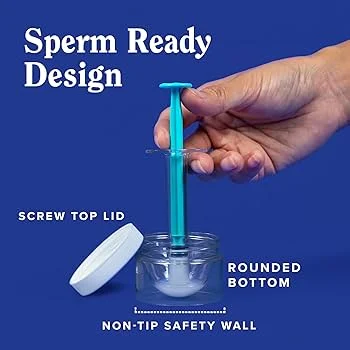
Now comes the actual insemination process. The most common method for home insemination is to use a syringe without a needle. Fill the syringe with the prepared sperm and gently insert it into the vagina, aiming towards the cervix. It is recommended to remain lying down for 15 to 20 minutes after insemination to increase the chances of sperm reaching the cervix.
Step 5: Monitoring and Waiting
After insemination, it is essential to monitor your body for any changes and keep track of any potential pregnancy symptoms. It is also crucial to relax and give your body time to do its job. It takes about 6-10 days for a fertilized egg to implant in the uterus and for pregnancy hormones to be detected in a pregnancy test. If you do not get a positive result, you can repeat the process in your next ovulation cycle.
Tips for Successful Home Insemination
– Always use sterile equipment and follow proper safety precautions.
– Track ovulation accurately to increase the chances of success.
– Consider using a fertility-friendly lubricant to make the process more comfortable.
– Keep sperm at the correct temperature and avoid exposure to air or extreme temperatures.
– Remain lying down for 15-20 minutes after insemination to increase sperm’s chances of reaching the cervix.
– Stay relaxed and positive throughout the process.
Conclusion
DIY home insemination can be a successful and affordable option for starting a family. By understanding the process and following the steps carefully, you can increase your chances of success. Remember to consult with a medical professional if you have any concerns or difficulties. With patience, preparation, and proper timing, you can achieve your dream of becoming a parent through home insemination.
In summary, DIY home insemination is the process of manually inserting sperm into the vagina to achieve pregnancy. The first step is to track ovulation accurately, followed by collecting and preparing the sperm. The actual insemination is done using a syringe without a needle, and it is crucial to remain lying down for 15-20 minutes after the process. By following safety precautions and tips for success, you can increase your chances of achieving pregnancy through home insemination.
Leave a Reply