Tag: ovulation tracking

  • Fighting for Fertility: Insemination After a Tubal Ligation at Home

    Blog Post:

    For couples struggling with fertility, the journey to parenthood can be a long and difficult one. This can be especially true for those who have undergone a tubal ligation, a permanent form of birth control that involves cutting or blocking the fallopian tubes. While this procedure is highly effective in preventing pregnancy, it can also make it challenging for women to conceive naturally. However, with the advancements in modern medicine and technology, there are alternative options available for those who still wish to have a child. One such option is insemination after a tubal ligation, which can be done at home with the right knowledge and tools.

    Insemination, also known as artificial insemination, is a procedure where sperm is inserted into the female reproductive tract to facilitate fertilization. This can be done through various methods, including intrauterine insemination (IUI) or intracervical insemination (ICI). In the case of a tubal ligation, IUI is the preferred method as it bypasses the blocked or damaged fallopian tubes and deposits the sperm directly into the uterus.

    The first step in the process of insemination after a tubal ligation is to consult with a fertility specialist. They will assess your overall health and determine if you are a good candidate for the procedure. They may also recommend some tests to check the quality and quantity of your partner’s sperm. This is crucial as it will determine the success rate of the insemination.

    Once you have been given the green light by your doctor, you can begin the process of insemination at home. The first step is to track your ovulation using methods such as ovulation predictor kits or basal body temperature charting. This will help you determine the most fertile days of your cycle, which are crucial for the success of the procedure.

    The next step is to obtain the sperm. This can be done through a sperm bank or through a known donor. If using a known donor, it is important to have them undergo testing for sexually transmitted infections (STIs) and genetic disorders to ensure the health of both the donor and the potential child.

    A person using a syringe from an at-home insemination kit on a wooden table.

    Fighting for Fertility: Insemination After a Tubal Ligation at Home

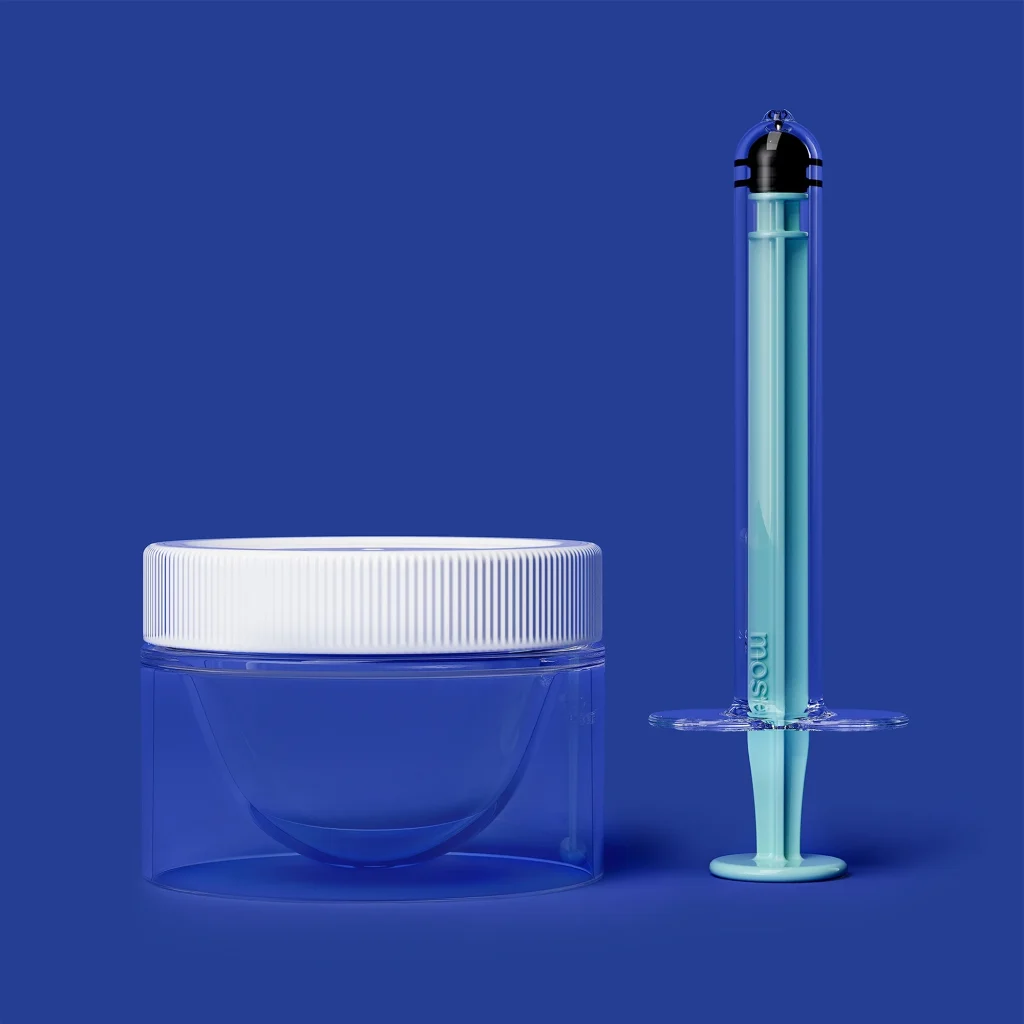
    Once you have the sperm, it needs to be prepared for insemination. This involves washing and concentrating the sperm to remove any impurities and increase the chances of fertilization. This can be done at home using a home insemination kit or at a fertility clinic.

    Now comes the actual insemination process. It is important to follow the instructions provided by your doctor or the home insemination kit carefully. In general, the process involves inserting a catheter or syringe into the cervix and depositing the prepared sperm into the uterus. It is recommended to lie down for 15-20 minutes after the procedure to allow the sperm to travel towards the fallopian tubes.

    After the insemination, it is important to take proper care of your body and avoid any activities that may interfere with the fertilization process. This includes abstaining from intercourse, heavy lifting, and strenuous exercise. Your doctor may also recommend taking progesterone supplements to support the uterine lining and increase the chances of implantation.

    The two-week wait after insemination can be filled with anxiety and anticipation. It is important to stay positive and not get discouraged if the first attempt is unsuccessful. Many couples may need multiple attempts before achieving a successful pregnancy. If after several attempts, insemination is still unsuccessful, other fertility options such as in vitro fertilization (IVF) may be recommended.

    In conclusion, while a tubal ligation may seem like an irreversible end to the dream of having children, insemination at home after a tubal ligation offers hope for couples who still wish to conceive. It is important to consult with a fertility specialist, track ovulation, and follow proper procedures to increase the chances of success. With determination and the right resources, couples can overcome the challenges of tubal ligation and continue their journey to parenthood.

    Summary:

    For couples struggling with fertility after a tubal ligation, insemination at home offers a potential solution. This procedure involves inserting prepared sperm into the uterus to bypass the blocked or damaged fallopian tubes. The process involves tracking ovulation, obtaining sperm, and carefully following instructions for the insemination. It is important to stay positive and seek help from a fertility specialist if needed. With determination and the right resources, couples can overcome the challenges of tubal ligation and continue their journey to parenthood.

  • Navigating the World of Same-Sex Parenting: Tips for Home Insemination

    Navigating the World of Same-Sex Parenting: Tips for Home Insemination

    Same-sex parenting is becoming increasingly common and more accepted in society. However, for couples or individuals in same-sex relationships who want to start a family, there are still many challenges to overcome. One of the main challenges is the process of home insemination. Home insemination involves using donor sperm to fertilize an egg at home, without the assistance of a medical professional. While this may seem daunting at first, with the right information and preparation, home insemination can be a successful and fulfilling journey towards parenthood. In this blog post, we will provide tips and advice for navigating the world of same-sex parenting through home insemination.

    1. Educate Yourself on the Process

    The first step in navigating home insemination is to educate yourself on the process. As with any major decision, it is important to have a clear understanding of what you are getting into. Research the different methods of home insemination, such as using a syringe or soft cup, and determine which one is best for you. You should also research the legal implications of home insemination in your state or country, as laws may vary. It is also vital to understand the risks involved, such as the potential for multiple pregnancies and the importance of screening for genetic disorders in the donor sperm.

    2. Choose a Donor

    Selecting a donor is a crucial step in the home insemination process. You can choose to use a known donor, such as a friend or family member, or an anonymous donor from a sperm bank. Whichever route you choose, it is essential to thoroughly screen the donor for any potential health issues or genetic disorders. It is also important to discuss expectations and boundaries with the donor, such as their involvement in the child’s life. Donor agreements and legal contracts may also be necessary to protect all parties involved.

    At-home insemination kit featuring a syringe and collection cup on a blue background.

    Navigating the World of Same-Sex Parenting: Tips for Home Insemination

    3. Prepare Your Home

    Before beginning the insemination process, it is crucial to prepare your home. Choose a quiet and comfortable space where you can perform the insemination without interruptions. Make sure you have all the necessary supplies, such as sterile syringes, a soft cup, and ovulation predictor kits. Have a plan in place for storing and handling the donor sperm, as it needs to be kept at a certain temperature. It is also helpful to have a support system in place, whether it is a partner, friend, or family member, who can assist and provide emotional support throughout the process.

    4. Track Ovulation

    Timing is critical when it comes to home insemination. Tracking your ovulation is essential to increase the chances of success. There are various methods to track ovulation, such as tracking your menstrual cycle, using ovulation predictor kits, or monitoring your basal body temperature. Find the method that works best for you and make sure to have intercourse or perform insemination during your most fertile days.

    5. Be Patient and Stay Positive

    The journey of home insemination can be emotionally and physically taxing, and it is essential to be patient and stay positive. It may take multiple attempts before a successful pregnancy occurs, so it is crucial to manage expectations and remain optimistic. Take care of your physical and mental well-being by eating healthily, exercising, and seeking support when needed. Remember to communicate openly and honestly with your partner throughout the process and lean on each other for support.

    In conclusion, navigating the world of same-sex parenting through home insemination can be a challenging but rewarding experience. Educate yourself on the process, choose a donor carefully, prepare your home, track ovulation, and stay patient and positive. With the right preparation and support, home insemination can lead to the creation of a loving and happy family.

  • The Role of Technology in At-Home Insemination with a Male Partner

    Blog Post:

    In recent years, the rise of technology has greatly impacted various aspects of our lives, including the way we approach fertility and family planning. One area that has seen significant changes is at-home insemination with a male partner. With the help of technology, couples can now perform insemination procedures in the comfort and privacy of their own homes, without the need for medical intervention. In this blog post, we will delve into the role of technology in at-home insemination with a male partner and how it has revolutionized the process.

    What is At-Home Insemination?

    At-home insemination, also known as artificial insemination or home insemination, is the process of depositing sperm into the female reproductive tract in order to facilitate fertilization and conception. This procedure can be done either by a healthcare professional in a clinic or in the comfort of one’s own home. While traditionally, insemination was performed in a medical setting, the advent of technology has made it possible for couples to safely and effectively perform the procedure on their own.

    The Role of Technology in At-Home Insemination

    1. Sperm Donor Matching

    One of the major challenges in at-home insemination with a male partner is finding a suitable sperm donor. Traditionally, couples had to rely on sperm banks or clinics to provide them with donor sperm. However, with the help of technology, couples now have access to online platforms and apps that allow them to search for and connect with potential sperm donors directly. This not only gives couples a wider pool of donors to choose from but also allows them to personalize their search based on specific criteria such as physical characteristics, health history, and educational background.

    2. Ovulation Tracking Apps

    Timing is crucial in at-home insemination, as it increases the chances of conception. Ovulation tracking apps, also known as fertility tracking apps, use technology to help couples determine the most fertile days in a woman’s menstrual cycle. These apps use various methods such as temperature tracking, cervical mucus monitoring, and ovulation prediction kits to accurately predict ovulation. This eliminates the need for invasive procedures such as blood tests and ultrasounds, making the process more convenient and less expensive for couples.

    3. Home Insemination Kits

    Technology has also made it possible for couples to purchase home insemination kits, which contain all the necessary tools and instructions for performing the procedure at home. These kits typically include a syringe or catheter, a collection cup, and sometimes even ovulation predictor kits. By following the instructions provided, couples can safely and effectively perform the procedure in the comfort of their own home, without the need for medical intervention.

    4. Telemedicine

    Telemedicine, or virtual healthcare, has been on the rise in recent years, and it has also made its way into the field of fertility. Many clinics now offer telemedicine services, which allow couples to consult with fertility specialists remotely. This is especially beneficial for couples who live in remote areas or have busy schedules that make it difficult to physically visit a clinic. Through telemedicine, couples can receive guidance and support from fertility experts, making the process of at-home insemination more accessible and convenient.

    at-home insemination kit with syringes and containers on a white background, featuring a holiday gift promotion.

    The Role of Technology in At-Home Insemination with a Male Partner

    5. Online Support and Resources

    The internet has become a valuable source of information and support for couples going through the at-home insemination process. Online forums, support groups, and social media communities provide a safe space for couples to share their experiences, connect with others, and seek advice. Additionally, there are many websites and blogs dedicated to providing information and resources for at-home insemination, making it easier for couples to navigate the process.

    Benefits of At-Home Insemination with a Male Partner

    1. Cost-Effective

    At-home insemination can be significantly less expensive than traditional insemination procedures performed in a medical setting. Couples can save on the cost of clinic visits, medical procedures, and medications by performing the procedure at home.

    2. Privacy and Comfort

    Many couples prefer at-home insemination as it allows them to maintain their privacy and perform the procedure in the comfort of their own home. This can be especially beneficial for couples who may feel uncomfortable with the idea of performing the procedure in a clinical environment.

    3. Flexibility

    With at-home insemination, couples have more control over the process and can perform it according to their schedule. This can be particularly beneficial for couples who have busy schedules or live in remote areas.

    4. More Intimate and Personal

    Some couples prefer the intimacy and personal connection of performing the insemination procedure at home, rather than in a clinical setting. This can create a more relaxed and comfortable environment, which can positively impact the success of the procedure.

    In conclusion, the role of technology in at-home insemination with a male partner has greatly improved and streamlined the process. From finding a sperm donor to performing the procedure at home, couples now have access to a variety of resources and tools that make the process more accessible, convenient, and cost-effective. With the help of technology, couples can take charge of their fertility journey and achieve their dream of starting a family.

    SEO metadata:

  • Navigating the Process of At-Home Insemination with Your Male Partner

    **Blog Post: Navigating the Process of At-Home Insemination with Your Male Partner**

    At-home insemination is a popular method for couples who are trying to conceive a child. While it may seem overwhelming and complicated at first, it is a simple process that can be done in the comfort and privacy of your own home. In this blog post, we will guide you through the steps of at-home insemination with your male partner and provide tips and advice to make the process easier and more successful.

    Step 1: Understand the Basics of Insemination

    Before starting the process, it is important to understand the basics of insemination. Insemination is the process of introducing sperm into the reproductive tract to fertilize an egg. There are two types of insemination – intrauterine insemination (IUI) and intracervical insemination (ICI). IUI involves placing the sperm directly into the uterus, while ICI involves placing the sperm in the cervix. At-home insemination typically involves ICI, which can be done without medical assistance.

    Step 2: Prepare the Sperm

    The first step in at-home insemination is to prepare the sperm. If you are using donor sperm, it can be purchased from a sperm bank. However, if you are using your partner’s sperm, it is important to ensure that it is healthy and viable. This can be done by having your partner undergo a semen analysis to check the sperm count, motility, and morphology.

    Step 3: Gather Supplies

    Next, you will need to gather all the necessary supplies for the insemination process. This includes a sterile container to collect the sperm, a sterile syringe or soft cup to insert the sperm, and a speculum to help locate the cervix. You may also want to have a towel or pad to lie on during the process.

    Step 4: Track Ovulation

    Timing is crucial when it comes to at-home insemination. You will need to track your ovulation to determine the best time to inseminate. This can be done through methods such as tracking your basal body temperature, using ovulation predictor kits, or monitoring changes in your cervical mucus. Once you have determined your fertile window, you can plan for insemination accordingly.

    Step 5: Prepare for Insemination

    at-home insemination kit by Mosie Baby, featuring syringes and storage containers for comfort and convenience.

    Navigating the Process of At-Home Insemination with Your Male Partner

    On the day of insemination, it is important to prepare yourself physically and mentally. Take a warm bath or use a heating pad to relax your pelvic muscles. This will make it easier to insert the sperm. It is also recommended to use a water-based lubricant to aid in the insertion process.

    Step 6: Perform the Insemination

    To start the insemination process, your partner will need to ejaculate into the sterile container. If using a syringe, carefully remove the sperm from the container and insert it into the vagina, aiming for the cervix. If using a soft cup, insert it into the vagina and pour the sperm into the cup, making sure it reaches the cervix. Afterward, lie down for 20-30 minutes with your hips elevated to allow the sperm to reach the cervix.

    Step 7: Rest and Wait

    After the insemination, it is important to rest and wait. You can lie down for an additional 15-20 minutes with your hips elevated to increase the chances of successful fertilization. Afterward, it is recommended to rest and avoid any strenuous activities for the rest of the day.

    Step 8: Monitor for Pregnancy

    The waiting game begins after insemination. You will need to monitor for any signs of pregnancy, such as missed periods or early pregnancy symptoms. If you have been trying for a few months without success, it may be time to consult a fertility specialist for further assistance.

    Tips for a Successful At-Home Insemination

    – Communicate with your partner and be open about the process.
    – Use ovulation tracking methods to determine the best time for insemination.
    – Have your partner maintain a healthy lifestyle to ensure healthy sperm.
    – Use a sterile container and syringe or soft cup for the insemination process.
    – Elevate your hips after insemination to increase the chances of success.
    – Take care of yourself both physically and mentally during the process.

    In conclusion, at-home insemination with your male partner is a simple and effective way to conceive a child. By following the steps and tips outlined in this blog post, you can navigate the process with ease and increase your chances of success. Remember to be patient and communicate with your partner throughout the journey. Happy inseminating!

    **Summary:**

    At-home insemination with your male partner is a simple process that can be done in the comfort and privacy of your own home. It involves preparing the sperm, tracking ovulation, and performing the insemination process at the right time. By following the tips and steps provided in this blog post, you can increase your chances of successful fertilization and conception. Remember to communicate with your partner and take care of yourself both physically and mentally throughout the process.

  • The Importance of Patience in a Home Insemination Journey

    Blog Post Title: The Power of Patience: Navigating the Home Insemination Journey

    Summary:

    The journey towards starting a family through home insemination can be an emotional rollercoaster. It requires patience, perseverance, and a strong sense of determination. In this blog post, we will discuss the importance of patience in a home insemination journey and how it can help you navigate the challenges and uncertainties that come along the way.

    Firstly, it is crucial to understand that the process of home insemination may not yield immediate results. It takes time for your body to ovulate, for the sperm to reach the egg, and for fertilization to occur. It is not uncommon for couples to try for months or even years before successfully conceiving. Therefore, it is essential to have patience and not lose hope.

    Secondly, patience is critical in dealing with the emotional journey of home insemination. The experience of trying to conceive can be emotionally draining, with each unsuccessful attempt bringing feelings of disappointment and frustration. It is vital to have patience and understand that it is a natural process that takes time. It is also essential to have open communication with your partner and seek support from loved ones during this emotionally challenging time.

    hands demonstrating steps for using a syringe kit, with instructions listed beside them

    The Importance of Patience in a Home Insemination Journey

    Furthermore, it is essential to have patience when it comes to tracking ovulation and timing insemination. The process of tracking ovulation can be time-consuming and may require several attempts to get it right. It is also essential to be patient and not rush into insemination without ensuring that ovulation has occurred. Rushing can lead to missed opportunities and decrease the chances of successful conception.

    Patience is also crucial in dealing with any setbacks or challenges that may arise during the home insemination journey. It is not uncommon for couples to face unexpected hurdles such as failed attempts, fertility issues, or financial constraints. In such cases, having patience and a positive attitude can help you overcome these challenges and continue on your journey towards starting a family.

    Moreover, having patience throughout the home insemination journey can also help you make informed decisions. It is common for couples to feel overwhelmed and make impulsive decisions, such as trying different methods or treatments without fully understanding the risks and benefits. Having patience allows you to take the time to research and consult with medical professionals before making any decisions.

    Lastly, patience is crucial in maintaining a healthy and positive mindset during the home insemination journey. It is easy to become consumed by the desire to conceive and let it take over your life. This can lead to stress, which can negatively impact fertility. By practicing patience, you can maintain a positive mindset and reduce stress, which can increase your chances of successful conception.

    In conclusion, patience plays a significant role in a home insemination journey. It helps you navigate the challenges and uncertainties, maintain a positive mindset, and make informed decisions. Remember that the journey towards starting a family may not be easy, but with patience, perseverance, and determination, you can overcome any obstacles and achieve your dream of parenthood.

  • The Dos and Don’ts of Preparing for a Home Insemination Cycle

    Blog Post Title: The Dos and Don’ts of Preparing for a Home Insemination Cycle

    Summary:

    Home insemination is becoming an increasingly popular method for individuals and couples looking to start a family. It offers a more affordable and less invasive option compared to traditional fertility treatments. However, preparing for a home insemination cycle requires careful planning and preparation to increase the chances of success. In this blog post, we will discuss the dos and don’ts of preparing for a home insemination cycle.

    Dos:

    1. Consult with a Fertility Specialist: Before embarking on a home insemination journey, it is essential to consult with a fertility specialist. They can provide valuable insights and advice on the process, as well as perform necessary tests to determine the best course of action.

    2. Track Ovulation: Timing is crucial when it comes to home insemination. It is essential to track your ovulation cycle to determine the best time to inseminate. There are various methods for tracking ovulation, such as using ovulation predictor kits or tracking basal body temperature.

    3. Choose the Right Sperm Donor: Selecting the right sperm donor is a crucial step in preparing for a home insemination cycle. It is essential to go through a reputable sperm bank or use a known donor who has undergone necessary medical and genetic screening. You should also consider the donor’s physical characteristics, medical history, and personal qualities.

    4. Gather Supplies: Before starting the insemination process, make sure you have all the necessary supplies, such as a sterile specimen cup, syringes, and a sterile insemination kit. It is also advisable to have a backup plan in case any of the supplies are not available or do not work as expected.

    instructions and warnings for using the Mosie Baby at-home insemination kit

    The Dos and Don'ts of Preparing for a Home Insemination Cycle

    5. Create a Relaxing Environment: Insemination can be a stressful and emotional process, so it is crucial to create a relaxing environment. You can play soothing music, dim the lights, and use scented candles to create a calm and comfortable atmosphere. It is also helpful to have a partner or friend present for emotional support.

    Don’ts:

    1. Rush the Process: Preparing for a home insemination cycle takes time and patience. It is essential not to rush the process and take the necessary steps to ensure success. Rushing the process can lead to mistakes or missed opportunities for conception.

    2. Use Non-sterile Supplies: Using non-sterile supplies can increase the risk of infection and reduce the chances of conception. It is crucial to use sterile supplies and follow proper hygiene practices during the insemination process.

    3. Neglect Emotional Support: Going through a home insemination cycle can be emotionally taxing, so it is essential not to neglect emotional support. Lean on friends, family, or online support groups for guidance and emotional support during this process.

    4. Skip Follow-up Care: After insemination, it is crucial to follow up with your fertility specialist to monitor your progress and address any concerns. Skipping follow-up care can lead to missed opportunities for adjustments or interventions that can increase your chances of success.

    5. Give Up After One Attempt: Home insemination may not result in pregnancy after the first attempt, and it is essential not to give up. It may take multiple attempts before conception occurs, so it is vital to have patience and stay positive.

    In summary, preparing for a home insemination cycle requires careful planning, patience, and support. Consult with a fertility specialist, track ovulation, choose the right sperm donor, gather necessary supplies, and create a relaxing environment. Avoid rushing the process, using non-sterile supplies, neglecting emotional support, skipping follow-up care, and giving up after one attempt. With these dos and don’ts in mind, you can increase your chances of a successful home insemination cycle and starting the family of your dreams.

  • The Rise of DIY Insemination: A Guide for Single Women

    Blog Post:

    In today’s society, more and more women are choosing to become single mothers by choice. This decision can be made for a variety of reasons, such as not finding the right partner, wanting to have children at a specific time in their life, or simply not wanting to wait for a partner to come along. In the past, single motherhood was seen as taboo, but with changing social norms and advancements in technology, it is becoming an increasingly popular choice. One trend that has emerged in the world of single motherhood is DIY insemination, where single women use at-home methods to get pregnant. In this blog post, we will delve into the rise of DIY insemination and provide a guide for single women who are considering this option.

    The History of DIY Insemination:
    The concept of DIY insemination is not a new one. In fact, it has been around for centuries. In ancient times, women would use various methods such as inserting sperm-soaked sponges or turkey basters to impregnate themselves. However, with the advancement of medical technology, DIY insemination became less popular. It wasn’t until the 1970s when the feminist movement and the rise of alternative lifestyles brought back the idea of women taking control of their reproductive choices. The first recorded case of a successful DIY insemination in the modern era was in 1977 when a single woman used a turkey baster to conceive.

    Advancements in Technology:
    Today, DIY insemination has become more accessible and safer due to advancements in technology. The most popular method is using a syringe or a menstrual cup to collect the sperm from a donor and then inserting it into the vagina. This method eliminates the need for a turkey baster and minimizes the risk of infection. There are also online sperm banks and donor networks that make it easier for single women to find a donor and receive the sperm directly at their doorstep.

    hands demonstrating steps for using a syringe kit, with instructions listed beside them

    The Rise of DIY Insemination: A Guide for Single Women

    Legal Implications:
    One of the biggest concerns for single women considering DIY insemination is the legal implications. In most countries, the law recognizes the sperm donor as the legal father of the child, which can create complications in the future. However, some countries have laws that protect the rights of the single mother and donor by requiring a legal contract to be signed before the insemination takes place. It is essential for single women to research and understand the legal implications in their country before proceeding with DIY insemination.

    Choosing a Donor:
    When it comes to DIY insemination, choosing the right donor is crucial. Single women have the option to use a known donor, such as a friend or family member, or an anonymous donor through a sperm bank or online network. It is essential to consider factors such as health history, genetic testing, and compatibility with the donor’s values and beliefs. Many single women also prefer to choose donors who are open to future contact with the child, as it can be beneficial for the child’s well-being.

    The Process of DIY Insemination:
    The process of DIY insemination involves tracking ovulation and using a syringe or menstrual cup to insert the sperm into the vagina. It is essential to track ovulation accurately, as this increases the chances of conception. There are various methods for tracking ovulation, such as using an ovulation predictor kit, tracking basal body temperature, or monitoring cervical mucus. Once ovulation is confirmed, the sperm can be inserted into the vagina, preferably near the cervix, to increase the chances of fertilization.

    Challenges and Risks:
    While DIY insemination can be a cost-effective and empowering choice for single women, there are some challenges and risks involved. One of the biggest risks is the lack of medical supervision, which can increase the chances of infection or other complications. It is crucial to take precautions and practice safe insemination techniques to minimize these risks. Another challenge is the emotional and financial burden of raising a child alone. Single mothers may also face societal stigma and discrimination, which can be challenging to navigate.

    Summary:
    In conclusion, the rise of DIY insemination has provided single women with a way to take control of their reproductive choices and become mothers on their terms. With advancements in technology, it has become more accessible and safer, but it is essential to consider the legal implications and choose a donor carefully. DIY insemination is not without its challenges and risks, but for many single women, it is a viable option to fulfill their dream of motherhood.

  • The Importance of Preparation for Inseminating with a Friend at Home

    The decision to inseminate at home with a friend can be both exciting and nerve-wracking. While it offers a more intimate and comfortable setting, it also requires thorough preparation to ensure a successful and safe experience. In this blog post, we will explore the importance of preparation for inseminating with a friend at home and provide tips for a smooth and stress-free process.

    Inseminating with a friend at home involves the use of a donor’s sperm to fertilize the egg of the intended recipient. This method is often chosen by those who want a more personal and private approach to conception. However, it is crucial to remember that inseminating at home is not a medical procedure, and therefore, proper preparation is essential to minimize any potential risks and increase the chances of success.

    The first step in preparing for insemination at home is to consult with a healthcare professional. It is essential to discuss your decision and get a thorough understanding of the process, including the risks and potential complications. Your healthcare provider can also provide guidance on fertility tracking and timing of insemination to increase the chances of conception.

    Next, it is crucial to choose a reliable and trustworthy sperm donor. Whether it is a close friend or someone from a sperm bank, it is vital to have a clear understanding of their medical history, including any genetic conditions, sexually transmitted infections, or fertility issues. This information is crucial as it can impact the health of the child and the success of insemination.

    Once a donor has been chosen, it is time to prepare the necessary supplies for insemination. This includes a sterile specimen cup for the sperm, a sterile syringe, and a sterile container to hold the syringe. It is also essential to have a clean and comfortable environment for the process. This can include a quiet and private room with ample lighting and a comfortable bed or couch for the recipient.

    The timing of insemination is crucial and requires careful planning. Ovulation tracking is necessary to determine the most fertile days for the recipient. This can be done through various methods, such as tracking basal body temperature, monitoring cervical mucus, or using ovulation predictor kits. It is recommended to have sex or insemination within 12-24 hours of ovulation to increase the chances of conception.

    illustration comparing standard and Mosie syringe openings with text highlighting design benefits

    The Importance of Preparation for Inseminating with a Friend at Home

    Another crucial aspect of preparation for inseminating at home is to create a supportive and stress-free environment. This can include involving a trusted friend or family member to assist with the process, playing relaxing music, or practicing deep breathing exercises. Stress and anxiety can negatively impact fertility, so it is essential to create a calm and positive atmosphere.

    It is also crucial to have a backup plan in case the first insemination attempt is unsuccessful. This can include scheduling another insemination session, trying different methods of tracking ovulation, or exploring other fertility options. It is essential to have realistic expectations and be prepared for any possible outcomes.

    In addition to physical preparation, it is also crucial to discuss and address any emotional and psychological aspects of inseminating at home. This decision can bring up a range of emotions for both the recipient and the donor, and it is essential to have open and honest communication to ensure everyone’s needs and boundaries are respected.

    Lastly, it is crucial to have a post-insemination plan in place. This can include resting for a short period after insemination, taking a pregnancy test at the appropriate time, and scheduling a follow-up appointment with a healthcare provider. It is essential to monitor any potential symptoms or complications and seek medical attention if necessary.

    In conclusion, inseminating with a friend at home is a significant decision that requires thorough preparation to ensure a safe and successful experience. It is vital to consult with a healthcare professional, choose a reliable donor, gather necessary supplies, track ovulation, create a supportive environment, and have a post-insemination plan. By taking these steps, you can increase the chances of a positive outcome and create a more intimate and personal journey towards conception.

    In summary, preparing for inseminating with a friend at home involves consulting with a healthcare professional, choosing a reliable donor, gathering necessary supplies, tracking ovulation, creating a supportive environment, and having a post-insemination plan. Adequate preparation can increase the chances of a successful and safe experience.

  • The Role of Ovulation Tracking in At-Home Insemination After a Vasectomy Reversal

    Blog Post:

    For couples who have undergone a vasectomy reversal, the journey to conceive can be a challenging one. While the reversal procedure restores the flow of sperm, it does not guarantee immediate success in achieving pregnancy. This is where ovulation tracking and at-home insemination come into play. By understanding the role of ovulation tracking in at-home insemination after a vasectomy reversal, couples can increase their chances of success and make their journey to parenthood a bit easier.

    What is Ovulation Tracking?

    Ovulation tracking, also known as ovulation prediction, is the process of monitoring a woman’s menstrual cycle to determine the most fertile days for conception. This can be done through various methods such as tracking basal body temperature, changes in cervical mucus, and using ovulation predictor kits. By tracking these changes, couples can identify the days when a woman is most likely to ovulate and time intercourse accordingly.

    Why is Ovulation Tracking Important for Couples After a Vasectomy Reversal?

    After a vasectomy reversal, the sperm count and quality may not be at the same level as before the procedure. This means that timing intercourse during the most fertile days is crucial for increasing the chances of conception. Ovulation tracking allows couples to pinpoint these days, making their efforts more targeted and efficient. It also helps avoid unnecessary stress and disappointment by avoiding trying during days when the chances of conception are low.

    The Role of At-Home Insemination

    At-home insemination involves the process of introducing sperm into the woman’s reproductive tract without the need for intercourse. This can be done through various methods, such as using a syringe or a cervical cap. For couples who have undergone a vasectomy reversal, at-home insemination can be a useful tool for increasing their chances of conceiving.

    How Does Ovulation Tracking Help with At-Home Insemination?

    hands using a syringe to extract contents from a clear container, showcasing a home insemination kit.

    The Role of Ovulation Tracking in At-Home Insemination After a Vasectomy Reversal

    Ovulation tracking plays a crucial role in at-home insemination. By accurately predicting the most fertile days, couples can time the insemination process for optimal results. This ensures that the sperm is introduced into the reproductive tract at the right time, increasing the chances of successful fertilization. Additionally, by tracking ovulation, couples can also identify any potential issues with their reproductive health, such as irregular ovulation or hormonal imbalances, which can be addressed with the help of a medical professional.

    Tips for Ovulation Tracking and At-Home Insemination After a Vasectomy Reversal

    1. Track ovulation consistently: For accurate results, it is essential to track ovulation consistently. This means tracking basal body temperature, cervical mucus, and using ovulation predictor kits every day.

    2. Seek guidance from a medical professional: It is always advisable to seek guidance from a medical professional when it comes to ovulation tracking and at-home insemination. They can provide personalized advice and monitor the process to ensure everything is going smoothly.

    3. Consider using fertility supplements: Fertility supplements can help improve sperm count and quality, making the chances of conception higher. Consult with a doctor to find the right supplements for you.

    4. Be patient and stay positive: The journey to conception can be a challenging one, and it’s important to stay patient and positive. Remember that each cycle is a chance to try again, and with the help of ovulation tracking and at-home insemination, your chances of success are higher.

    In conclusion, ovulation tracking plays a crucial role in at-home insemination after a vasectomy reversal. By accurately predicting the most fertile days, couples can increase their chances of conceiving and make their journey to parenthood a bit easier. With consistency, guidance, and patience, couples can achieve their dream of starting a family after a vasectomy reversal.

    Summary:

    After a vasectomy reversal, the journey to conception can be challenging. Ovulation tracking, the process of monitoring a woman’s menstrual cycle to determine the most fertile days, plays a crucial role in at-home insemination. By accurately predicting ovulation, couples can time at-home insemination for optimal results. Tips for successful ovulation tracking and at-home insemination after a vasectomy reversal include consistency, seeking guidance from a medical professional, considering fertility supplements, and staying patient and positive.

  • Beyond the Basics: Advanced Techniques for At-Home Insemination After a Vasectomy Reversal

    Blog Post Title: Beyond the Basics: Advanced Techniques for At-Home Insemination After a Vasectomy Reversal

    Summary:

    For couples who have undergone a vasectomy reversal, conceiving a child can still be a challenging and emotional journey. While many may consider traditional methods such as in vitro fertilization or intrauterine insemination, these options can be expensive and invasive. However, with the advancement of technology and medical knowledge, at-home insemination has become a viable option for couples trying to conceive after a vasectomy reversal.

    This blog post will explore the advanced techniques and tools available for at-home insemination after a vasectomy reversal. From finding the right donor sperm to using intrauterine insemination kits and tracking ovulation, we will delve into the details of making the process as successful as possible.

    Key Takeaways:

    Hands holding a syringe and a small container against a blue background.

    Beyond the Basics: Advanced Techniques for At-Home Insemination After a Vasectomy Reversal

    1. Donor Sperm Options: When considering at-home insemination, finding the right donor sperm is crucial. This can be done through known donors, sperm banks, or online sperm donation websites. It is essential to research and understand the legal implications and potential risks of each option.

    2. Intrauterine Insemination Kits: These kits contain all the necessary tools and instructions for at-home insemination, including a catheter, syringe, and sperm-friendly lubricant. They are a cost-effective option and can be purchased online or at fertility clinics.

    3. Timing is Everything: Timing is crucial when trying to conceive through at-home insemination. Tracking ovulation using methods such as ovulation predictor kits or basal body temperature charting can increase the chances of success. Insemination should be done within 6-12 hours of ovulation for the best results.

    4. Techniques for Insemination: There are various methods for at-home insemination, including vaginal insemination and cervical cap insemination. Vaginal insemination involves placing the sperm as close to the cervix as possible using a syringe, while cervical cap insemination uses a cervical cap to hold the sperm at the cervix.

    5. Tips for Success: Along with the advanced techniques mentioned above, some tips can increase the chances of success with at-home insemination after a vasectomy reversal. These include maintaining a healthy lifestyle, using sperm-friendly lubricants, and considering fertility supplements.

    In conclusion, at-home insemination is a viable option for couples trying to conceive after a vasectomy reversal. With the right techniques, tools, and timing, the chances of success can be increased significantly. However, it is essential to consult with a fertility specialist and understand the potential risks and legal implications before embarking on this journey.