Wednesday, January 7

Latest news


fertility


menstrual cycle


reproductive health


home insemination


women's health


conception


pregnancy


ovulation


infertility


self-care


hormones


menstruation


at-home insemination


support
Browse by topic

Stories for you

See all latest

Blog

  • The Emotional Rollercoaster of Home Insemination: A Step-by-Step Guide

    Blog Post:

    The decision to start a family is an exciting and emotional one. For many couples, the journey to parenthood can be challenging, and it may involve various fertility treatments. Home insemination is a popular method used by same-sex couples, single individuals, and couples with fertility issues. While it may seem like a simple process, the emotional rollercoaster of home insemination can be overwhelming. In this step-by-step guide, we will explore the ups and downs of home insemination and provide tips on how to navigate this emotional journey.

    Step 1: Making the Decision

    The first step in home insemination is making the decision to do it. This can be an emotional process as it involves facing your fears, insecurities, and hopes. Talking to your partner and discussing your options can help ease any anxiety or doubts you may have. It is also crucial to have open and honest communication about your expectations and emotions throughout the process.

    Step 2: Preparing for Home Insemination

    Once you have made the decision to proceed with home insemination, it is essential to prepare yourself both physically and emotionally. This may include taking fertility supplements, tracking your ovulation, and making lifestyle changes to improve your chances of conception. It is also crucial to have a support system in place, whether it be your partner, family, or friends, to help you through the process.

    Step 3: Choosing the Right Sperm Donor

    Choosing the right sperm donor is a critical step in home insemination. This decision can be overwhelming and emotional, as it involves finding the perfect match for your family. It is essential to consider factors such as physical traits, medical history, and personal values when selecting a donor. You may also want to consider using a known donor, such as a friend or family member, or using a sperm bank for anonymous donors.

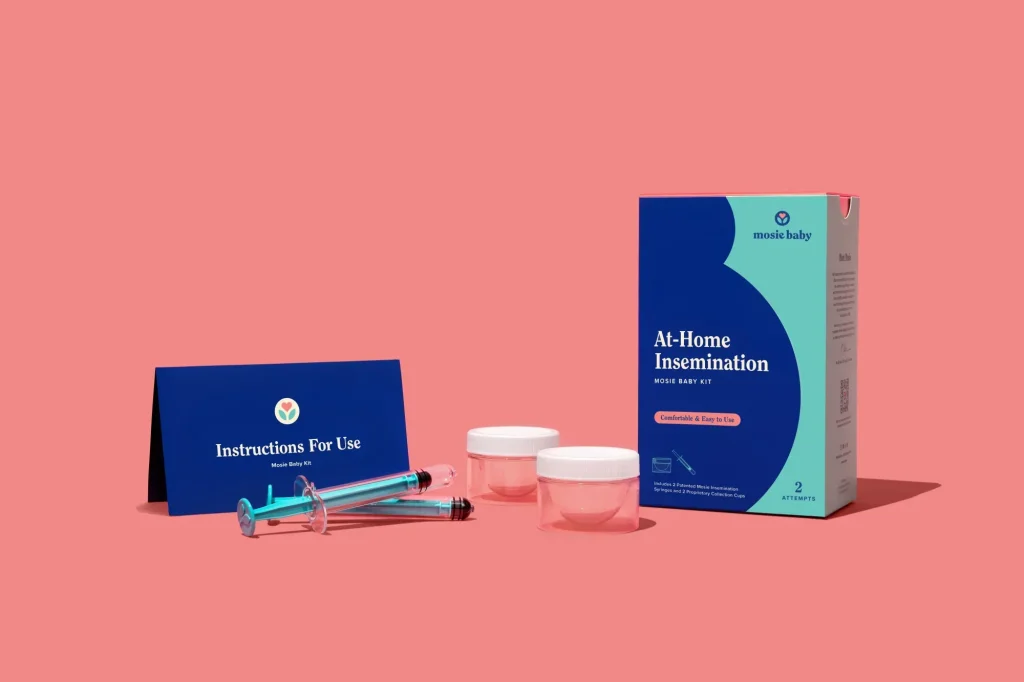
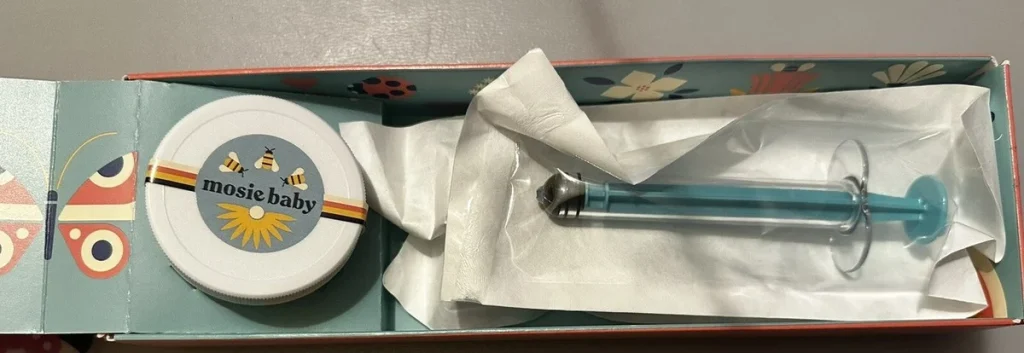
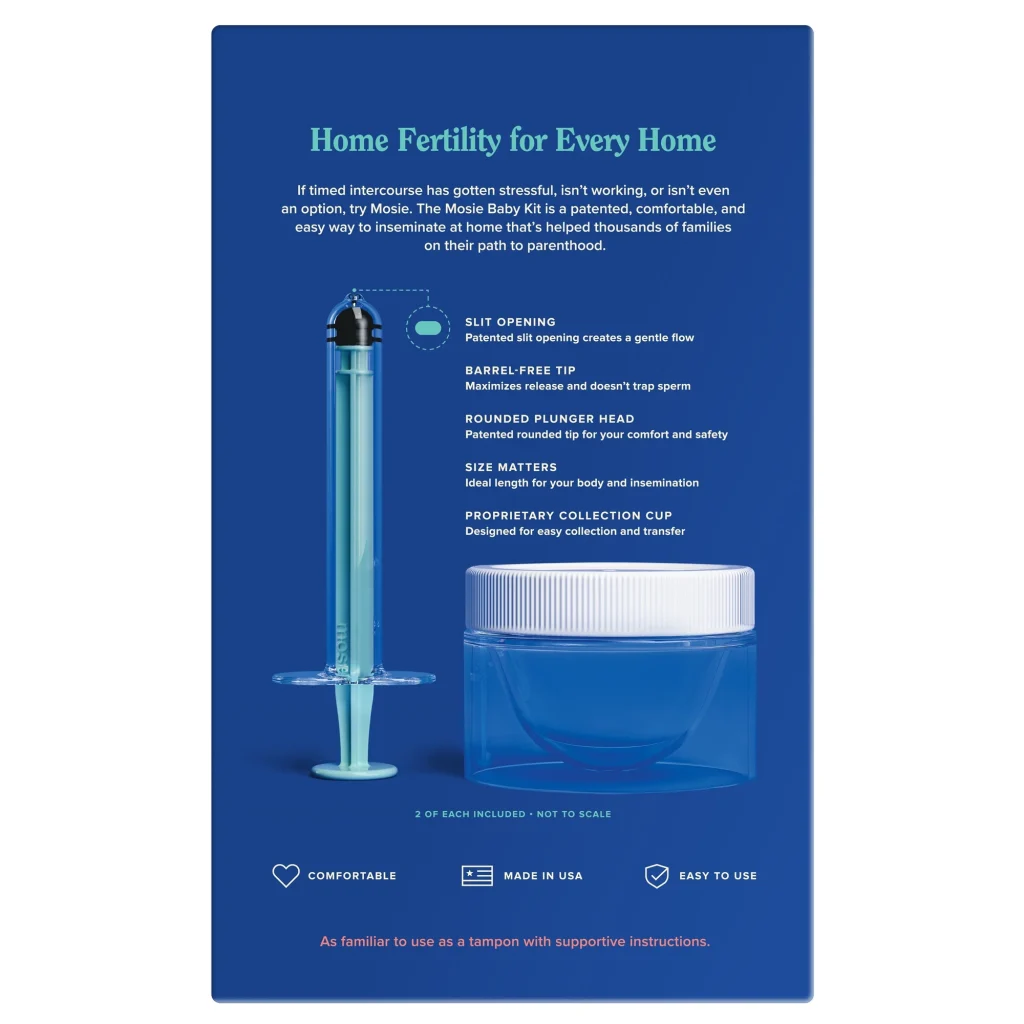
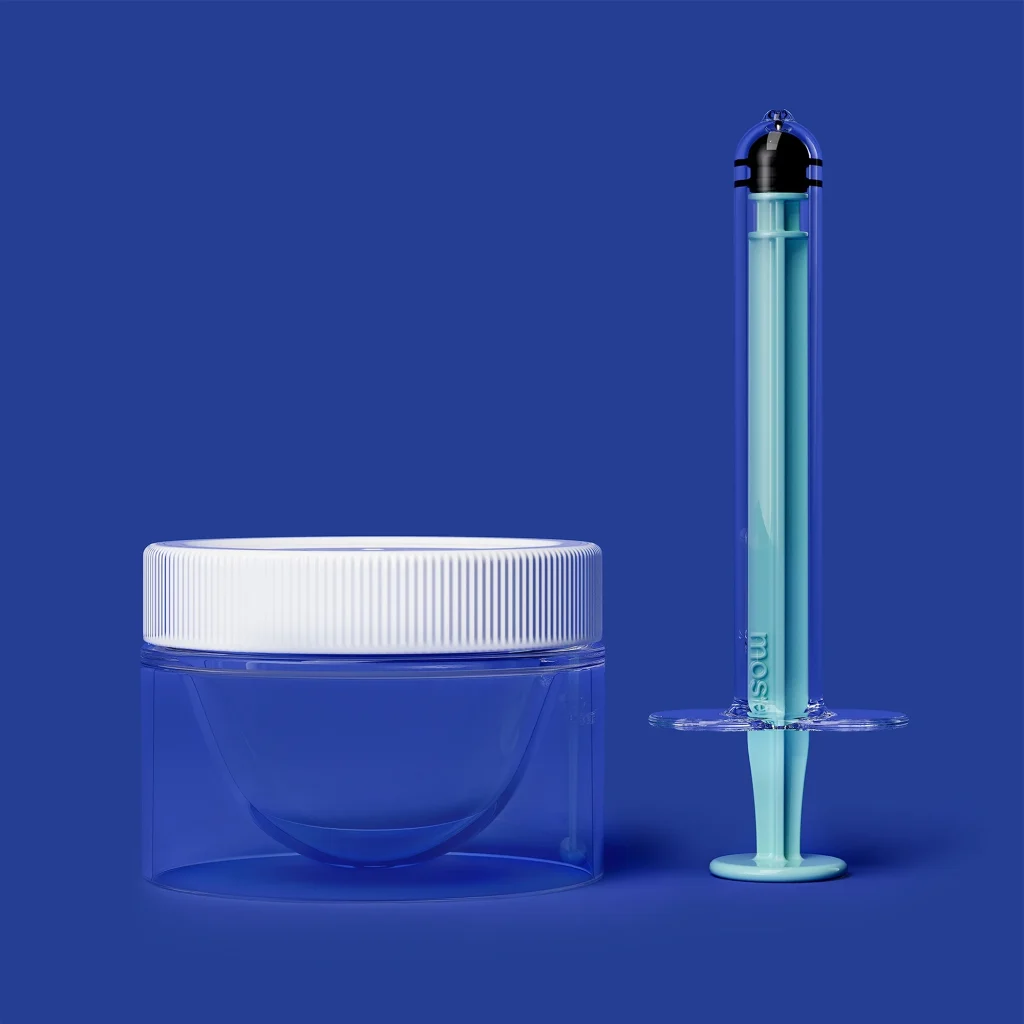
    Step 4: The Insemination Process

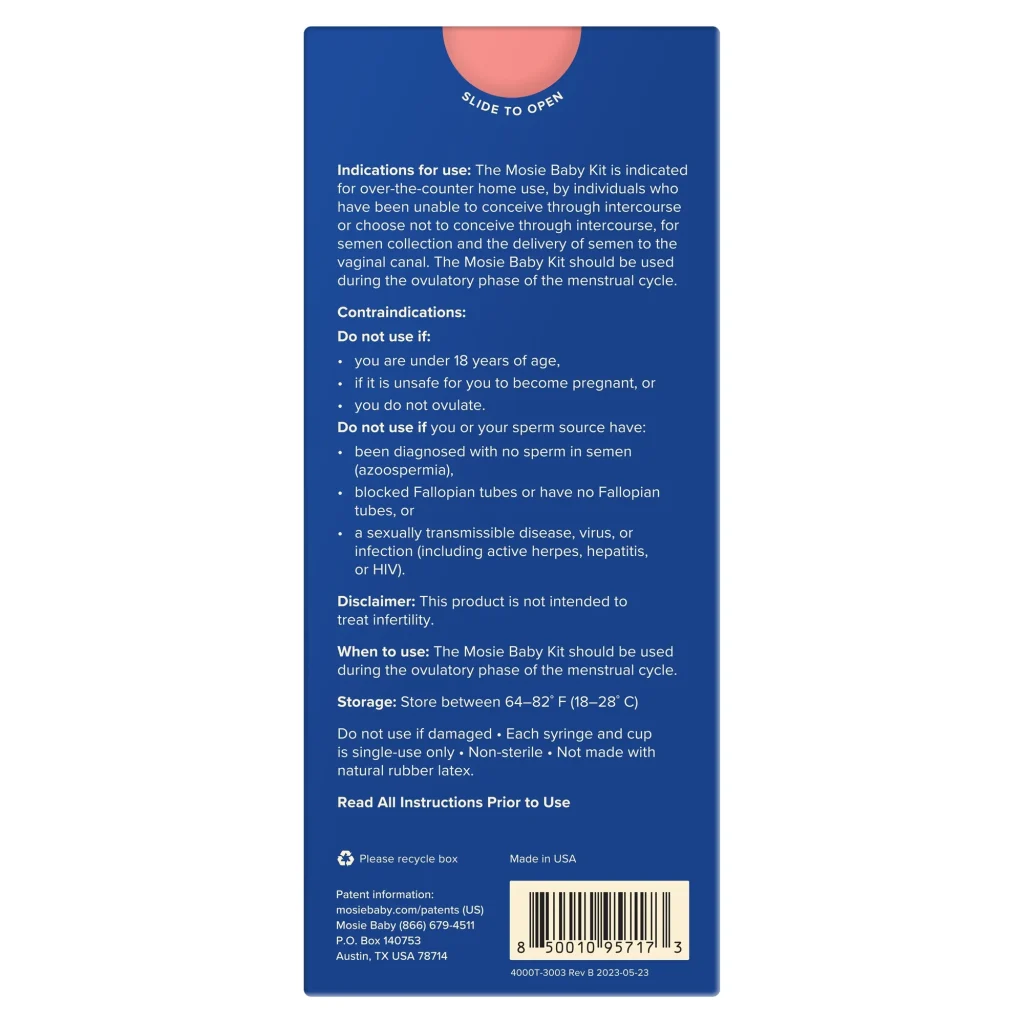
    The actual insemination process can be both exciting and nerve-wracking. It involves tracking your ovulation and timing the insemination accordingly. It is essential to have all the necessary supplies and follow the instructions carefully. It is also common to experience a range of emotions during this process, from excitement to anxiety, and it is crucial to communicate with your partner and support system throughout.

    mosie baby syringe kit with instructions and packaging on a textured surface.

    The Emotional Rollercoaster of Home Insemination: A Step-by-Step Guide

    Step 5: The Two-Week Wait

    After the insemination, you enter the two-week wait period, where you eagerly wait to take a pregnancy test. This can be an emotional rollercoaster as you may experience a mix of hope, anxiety, and impatience. It is crucial to keep yourself busy and find ways to relax and stay positive during this time. It can also be helpful to have a support system to lean on and talk to about your feelings.

    Step 6: Dealing with Negative Results

    Unfortunately, not every home insemination attempt will result in a positive pregnancy test. Dealing with negative results can be heartbreaking and can trigger a range of emotions, from disappointment to anger and sadness. It is essential to give yourself time to grieve and process these emotions. Talking to your partner, therapist, or support group can also be helpful in coping with the disappointment.

    Step 7: Celebrating Positive Results

    On the other hand, receiving a positive pregnancy test after home insemination can be an overwhelming and joyous experience. It is essential to take care of yourself both physically and emotionally during this time. You may also want to celebrate this milestone with your partner, family, and friends.

    Step 8: Preparing for Parenthood

    After a successful home insemination, it is time to prepare for parenthood. This can involve physical preparations, such as setting up the nursery and attending doctor appointments, as well as emotional preparations. Becoming a parent is a significant life change, and it is essential to take care of yourself and your partner during this transition. It is also helpful to seek out resources and support for new parents, such as parenting classes or support groups.

    In conclusion, the emotional rollercoaster of home insemination is a journey that involves many ups and downs. It is essential to have open and honest communication with your partner and support system throughout the process. Remember to take care of yourself both physically and emotionally, and seek out resources and support when needed. With patience, perseverance, and a positive mindset, home insemination can be a fulfilling and joyous experience on the road to parenthood.

    Summary:

    Home insemination is a popular method used by same-sex couples, single individuals, and couples with fertility issues. However, the emotional rollercoaster of home insemination can be overwhelming. This step-by-step guide explores the ups and downs of home insemination and provides tips on how to navigate this emotional journey. The steps include making the decision, preparing for home insemination, choosing the right sperm donor, the insemination process, the two-week wait, dealing with negative results, celebrating positive results, and preparing for parenthood. Through open communication, self-care, and seeking support, home insemination can be a fulfilling and joyous experience on the path to parenthood.

  • The Role of Technology in Home Insemination: A Step-by-Step Guide

    Blog Post Title: The Role of Technology in Home Insemination: A Step-by-Step Guide

    Summary:

    Technology has revolutionized many aspects of our lives, including the way we approach home insemination. Gone are the days when couples had to rely solely on traditional methods for conceiving a child. With advancements in technology, home insemination has become a more accessible and efficient option for those looking to start a family.

    In this blog post, we will explore the role of technology in home insemination and provide a step-by-step guide for those considering this method. We will discuss the various tools and techniques that can aid in the process, as well as the benefits and risks of using technology for home insemination. With this guide, you can make an informed decision about whether home insemination is the right option for you.

    Step 1: Understanding Home Insemination

    Before we dive into the role of technology, it’s essential to understand what home insemination is and how it works. Home insemination, also known as artificial insemination, is the process of placing sperm into a woman’s reproductive tract to facilitate fertilization. This method can be done at home using a donor’s sperm or with the help of a medical professional.

    Step 2: Choosing the Right Technology

    When it comes to home insemination, there are several technology options available. The most common ones include ovulation trackers, sperm-friendly lubricants, and at-home insemination kits. Ovulation trackers, such as basal body temperature monitors and ovulation predictor kits, help determine the most fertile days for conception. Sperm-friendly lubricants are specially designed to mimic the natural environment of a woman’s reproductive tract and increase the chances of fertilization. At-home insemination kits include all the necessary tools, such as a syringe or cervical cap, for the insemination process.

    Step 3: Preparing for Home Insemination

    at-home insemination kit with syringes and collection containers on a teal background

    The Role of Technology in Home Insemination: A Step-by-Step Guide

    Before starting the home insemination process, it’s crucial to prepare both physically and emotionally. For women, this may involve tracking ovulation and making lifestyle changes to increase fertility. For men, it may include producing a sperm sample and following a healthy diet. It’s also essential to have open and honest communication with your partner throughout the process.

    Step 4: Performing the Insemination

    Once you have chosen the right technology and prepared for home insemination, it’s time to perform the actual insemination. The process may vary depending on the chosen method, but generally, it involves inserting sperm into the vagina using a syringe or cervical cap. It’s essential to follow the instructions carefully and maintain a sterile environment to minimize the risk of infection.

    Step 5: Post-Insemination Care

    After insemination, it’s essential to take proper care to increase the chances of successful fertilization. This may include lying down for at least 15 minutes after the procedure, avoiding strenuous activities, and staying hydrated. It’s also crucial to continue tracking ovulation and possibly perform multiple insemination attempts during the fertile window to increase the chances of pregnancy.

    Benefits of Using Technology for Home Insemination

    There are several benefits to using technology for home insemination, including increased convenience, privacy, and cost-effectiveness. With the help of technology, couples can track ovulation and perform insemination in the comfort of their own home, without the need for frequent doctor visits. It also allows for more privacy, as some couples may feel uncomfortable with the idea of a medical professional performing the procedure. Additionally, home insemination is significantly more affordable than traditional fertility treatments, making it a viable option for many couples.

    Risks of Using Technology for Home Insemination

    While home insemination may seem like an attractive option, there are also risks involved. The most significant risk is the lack of medical supervision, which can increase the chances of infection or other complications. It’s crucial to carefully follow instructions and maintain a sterile environment to minimize these risks. There is also the risk of selecting a donor with a genetic disease or sexually transmitted infection, so it’s essential to thoroughly screen and test any donor sperm used for home insemination.

    In conclusion, technology has played a significant role in making home insemination a viable option for couples looking to start a family. With the right tools and techniques, couples can perform insemination at home, increasing convenience, privacy, and cost-effectiveness. However, it’s crucial to carefully consider the risks and take necessary precautions to ensure a safe and successful insemination process.

  • The Impact of Age on Home Insemination: A Step-by-Step Guide

    Blog post: The Impact of Age on Home Insemination: A Step-by-Step Guide

    Home insemination, also known as at-home insemination, is becoming an increasingly popular method for couples and individuals looking to start a family. This process involves injecting sperm into the female reproductive tract in order to fertilize an egg and achieve pregnancy. While age is not a limiting factor for home insemination, it does have an impact on the success rate and overall process. In this blog post, we will take a closer look at the impact of age on home insemination and provide a step-by-step guide for those considering this method as a means of starting or expanding their family.

    The Impact of Age on Home Insemination

    Age can have a significant impact on the success rate of home insemination. As a woman ages, her fertility declines, which means that the chances of getting pregnant through home insemination decreases. This is because a woman’s ovarian reserve, or the number of eggs she has left, decreases as she gets older. Additionally, the quality of those eggs also declines, making it more difficult for fertilization to occur.

    For men, age also plays a role in the success of home insemination. As men age, the quality and quantity of their sperm can decline, making it more difficult to achieve pregnancy through home insemination. This is due to a decrease in testosterone levels, which can affect the production and quality of sperm.

    However, it is important to note that age alone does not determine the success of home insemination. There are many other factors that can impact the success rate, such as overall health, lifestyle choices, and underlying medical conditions.

    Step-by-Step Guide to Home Insemination

    1. Understand the Process

    The first step in considering home insemination is to understand the process. This includes knowing the steps involved, the equipment needed, and the potential risks and side effects. It is important to do thorough research and consult with a medical professional before proceeding with home insemination.

    2. Choose a Donor

    The next step is to choose a sperm donor. This can be a known donor, such as a friend or family member, or a donor from a sperm bank. It is important to thoroughly screen and test the donor to ensure the safety and health of both the donor and the recipient.

    hands holding a syringe above a collection cup with instructions for using a home insemination kit

    The Impact of Age on Home Insemination: A Step-by-Step Guide

    3. Prepare the Equipment

    Before starting the insemination process, it is important to prepare all of the necessary equipment. This includes a sterile container for the sperm, a sterile syringe, and a speculum for the female partner.

    4. Timing is Everything

    Timing is crucial when it comes to home insemination. It is important to track ovulation and plan to inseminate during the most fertile days of the woman’s cycle. This increases the chances of successful fertilization and pregnancy.

    5. Insemination Process

    The actual insemination process involves inserting the sperm into the vagina using a sterile syringe and speculum. The sperm is deposited near the cervix, where it can then travel to the fallopian tubes to fertilize the egg.

    6. Rest and Relaxation

    After the insemination process, it is important for the female partner to rest and relax. This allows the sperm to travel to the fallopian tubes without any interference or disruption.

    7. Monitor for Pregnancy

    The final step is to monitor for pregnancy. This can be done through at-home pregnancy tests or by visiting a medical professional for a blood test. It is important to keep in mind that it may take several attempts before achieving a successful pregnancy through home insemination.

    Summary:

    Age can have a significant impact on the success of home insemination. As a woman ages, her fertility declines, making it more difficult to achieve pregnancy through this method. The same goes for men, as their sperm quality and quantity may decrease with age. However, age alone does not determine the success of home insemination. It is important to thoroughly understand the process, choose a suitable donor, prepare the necessary equipment, time the insemination correctly, and allow for rest and relaxation afterwards. Monitoring for pregnancy is also important, as it may take several attempts before achieving a successful pregnancy through home insemination.

  • The Importance of Patience in Home Insemination: A Step-by-Step Guide

    Summary:

    Home insemination is a popular method for couples who are trying to conceive. It involves the process of inserting semen into the vagina in order to fertilize the egg and potentially lead to pregnancy. While home insemination may seem like a straightforward process, it requires a great deal of patience and precision in order to be successful. In this blog post, we will discuss the importance of patience in home insemination and provide a step-by-step guide for those who are considering this method.

    The Importance of Patience in Home Insemination:

    1. Preparing for Home Insemination

    Before beginning the process of home insemination, it is important to properly prepare both physically and mentally. This includes tracking ovulation, having a healthy diet, and ensuring a stress-free environment. While it may be tempting to rush into the process, taking the time to properly prepare can increase the chances of success.

    2. Choosing the Right Sperm Donor

    Choosing the right sperm donor is a crucial step in home insemination. It is important to take the time to research potential donors and find the one that best fits your needs. This can be a lengthy process, but it is important to be patient and find the best match for you and your partner.

    3. Understanding the Menstrual Cycle

    In order for home insemination to be successful, it is important to have a good understanding of the menstrual cycle. This includes knowing when ovulation occurs and when the best time to inseminate is. It is important to track your cycle and be patient in waiting for the right time to begin the process.

    4. Having the Right Equipment

    Having the right equipment is essential for a successful home insemination. This includes using a sterile syringe or a soft cup to insert the semen into the vagina. It is important to take the time to properly clean and sterilize these tools before using them. Rushing this process can result in contamination and decrease the chances of success.

    5. Being Patient During the Insemination Process

    During the actual insemination process, it is important to be patient and take your time. Rushing the process can lead to discomfort and decrease the chances of success. It is recommended to take deep breaths and relax during the process.

    Mosie Baby at-home insemination kit box featuring instructions and details for two attempts.

    The Importance of Patience in Home Insemination: A Step-by-Step Guide

    6. Post-Insemination Care

    After the insemination process, it is important to take care of your body and give it time to rest. This includes avoiding strenuous activities and staying in a relaxed state for at least 20 minutes after the insemination. It is also important to stay hydrated and avoid alcohol and caffeine.

    7. Understanding the Success Rates

    It is important to have realistic expectations when it comes to home insemination. The success rates can vary and it may take multiple attempts before achieving pregnancy. It is important to be patient and continue to track ovulation and try again in the next cycle if necessary.

    Step-by-Step Guide to Home Insemination:

    Step 1: Prepare the environment: Create a stress-free and comfortable environment for the insemination process.

    Step 2: Choose the right sperm donor: Take the time to research and choose the right sperm donor for you and your partner.

    Step 3: Track ovulation: Use ovulation tracking tools to determine the best time for insemination.

    Step 4: Gather the necessary equipment: Make sure to have a sterile syringe or soft cup ready for the insemination process.

    Step 5: Prepare sperm: If using frozen sperm, make sure to follow the instructions for thawing and preparing it for insemination.

    Step 6: Insemination process: Take your time and be patient during the insemination process. Follow the instructions carefully and make sure to relax.

    Step 7: Post-insemination care: After the process, rest and relax for at least 20 minutes. Avoid strenuous activities and stay hydrated.

    Step 8: Wait and track results: It may take several attempts before achieving pregnancy. Be patient and continue to track ovulation for the next cycle.

    In conclusion, home insemination can be a successful method for couples who are trying to conceive. However, it requires a great deal of patience and precision in order to be successful. By properly preparing, understanding the menstrual cycle, having the right equipment, and being patient during the process, the chances of success can greatly increase. It is important to have realistic expectations and not rush the process. With patience and perseverance, home insemination can be a successful and rewarding experience for couples.

  • Creating a Positive Environment for Home Insemination: A Step-by-Step Guide

    Creating a Positive Environment for Home Insemination: A Step-by-Step Guide

    In today’s society, there are many ways to start a family, and home insemination is becoming an increasingly popular option for couples and individuals. With the advancements in technology and the willingness to challenge traditional norms, more people are turning to home insemination as a way to conceive. However, this process can be overwhelming and daunting for those who are new to it. That’s why it’s essential to create a positive environment for home insemination to ensure a smooth and successful experience. In this blog post, we will provide you with a step-by-step guide on how to create a positive environment for home insemination.

    Step 1: Educate Yourself

    The first step in creating a positive environment for home insemination is to educate yourself about the process. It’s crucial to understand the basics of home insemination, including the different methods, risks, and success rates. You can consult with fertility experts, join online forums, and read reliable sources to gain more knowledge about the procedure. By educating yourself, you can make informed decisions and feel more confident and in control of the process.

    Step 2: Communicate with Your Partner

    If you’re planning to undergo home insemination with a partner, it’s essential to have open and honest communication. Discuss your expectations, fears, and concerns with each other. It’s also crucial to talk about your roles and responsibilities during the process. By communicating effectively, you can build trust and create a positive atmosphere for the procedure.

    Step 3: Choose a Comfortable and Private Space

    Home insemination should be done in a comfortable and private space to reduce stress and increase relaxation. Choose a room in your home that is quiet, cozy, and has enough space for the procedure. Make sure to declutter the room and add some soothing elements like scented candles, soft lighting, and calming music. It’s also essential to have all the necessary supplies and equipment within reach to avoid interruptions during the procedure.

    hands holding a teal syringe and a clear container against a blue background

    Creating a Positive Environment for Home Insemination: A Step-by-Step Guide

    Step 4: Practice Good Hygiene

    Maintaining good hygiene is crucial to creating a positive environment for home insemination. Before starting the procedure, make sure to wash your hands thoroughly with soap and warm water. It’s also advisable to clean the area where the insemination will take place, including the surfaces and equipment you’ll be using. This step is essential to reduce the risk of infections and ensure the success of the procedure.

    Step 5: Be Mindful of Your Mental and Emotional State

    Home insemination can be a physically and emotionally demanding process. It’s essential to be mindful of your mental and emotional state before and during the procedure. Practice relaxation techniques like deep breathing and meditation to reduce stress and anxiety. You can also try to visualize a positive outcome and surround yourself with positive thoughts and affirmations. It’s also crucial to communicate any feelings or concerns you may have with your partner or a trusted friend or family member.

    Step 6: Follow the Instructions Carefully

    Whether you’re using a home insemination kit or following a natural method, it’s crucial to follow the instructions carefully. Make sure to read and understand the instructions before starting the procedure. If you have any doubts or questions, don’t hesitate to seek clarification from a healthcare professional or fertility expert. By following the instructions correctly, you can increase the chances of a successful insemination.

    Step 7: Have Realistic Expectations

    It’s essential to have realistic expectations when it comes to home insemination. Not every attempt will result in a positive pregnancy, and that’s okay. It’s crucial to remember that the process may take some time, and it’s essential to be patient and not get discouraged. Having a positive mindset and realistic expectations can make the experience more enjoyable and less stressful.

    In conclusion, creating a positive environment for home insemination requires proper education, communication, preparation, and a positive mindset. By following these steps, you can create a conducive environment for the procedure and increase the chances of a successful insemination. Remember to stay positive, be patient, and seek help from professionals if needed. With determination and perseverance, you can achieve your dream of starting a family through home insemination.

  • The Pros and Cons of Home Insemination: A Step-by-Step Guide

    Blog post summary:

    In recent years, home insemination has become a popular option for couples and individuals looking to start a family. It offers a more intimate and cost-effective alternative to clinical insemination procedures. However, with this method, there are both pros and cons to consider. In this blog post, we will discuss the step-by-step process of home insemination and weigh the advantages and disadvantages of this technique.

    The process of home insemination involves using a syringe or a cervical cap to insert sperm into a woman’s reproductive tract. This can be done using fresh or frozen sperm, and can be performed with or without a partner. The first step is to choose a donor, whether it be a known donor or an anonymous one. Once sperm is obtained, the next step is to prepare for the insemination. This includes tracking ovulation, purchasing a home insemination kit, and preparing the sperm for insertion.

    One of the main advantages of home insemination is the privacy and comfort it offers. Many people feel more at ease performing the insemination in the comfort of their own home rather than in a clinical setting. It also allows for a more intimate experience for couples, as they can share the process together. Additionally, home insemination is significantly less expensive than clinical procedures, making it a more accessible option for those on a budget.

    hand holding a syringe with a blue plunger against a solid blue background

    The Pros and Cons of Home Insemination: A Step-by-Step Guide

    Another benefit of home insemination is the ability to control and customize the process. With clinical procedures, there are often strict guidelines and protocols that must be followed. However, with home insemination, individuals can tailor the process to their specific needs and preferences. This can include choosing the timing and frequency of insemination, as well as using different positions and techniques.

    However, there are also potential drawbacks to home insemination. One of the main concerns is the risk of infection. It is crucial to ensure that all equipment used is sterile and that proper hygiene is maintained throughout the process. It is also essential to consider the legal implications of using a known donor, as there may be legal issues surrounding parental rights and responsibilities.

    Another potential disadvantage is the lack of medical supervision and guidance. With clinical insemination, trained professionals are available to provide support and monitor the process. At home, individuals may face challenges or complications without the guidance of a medical expert. It is essential to thoroughly research and educate oneself on the process before attempting home insemination.

    In conclusion, home insemination offers a unique and personal approach to starting a family. It can be a more affordable and intimate option for couples and individuals, but it also comes with potential risks and challenges. It is crucial to weigh the pros and cons and carefully consider all factors before deciding if home insemination is the right choice for you.

  • The Role of Medical Professionals in Home Insemination: A Step-by-Step Guide

    The Role of Medical Professionals in Home Insemination: A Step-by-Step Guide

    Home insemination, also known as self-insemination, is a method of achieving pregnancy without the assistance of a medical professional. This can be a more affordable and private option for those looking to conceive. However, it is important to note that while home insemination can be successful, there are some risks involved and it is not suitable for everyone. In this blog post, we will discuss the role of medical professionals in home insemination and provide a step-by-step guide for those considering this method.

    Step 1: Consultation with a Fertility Specialist

    Before beginning the process of home insemination, it is important to consult with a fertility specialist. This is especially crucial for individuals or couples who have been trying to conceive for a prolonged period of time, have a history of infertility, or have any underlying medical conditions that may affect their fertility. A fertility specialist will be able to assess your individual situation and provide personalized recommendations for the best course of action.

    Step 2: Gather Necessary Supplies

    The next step is to gather all the necessary supplies for home insemination. This includes a sterile syringe, ovulation predictor kits, and a home insemination kit (if desired). It is important to make sure that all the supplies are sterile to avoid any risk of infection.

    Step 3: Tracking Ovulation

    Timing is crucial when it comes to home insemination. It is important to track ovulation using ovulation predictor kits or by monitoring your basal body temperature. These methods can help determine the best time for insemination to increase the chances of conception.

    hands holding a syringe above a collection cup with instructions for using a home insemination kit

    The Role of Medical Professionals in Home Insemination: A Step-by-Step Guide

    Step 4: Preparing the Sperm

    If using donor sperm, it is important to purchase it from a reputable sperm bank. The sperm will need to be thawed and brought to room temperature before insemination. If using a partner’s sperm, it can be collected and placed in a sterile container.

    Step 5: Insemination Process

    The insemination process can vary depending on the individual’s or couple’s preferences and needs. Some may choose to use a home insemination kit, which typically includes a cervical cap or a soft cup to hold the sperm in place. Others may choose to use a syringe for insemination. It is important to follow the instructions provided with the home insemination kit or consult with a fertility specialist for proper technique.

    Step 6: Rest and Relaxation

    After insemination, it is important to relax and rest for at least 30 minutes to allow the sperm to travel to the fallopian tubes. Some may choose to elevate their hips or use a heating pad to increase blood flow to the pelvic area.

    Step 7: Follow-Up with a Fertility Specialist

    It is recommended to follow-up with a fertility specialist after home insemination to confirm ovulation and assess the success of the insemination. This can also help address any concerns or issues that may have arisen during the process.

    In summary, the role of medical professionals in home insemination is crucial for individuals or couples who are considering this method. A fertility specialist can provide personalized recommendations and guide you through the process to increase the chances of success. It is important to gather all necessary supplies, track ovulation, properly prepare the sperm, and follow proper technique during insemination. Additionally, following up with a fertility specialist can ensure the process is successful and address any concerns. While home insemination can be a viable option for some, it is important to consult with a medical professional to determine if it is the right choice for you.

  • Supporting Your Partner Through Home Insemination: A Step-by-Step Guide

    Summary:

    Home insemination, also known as self-insemination or at-home insemination, is becoming a popular option for couples and individuals who are trying to conceive. This method involves using a sperm donor at home, rather than going through a fertility clinic. For same-sex couples and those facing fertility challenges, home insemination can be an affordable and convenient alternative. However, it is important to have the right support and knowledge in place to ensure a successful and safe experience. In this blog post, we will provide a step-by-step guide on how to support your partner through home insemination.

    Step 1: Have an open and honest conversation
    Before embarking on the journey of home insemination, it is crucial to have an open and honest conversation with your partner. This discussion should include reasons for choosing home insemination, expectations, and any concerns or fears that may arise. It is essential to have a strong foundation of communication and trust before proceeding.

    Step 2: Educate yourselves on the process
    Home insemination involves using a donor’s sperm, either from a known or anonymous donor, to fertilize the partner’s egg. It is essential to educate yourselves on the process, including the timing of ovulation, the best positions for insemination, and how to properly handle and store the sperm. There are also various resources available, such as online forums and support groups, where you can connect with other couples who have gone through the same process.

    Step 3: Choose a donor
    Choosing a sperm donor is a significant decision that should be made carefully. If you decide to use a known donor, it is crucial to have a legal agreement in place to protect all parties involved. If you opt for an anonymous donor, you can purchase sperm from a reputable sperm bank. Ensure that the donor meets all necessary health and screening requirements.

    mosie baby at-home insemination kit packaging featuring instructions and details for use.

    Supporting Your Partner Through Home Insemination: A Step-by-Step Guide

    Step 4: Create the right environment
    Creating a comfortable and relaxing environment is essential for successful home insemination. This can include dim lighting, soft music, and comfortable bedding. It is also helpful to have all necessary supplies, such as an insemination kit, on hand to avoid any last-minute stress.

    Step 5: Follow the proper insemination technique
    Timing is crucial when it comes to home insemination. It is recommended to inseminate 24-48 hours before ovulation to increase the chances of conception. The insemination process should be similar to sexual intercourse, with the partner lying down for at least 15 minutes after insemination. Following the proper technique can increase the chances of success.

    Step 6: Be supportive and understanding
    Home insemination can be an emotional and physically demanding process for both partners. As the partner supporting the insemination, it is essential to be understanding and supportive throughout the entire experience. This can include being patient, offering words of encouragement, and being there for your partner during the two-week wait for the pregnancy test.

    Step 7: Seek professional support if needed
    While home insemination can be a successful option for many couples, it is essential to seek professional support if needed. If you have been trying to conceive for an extended period without success, it may be time to consult a fertility specialist. They can provide valuable insight and guidance on the next steps to take.

    In conclusion, home insemination can be an empowering and intimate experience for couples trying to conceive. With proper support, education, and communication, it can be a successful and safe option for starting a family. Remember to be patient, understanding, and open to all possibilities throughout the process. With the right mindset and approach, you can support your partner through home insemination and embark on the journey of parenthood together.

  • The Benefits of Tracking Ovulation for Home Insemination: A Step-by-Step Guide

    Summarized:

    Tracking ovulation for home insemination can offer a variety of benefits for those looking to conceive. By understanding your body’s natural cycle and using the proper tools and methods, you can increase your chances of successful insemination. This step-by-step guide will walk you through the process of tracking ovulation and how it can improve your home insemination journey.

    Firstly, it’s important to understand the basics of ovulation. Ovulation is the process in which a mature egg is released from the ovary and travels down the fallopian tube, making it available for fertilization. This typically occurs once a month, around the middle of a woman’s menstrual cycle. However, every woman’s cycle is different, so it’s crucial to track your own individual cycle.

    Tracking your ovulation can be done through various methods, such as tracking your menstrual cycle, using ovulation predictor kits, monitoring your basal body temperature, and tracking your cervical mucus. Each method has its own benefits and can provide valuable information about your fertile window. By combining these methods, you can get a more accurate understanding of when you are most likely to ovulate.

    One of the main benefits of tracking ovulation for home insemination is that it can help you time your insemination correctly. In order to increase your chances of success, it’s important to inseminate around the time of ovulation. By tracking your cycle and using the proper tools, you can pinpoint your most fertile days and plan for insemination accordingly.

    Another advantage of tracking ovulation is that it can help you identify any potential issues with your fertility. If you consistently have difficulty tracking ovulation or notice irregularities in your cycle, it may be a sign of an underlying fertility issue. By tracking ovulation, you can bring this information to your doctor and potentially address any issues that may be hindering your ability to conceive.

    Tracking ovulation can also help reduce the stress and anxiety that often comes with trying to conceive. By having a better understanding of your body’s natural cycle, you can feel more in control and confident in your home insemination journey. This can also lead to a healthier and more positive mindset, which can have a positive impact on your overall fertility.

    At-home insemination kit packaging featuring syringes and collection cups, labeled for comfort and ease of use.

    The Benefits of Tracking Ovulation for Home Insemination: A Step-by-Step Guide

    In addition, tracking ovulation can also be a great way to involve your partner in the process. By including them in the tracking and planning, it can strengthen your relationship and make the journey to conception a team effort.

    Now that we understand the benefits of tracking ovulation, let’s dive into a step-by-step guide on how to do it effectively for home insemination.

    Step 1: Know your menstrual cycle. Start by tracking the length of your menstrual cycle for a few months to get an idea of its regularity. This will help you predict when you may ovulate.

    Step 2: Use ovulation predictor kits. These kits detect the surge of luteinizing hormone (LH) in your urine, which occurs 24-36 hours before ovulation. They can be purchased at most drugstores and are easy to use.

    Step 3: Monitor your basal body temperature (BBT). Your BBT is your body’s temperature at rest, and it can increase slightly after ovulation. By tracking your BBT every morning before getting out of bed, you can identify when you have ovulated.

    Step 4: Track your cervical mucus. The consistency and color of your cervical mucus can change throughout your cycle and can be a good indicator of ovulation. As you approach ovulation, your mucus will become clear, stretchy, and slippery.

    Step 5: Combine methods for a more accurate prediction. By using all of these methods together, you can get a better understanding of your fertile window and increase your chances of successful insemination.

    In conclusion, tracking ovulation for home insemination can offer a variety of benefits, such as timing insemination correctly, identifying potential fertility issues, reducing stress and involving your partner in the process. By utilizing the various methods available and following this step-by-step guide, you can increase your chances of successfully conceiving at home.

  • The Impact of Stress on Home Insemination: A Step-by-Step Guide

    Blog Post Title: The Impact of Stress on Home Insemination: A Step-by-Step Guide

    Summary:

    Insemination at home has become a popular option for many couples and individuals who are trying to conceive. It offers privacy, convenience, and lower costs compared to medical procedures. However, one factor that is often overlooked is the impact of stress on the success of home insemination. Stress can affect not only the physical process of insemination but also the overall emotional and mental well-being of the individuals involved. In this blog post, we will explore the different ways in which stress can affect home insemination and provide a step-by-step guide on how to manage stress for a more successful and positive experience.

    The first step in managing stress during home insemination is to understand how it can affect the process. Stress can cause changes in hormone levels, which can impact ovulation and sperm production. It can also affect the quality and quantity of cervical mucus, making it more difficult for sperm to reach the egg. Additionally, stress can lead to sexual dysfunction and decreased libido, making it difficult for couples to time their insemination correctly. These factors can significantly decrease the chances of successful home insemination.

    So, how can we reduce stress during the home insemination process? The key is to create a supportive and calm environment. This can be achieved by involving a partner or a support person who can help with the insemination process. Having someone to share the responsibility and support each other emotionally can make a significant difference. Additionally, creating a comfortable and relaxing atmosphere in the bedroom can help alleviate stress. This can include dimming the lights, playing soothing music, and using relaxation techniques such as deep breathing or meditation.

    at-home insemination kit with syringes, collection cups, and instructions on a pink background

    The Impact of Stress on Home Insemination: A Step-by-Step Guide

    Another important aspect to consider is communication. Open and honest communication between the individuals involved is crucial in reducing stress. It is essential to discuss any fears, concerns, or anxieties that may arise during the process. This can help in finding solutions and providing emotional support to each other. Seeking advice from a therapist or a fertility specialist can also be beneficial in managing stress and improving communication.

    Managing expectations is also key in reducing stress during home insemination. It is essential to understand that the process may not be successful on the first try and that it may take multiple attempts. Constantly worrying about the outcome can increase stress levels and affect the overall experience. It is important to keep a positive mindset and to focus on the journey rather than the end result.

    Another way to reduce stress is to have a well-planned and organized approach to home insemination. This can include tracking ovulation, using quality fertility products, and following a proper insemination technique. Knowing that everything is in place can help alleviate stress and increase confidence in the process. It is also important to have a backup plan in case the first attempt is unsuccessful. This can help reduce the pressure and stress of having to start from scratch.

    Lastly, practicing self-care is essential in managing stress during home insemination. This can include eating a healthy and balanced diet, getting enough rest and sleep, and engaging in relaxation activities such as yoga or exercise. Taking care of one’s physical and mental well-being can go a long way in reducing stress levels and improving the chances of a successful home insemination.

    In conclusion, stress can have a significant impact on home insemination. It is important to understand how stress can affect the process and take proactive measures to manage it. By creating a supportive environment, communicating openly, managing expectations, and practicing self-care, couples and individuals can have a more positive and successful experience with home insemination.