Tag: family planning

  • DIY Donor Sperm Storage: Tips for Success at Home

    Blog Post Title: DIY Donor Sperm Storage: Tips for Success at Home

    Summary:

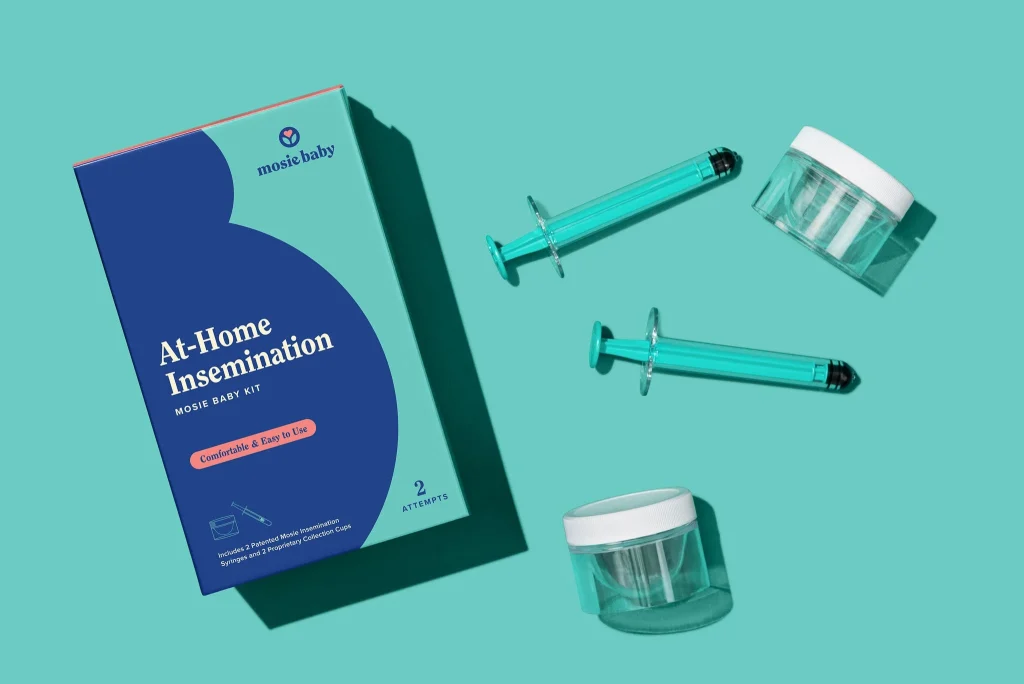
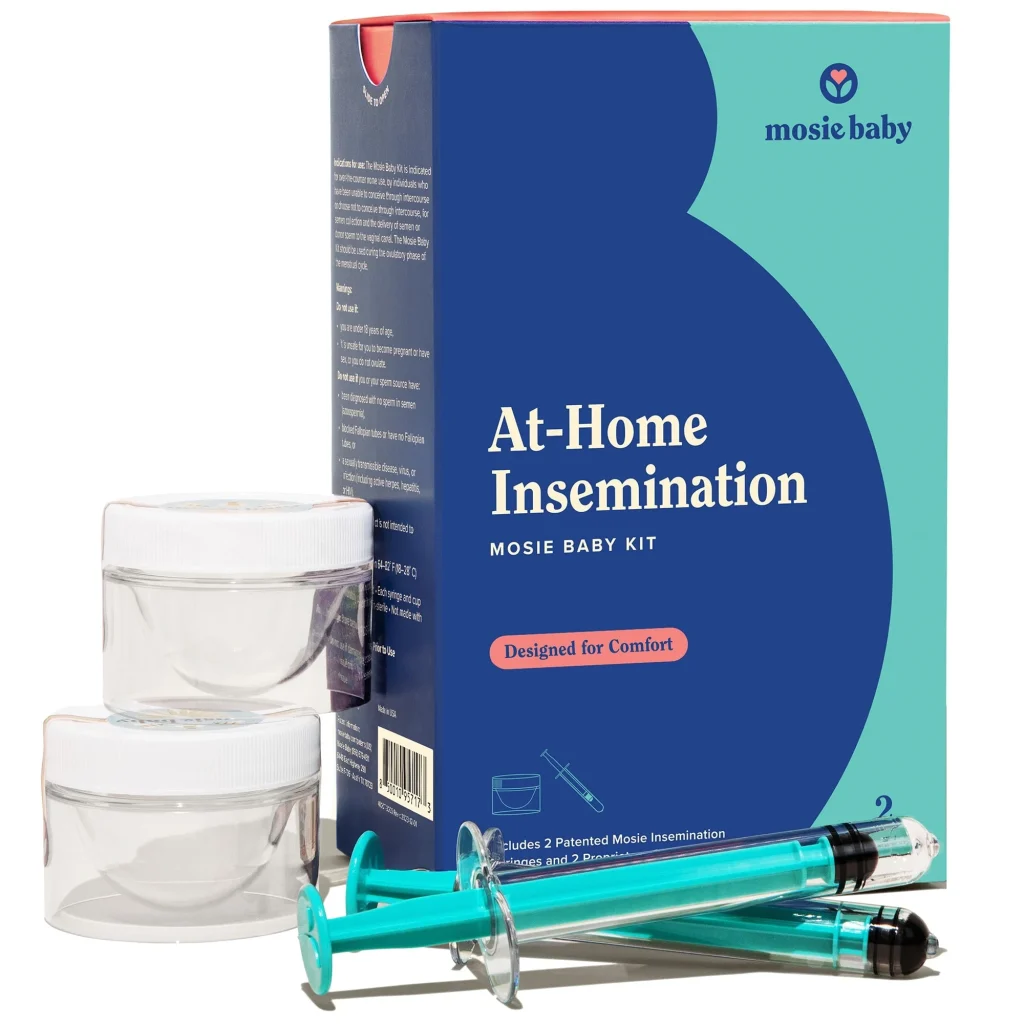
    DIY donor sperm storage is becoming an increasingly popular option for those looking to start a family. Whether you are a same-sex couple, a single parent, or someone struggling with fertility issues, storing donor sperm at home can offer a convenient and cost-effective solution. However, proper storage and handling are crucial to maintaining the viability and quality of the sperm. In this blog post, we will discuss the steps and tips for successfully storing donor sperm at home.

    Step 1: Choosing the Right Donor Sperm

    The first and most crucial step in DIY donor sperm storage is choosing the right donor sperm. It is essential to choose a donor from a reputable sperm bank or fertility clinic that screens donors for infectious diseases, genetic disorders, and other health issues. Also, consider the donor’s physical characteristics, such as height, weight, and ethnicity, to ensure a better match with the intended parent.

    Step 2: Understanding the Storage Requirements

    Before you start the process, it is essential to understand the storage requirements for donor sperm. Sperm can survive for a limited period outside the body, so it must be stored at the right temperature to maintain its viability. Ideally, sperm should be stored at a temperature between -196°C to -176°C. It is recommended to use a liquid nitrogen tank to store the sperm, which can maintain the required temperature for up to 30 days.

    Step 3: Preparing the Storage Container

    Once you have chosen the right sperm donor and have a liquid nitrogen tank, it is time to prepare the storage container. The container should be made of a material that can withstand extreme temperatures and is airtight. A stainless steel or glass container with a screw-top lid is ideal for storing donor sperm. Before adding the sperm, make sure to sanitize the container and allow it to dry completely.

    Step 4: Transferring the Sperm

    hands using a syringe to extract contents from a clear container, showcasing a home insemination kit.

    DIY Donor Sperm Storage: Tips for Success at Home

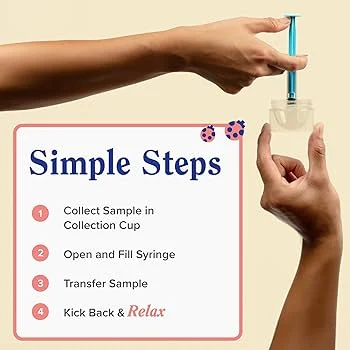
    Transferring the sperm from the original container to the storage container can be a delicate process. It is crucial to ensure that the sperm stays at the right temperature throughout the transfer. Use a sterile syringe to transfer the sperm, and make sure to work quickly to minimize exposure to room temperature.

    Step 5: Labeling and Storing the Container

    Proper labeling of the storage container is crucial for maintaining the integrity of the sperm. Include the donor’s name, date of collection, and any other relevant information on the label. Place the container in the liquid nitrogen tank and make sure to keep the tank in a well-ventilated, cool, and dark place.

    Tips for Success:

    1. Regularly Monitor the Temperature: It is essential to monitor the temperature of the liquid nitrogen tank regularly. A temperature alarm can be helpful in alerting you if the temperature drops below the recommended range.

    2. Plan for Backup Storage: In case of a power outage or any other emergency, it is always a good idea to have a backup storage plan. Consider storing the sperm at a second location or investing in a generator to keep the liquid nitrogen tank running.

    3. Keep Records: Keep a record of the storage dates, location, and any other relevant information to ensure proper tracking and monitoring of the sperm.

    4. Have a Backup Plan for Shipping: If you plan to use the sperm for fertility treatments, have a backup plan in case there are any issues with shipping or transportation. Consider using a courier service that specializes in transporting frozen goods.

    5. Don’t Overstock: It is essential to only store the amount of sperm you will need. Overstocking can lead to unnecessary expenses and wastage of sperm.

    DIY donor sperm storage can be a successful and convenient option for starting a family. However, it is crucial to follow the proper steps and tips to ensure the viability and quality of the sperm. With careful planning and monitoring, you can have a successful DIY donor sperm storage experience.

  • The Dos and Don’ts of Storing and Handling Donor Sperm at Home

    Summary:

    In recent years, there has been a significant increase in the use of donor sperm for assisted reproduction. Whether it’s due to fertility issues, same-sex couples, or single individuals looking to start a family, donor sperm has become a viable option for many. With the rise in popularity, there has also been a growing trend of storing and handling donor sperm at home. While it may seem like a convenient and cost-effective option, there are important dos and don’ts to keep in mind when storing and handling donor sperm at home. In this blog post, we will discuss the best practices for storing and handling donor sperm at home to ensure its safety and effectiveness.

    The Dos:

    1. Choose a reputable sperm bank or fertility clinic: When considering using donor sperm, it is crucial to choose a reputable sperm bank or fertility clinic. These institutions have strict protocols in place for screening and testing donors, ensuring the safety and quality of the sperm. Additionally, they have proper facilities and equipment for storing and handling donor sperm, which may not be available at home.

    2. Follow proper storage guidelines: Donor sperm needs to be stored at a specific temperature to maintain its viability. The ideal temperature for storing sperm is between -196°C to -80°C. It is essential to have a reliable and accurate thermometer to monitor the temperature of the storage container regularly. It is also recommended to store the sperm in a cryopreservation tank or a dedicated freezer that is not frequently opened.

    3. Use the right storage containers: When storing donor sperm, it is crucial to use the right storage containers. The best option is a cryopreservation vial or straw that is specifically designed for storing sperm. These containers are made of medical-grade plastic and are sterile, ensuring the safety and integrity of the sperm.

    4. Label and organize: It is essential to label the storage containers with the donor’s name, date of collection, and the number of vials/straws. This information will help keep track of the donor’s identity and ensure that the oldest sample is used first. It is also crucial to organize the storage containers properly and avoid overcrowding to prevent damage to the samples.

    5. Keep a backup plan: Despite following all the guidelines, there is always a risk of the storage container being damaged or the temperature being compromised. It is essential to have a backup plan in place, such as having a second storage container or alternate storage facility, to ensure the safety of the sperm.

    Mosie Baby kit for at-home insemination with syringes and collection cups on a teal background.

    The Dos and Don'ts of Storing and Handling Donor Sperm at Home

    The Don’ts:

    1. Do not use home freezers: It may be tempting to use a home freezer to store donor sperm, but this is not recommended. Home freezers are not designed to maintain the required temperature for storing sperm and may lead to damage or degradation of the samples.

    2. Do not store sperm in the fridge: Similarly, storing donor sperm in the fridge is not advised. The temperature in the fridge is not cold enough to keep the sperm viable and may cause damage to the samples.

    3. Do not store sperm near sources of heat: It is essential to store donor sperm in a cool and dry place, away from any sources of heat. Exposure to heat can significantly impact the viability and quality of the sperm.

    4. Do not use expired sperm: Sperm, like any other biological material, has an expiration date. It is essential to check the expiration date on the storage container and discard any expired sperm. Using expired sperm can significantly impact the chances of a successful pregnancy.

    5. Do not transport sperm without proper precautions: If you need to transport donor sperm, it is crucial to take the necessary precautions to ensure its safety. Use a dry shipper or a cooler with dry ice to maintain the required temperature during transportation.

    In conclusion, storing and handling donor sperm at home can be a convenient and cost-effective option, but it is essential to follow the dos and don’ts to ensure its safety and effectiveness. Choosing a reputable sperm bank or fertility clinic, using the proper storage containers, following storage guidelines, and having a backup plan are crucial for maintaining the integrity of the sperm. By following these guidelines, individuals and couples can have peace of mind and increase their chances of a successful pregnancy.

    SEO metadata:

  • Inseminating with a Friend at Home: A Supportive Network of Co-Parents

    Blog Post: Inseminating with a Friend at Home: A Supportive Network of Co-Parents

    Insemination, or the process of artificially introducing sperm into the female reproductive tract, has become a popular method for individuals or couples who are struggling with fertility. While many choose to go through this process with a medical professional, there is a growing trend of individuals choosing to inseminate at home with the help of a friend or known donor. This unconventional approach has given rise to a supportive network of co-parents, who come together to support and help each other in their journey towards parenthood. In this blog post, we will explore the concept of inseminating with a friend at home and the positive impact it has on creating a supportive network of co-parents.

    The decision to inseminate with a friend at home is often driven by various reasons. For some, it may be due to financial constraints, while for others, it could be a conscious choice to have a more personal and intimate experience. Inseminating at home allows the individuals to have control over the process, making it more comfortable and less intimidating. It also eliminates the need for medical interventions and can be a more affordable option for those who cannot afford expensive fertility treatments.

    One of the significant benefits of inseminating with a friend at home is the creation of a supportive network of co-parents. Unlike traditional co-parenting arrangements, where two individuals come together solely for the purpose of raising a child, inseminating with a friend at home allows for a deeper connection and friendship to develop. The individuals involved have a shared goal of creating a family and are committed to supporting each other through the process. This supportive network provides emotional and practical support, creating a sense of community and belonging for those involved.

    Moreover, inseminating with a friend at home also allows for a more transparent and open approach to co-parenting. The individuals involved have the opportunity to discuss and negotiate their roles and responsibilities in raising the child. This open communication and understanding can help avoid conflicts and ensure that everyone’s needs and expectations are met. It also allows for equal involvement from both co-parents, which can be beneficial for the child’s well-being in the long run.

    A person using a syringe from an at-home insemination kit on a wooden table.

    Inseminating with a Friend at Home: A Supportive Network of Co-Parents

    Inseminating with a friend at home also provides a unique opportunity for the child to have a diverse and supportive family structure. The child will have the love and support of not just two parents but also extended family members and friends who are involved in the co-parenting process. This diverse network can provide a more well-rounded and enriching upbringing for the child.

    However, while inseminating with a friend at home has many advantages, it is essential to consider and address any potential challenges that may arise. One of the primary concerns is legal issues surrounding parental rights and responsibilities. It is crucial for the co-parents to have a detailed legal agreement in place to ensure that everyone’s rights and obligations are clearly defined and protected. Seeking legal advice before embarking on this journey is highly recommended to avoid any future complications.

    In addition to legal issues, it is also essential for the co-parents to have open and ongoing communication to maintain a healthy and supportive co-parenting relationship. This includes discussing important decisions and being respectful of each other’s boundaries and wishes. Regular check-ins and the willingness to adapt to changes are crucial in ensuring a successful co-parenting dynamic.

    Inseminating with a friend at home has provided a unique and empowering option for individuals and couples who want to start a family. It has given rise to a supportive network of co-parents, who come together to support and help each other in their journey towards parenthood. While it may not be the traditional route, it has proven to be a successful and fulfilling option for many. With proper communication, legal agreements, and a shared commitment to the well-being of the child, inseminating with a friend at home can create a loving and supportive environment for all involved.

    In conclusion, inseminating with a friend at home has become a popular and viable option for those who want to start a family. It creates a unique and supportive network of co-parents, who come together to support each other in their journey towards parenthood. It also provides a more personal and intimate experience, allowing for open communication and equal involvement from both co-parents. While there may be challenges, with proper planning and communication, inseminating with a friend at home can lead to a fulfilling and enriching co-parenting experience for all involved.

    SEO Metadata:

  • Inseminating with a Friend at Home: A Bonding Experience for All Involved

    Inseminating with a Friend at Home: A Bonding Experience for All Involved

    Insemination is a process in which sperm is introduced into a female’s reproductive tract, usually with the goal of achieving pregnancy. Traditionally, this has been done in a clinical setting, with the help of a medical professional. However, in recent years, more and more people are turning to at-home insemination, especially with the support and involvement of a close friend. In this blog post, we will explore the benefits and challenges of inseminating with a friend at home, and how this experience can create a strong bond between all parties involved.

    The idea of inseminating with a friend may seem unconventional to some, but there are many reasons why people choose this route. For same-sex couples, it may be the only option for conceiving a child without the help of a sperm donor. For single individuals, it can provide a sense of emotional and physical support during the process. And for some, it may simply be a preference to have someone they know and trust as the biological father of their child. Whatever the reason, inseminating with a friend at home can be a deeply meaningful and bonding experience.

    One of the biggest advantages of at-home insemination with a friend is the level of comfort and familiarity between the inseminating parties. In a clinical setting, the process can feel impersonal and invasive. With a friend, there is a sense of trust and intimacy that can make the experience more relaxed and enjoyable. This can also help to alleviate any potential anxieties or fears that may arise during the process.

    Another benefit is the involvement and support of the non-inseminating partner. For same-sex couples, this can provide a sense of inclusivity and shared responsibility in the conception of their child. It can also be a bonding experience for the couple, as they work together towards a common goal. For single individuals, having a friend present during insemination can provide a sense of emotional support and physical assistance, making the process less daunting and more manageable.

    at-home insemination kit by Mosie Baby, featuring syringes and storage containers for comfort and convenience.

    Inseminating with a Friend at Home: A Bonding Experience for All Involved

    Inseminating with a friend at home also allows for more flexibility in terms of timing and location. In a clinical setting, appointments must be scheduled and adhered to, which can be challenging for those with busy schedules. With at-home insemination, the parties involved have more control over when and where the process takes place. This can make it easier to fit into their daily lives and routines, reducing any additional stress or pressure.

    However, inseminating with a friend at home also comes with its own set of challenges. One of the main concerns is the legal and financial implications of this arrangement. It is important for all parties involved to have a clear understanding and agreement about their roles and responsibilities before proceeding with insemination. This may include discussing issues such as parental rights, financial support, and the involvement of extended family members. It is recommended to seek legal advice and draw up a legal contract to protect all parties involved.

    Another challenge is the potential impact on the friendship. Inseminating with a friend can create a unique and intense bond between the inseminating parties. While this can be a positive experience, it can also put strain on the friendship if things do not go as planned. It is important to consider the potential risks and have open and honest communication throughout the process to ensure that the friendship remains a priority.

    Despite these challenges, many people who have inseminated with a friend at home have reported that it has strengthened their bond and created a deeper sense of connection. Sharing such an intimate experience can bring people closer together and create a lifelong bond between the inseminating parties and their child.

    In conclusion, inseminating with a friend at home can be a beautiful and meaningful experience for all involved. It allows for a more comfortable and familiar environment, the involvement of the non-inseminating partner, and more flexibility in terms of timing and location. However, it is important to carefully consider and address the potential challenges and implications before embarking on this journey. With proper communication and planning, inseminating with a friend at home can be a bonding experience that brings people together and creates a strong foundation for the future.

  • At-Home Insemination After a Vasectomy Reversal: A Step-by-Step Guide for Couples

    At-Home Insemination After a Vasectomy Reversal: A Step-by-Step Guide for Couples

    When a couple is trying to conceive a child, they may face various challenges along the way. One of these challenges could be a vasectomy, a surgical procedure that blocks sperm from being released during ejaculation. While vasectomies are often considered a permanent form of birth control, they can be reversed through a procedure called a vasectomy reversal. However, even after a successful reversal, some couples may still struggle to conceive naturally. This is where at-home insemination comes into play.

    At-home insemination, also known as artificial insemination, is a fertility technique that involves placing sperm directly into the cervix or uterus of a woman. This method can be used by couples who are unable to conceive through sexual intercourse or for same-sex couples who want to have a child. In this blog post, we will discuss the process of at-home insemination after a vasectomy reversal, including the steps involved and some tips for success.

    Step 1: Consult with a Fertility Specialist

    The first step in at-home insemination after a vasectomy reversal is to consult with a fertility specialist. This is important because they will be able to assess the fertility of both partners and determine if at-home insemination is the right option for them. The specialist will also be able to provide guidance on the best time to perform the insemination and any other necessary preparations.

    Step 2: Collect Sperm Sample

    The next step is to collect a sperm sample from the male partner. This can be done at home through masturbation or at a fertility clinic through a process called testicular sperm extraction (TESE). It is crucial to follow the instructions provided by the specialist or clinic for collecting the sample. The sample should be collected in a sterile container and kept at body temperature until the insemination process.

    Step 3: Prepare the Insemination Tools

    Before the insemination process, the couple should gather all the necessary tools and prepare the area where the procedure will take place. These tools include a sterile syringe, a sterile cup, and a speculum. The area should also be clean and comfortable for the woman.

    Step 4: Perform the Insemination

    hands demonstrating steps for using a syringe kit, with instructions listed beside them

    At-Home Insemination After a Vasectomy Reversal: A Step-by-Step Guide for Couples

    Once all the tools are prepared, the couple can begin the insemination process. The woman should lie on her back with her legs elevated, and the male partner should insert the speculum into the vagina. The sperm sample is then drawn into the syringe and inserted into the cervix or uterus through the speculum. After the insemination, the woman should remain lying down for 15-20 minutes to give the sperm enough time to travel to the fallopian tubes.

    Step 5: Monitor for Pregnancy

    After the insemination, the couple will need to wait and monitor for signs of pregnancy. This can be done through a home pregnancy test or a blood test at a fertility clinic. It is essential to follow up with the fertility specialist to confirm the pregnancy and ensure that everything is progressing as it should.

    Tips for Success

    Here are some tips to increase the chances of success with at-home insemination after a vasectomy reversal:

    1. Timing is crucial: It is essential to time the insemination process correctly, as the egg can only be fertilized for 24-48 hours after ovulation. The fertility specialist can help determine the best time for insemination based on the woman’s menstrual cycle.

    2. Consider fertility treatments: In some cases, fertility treatments such as ovulation induction or intrauterine insemination may be recommended by the specialist to increase the chances of success.

    3. Stay relaxed: Stress and anxiety can have a negative impact on fertility. It is essential to stay relaxed and calm during the insemination process to increase the chances of success.

    4. Use lubricant: Some couples may find it helpful to use a sperm-friendly lubricant during the insemination process to help the sperm reach the egg more easily.

    In conclusion, at-home insemination can be an effective option for couples who have undergone a vasectomy reversal and are struggling to conceive. By following the steps outlined above and seeking guidance from a fertility specialist, couples can increase their chances of having a successful at-home insemination and achieving their dream of starting a family.

    SEO metadata:

  • The Importance of Patience in At-Home Insemination After a Vasectomy Reversal

    Summary:

    When a couple decides to start a family, they often have a specific timeline in mind. However, sometimes life throws unexpected challenges, such as a vasectomy, in their path. While vasectomy reversal is an option for couples who want to conceive naturally, it can still take time for the sperm to successfully reach the egg. This is where patience becomes crucial, especially in the process of at-home insemination after a vasectomy reversal.

    At-home insemination is a method that allows couples to perform the insemination process in the comfort and privacy of their own home. It involves collecting the male partner’s sperm and manually placing it inside the female partner’s reproductive tract. This method is often used by couples who are struggling with fertility or those who have undergone a vasectomy reversal.

    Patience is essential in at-home insemination after a vasectomy reversal for several reasons. Firstly, the body needs time to heal and recover from the vasectomy reversal surgery. It can take several months for the sperm count to increase and for the couple to have a chance at conceiving. It is important to give the body enough time to heal and not rush into the insemination process.

    Secondly, the success rate of at-home insemination after a vasectomy reversal is not guaranteed, and it may take multiple attempts before the couple achieves a pregnancy. This can be emotionally draining and frustrating, but it is crucial to remain patient and not give up. It is also essential to track the woman’s ovulation cycle accurately, as insemination needs to take place during the most fertile window for the best chance of success.

    hands demonstrating steps for using a syringe kit, with instructions listed beside them

    The Importance of Patience in At-Home Insemination After a Vasectomy Reversal

    Another reason why patience is vital in at-home insemination after a vasectomy reversal is that it allows the couple to prepare and plan for the process properly. This includes obtaining the necessary supplies, such as a syringe, ovulation predictor kits, and sperm collection containers. Rushing into the process without proper preparation can lead to mistakes and decrease the chances of success.

    Moreover, patience is crucial for maintaining a positive mindset during the at-home insemination process. It is easy for couples to become stressed and overwhelmed when trying to conceive, especially after a vasectomy reversal. However, staying patient and optimistic can help reduce stress levels and increase the chances of success.

    In addition to physical and emotional factors, patience is also essential when it comes to communication and teamwork between the couple. At-home insemination requires both partners to be actively involved and supportive of each other. It is crucial to have open and honest communication about expectations, concerns, and any other issues that may arise during the process. Staying patient with each other and working together as a team can help strengthen the relationship and make the journey towards conception more manageable.

    In conclusion, patience is crucial in the process of at-home insemination after a vasectomy reversal. It is essential to give the body enough time to heal and prepare for the insemination process, track ovulation accurately, and remain optimistic and supportive of each other. While it may be challenging, staying patient can ultimately lead to a successful pregnancy and the creation of a family.

    SEO metadata:

    Title: The Importance of Patience in At-Home Insemination After a Vasectomy Reversal
    Meta description: Learn why patience is crucial in the process of at-home insemination after vasectomy reversal and how it can increase the chances of success in conceiving naturally.
    Slug: at-home-insemination-after-vasectomy-reversal-patience
    Focus keyphrase synonyms: Patience in Fertility, Vasectomy Reversal and At-Home Insemination, Importance of Staying Patient during At-Home Insemination
    SEO title: The Role of Patience in At-Home Insemination after Vasectomy Reversal
    Meta keywords: Patience, At-Home Insemination, Vasectomy Reversal, Fertility, Infertility, Family Planning

  • At-Home Insemination After a Vasectomy Reversal: A Solution for Couples with Busy Schedules

    At-Home Insemination After a Vasectomy Reversal: A Solution for Couples with Busy Schedules

    For couples who have undergone a vasectomy, the idea of starting a family may seem impossible. But with advancements in medical technology and procedures, couples now have the option of vasectomy reversal. However, this procedure comes with its own set of challenges, including the time and cost involved. For couples with busy schedules, taking time off work for multiple appointments may not be feasible. This is where at-home insemination after a vasectomy reversal comes in as a convenient and cost-effective alternative.

    What is Vasectomy Reversal?

    A vasectomy is a surgical procedure that involves cutting or blocking the tubes (vas deferens) that carry sperm from the testicles to the penis. It is one of the most effective forms of birth control and is a permanent decision for many couples. However, for some, the desire to start a family may arise later in life. In such cases, a vasectomy reversal may be an option.

    Vasectomy reversal is a surgical procedure that reconnects the vas deferens, allowing sperm to flow through and potentially result in pregnancy. The success rate of this procedure depends on various factors such as the time since the initial vasectomy, the type of vasectomy, and the surgeon’s skill.

    Challenges of Vasectomy Reversal

    While vasectomy reversal may seem like the perfect solution for couples looking to start a family after a vasectomy, it comes with its own set of challenges. The first and most significant challenge is the cost. The average cost of vasectomy reversal in the United States ranges from $5,000 to $15,000. This cost may not be covered by insurance, making it a significant financial burden for many couples.

    Another challenge is the time and effort involved. Vasectomy reversal is a surgical procedure that requires multiple appointments, including consultations, pre-operative evaluations, and the actual surgery. This can be difficult for couples with busy schedules, as it may mean taking time off work or rearranging their daily routine.

    At-Home Insemination as an Alternative Solution

    For couples who may not be able to afford the cost of vasectomy reversal or cannot take time off for multiple appointments, at-home insemination may be a viable alternative. At-home insemination involves collecting sperm from the male partner and using a syringe or a small device called an insemination cup to insert it into the female partner’s vagina near the cervix.

    This method is not only convenient but also significantly less expensive compared to vasectomy reversal. At-home insemination kits can range from $20 to $100, making it a more affordable option for couples on a budget. Moreover, the procedure can be done in the comfort of the couple’s home, eliminating the need for multiple appointments and time off work.

    How to Perform At-Home Insemination After Vasectomy Reversal

    instructions and warnings for using the Mosie Baby at-home insemination kit

    At-Home Insemination After a Vasectomy Reversal: A Solution for Couples with Busy Schedules

    Before attempting at-home insemination, it is essential to consult with a fertility specialist to ensure that the female partner is ovulating and to determine the best time for insemination. The male partner will also need to undergo a semen analysis to check the sperm count and quality.

    Once the necessary preparations have been made, the couple can proceed with the at-home insemination process. Here are the steps involved:

    1. Collect the sperm: The male partner will need to ejaculate into a sterile container. This can be done through masturbation or with the help of a condom during intercourse.

    2. Prepare the insemination device: The sperm can be drawn into a syringe or an insemination cup depending on the couple’s preference. If using a syringe, it is essential to remove the needle and replace it with a plastic tip.

    3. Insert the sperm: The female partner can lie on her back with her hips slightly elevated. The male partner can then insert the syringe or insemination cup into the vagina, near the cervix, and slowly release the sperm.

    4. Rest for a few minutes: After insemination, the female partner can rest for 10-15 minutes with her hips still elevated to allow the sperm to swim towards the cervix.

    5. Repeat if necessary: It is recommended to try at-home insemination for two to three consecutive days to increase the chances of pregnancy.

    Success Rates and Precautions

    The success rate of at-home insemination after vasectomy reversal varies, and it is essential to manage expectations. On average, the success rate is about 20-30%, which is lower than the success rates of vasectomy reversal. However, with proper timing and techniques, the chances of success can increase.

    It is also crucial to take precautions to ensure the safety and effectiveness of at-home insemination. The sperm collection and insemination process should be done in a clean and sterile environment to avoid any risk of infection. The couple should also avoid using lubricants, as they can harm the sperm and reduce the chances of conception.

    In conclusion, at-home insemination after vasectomy reversal can be an alternative solution for couples who are unable to undergo or afford the procedure. It is a convenient and cost-effective option that can be done in the comfort of one’s home. However, it is crucial to consult with a fertility specialist and take necessary precautions to increase the chances of success.

    Summary:

    For couples who have undergone a vasectomy but later decide to start a family, vasectomy reversal may seem like the only option. However, this procedure comes with its own set of challenges, including the high cost and time involved. At-home insemination after vasectomy reversal can be a convenient and cost-effective alternative for couples with busy schedules. This method involves collecting sperm from the male partner and inserting it into the female partner’s vagina near the cervix using a syringe or an insemination cup. While the success rates may be lower compared to vasectomy reversal, with proper timing and precautions, at-home insemination can be a viable option for couples looking to start a family.

  • From Vasectomy to Baby: The Benefits of At-Home Insemination After a Reversal

    From Vasectomy to Baby: The Benefits of At-Home Insemination After a Reversal

    For many couples, the decision to undergo a vasectomy is a permanent solution to preventing unwanted pregnancies. However, life can bring about unexpected changes, and some couples may find themselves longing for a child after a vasectomy. In these cases, vasectomy reversals and at-home insemination can provide a way to achieve pregnancy without the need for expensive and invasive fertility treatments. In this blog post, we will explore the benefits of at-home insemination after a vasectomy reversal and how it can be a viable option for couples seeking to expand their family.

    Understanding Vasectomy Reversal

    A vasectomy is a surgical procedure that involves cutting or blocking the vas deferens, the tubes that carry sperm from the testicles to the urethra. This procedure is highly effective in preventing pregnancy, with a success rate of over 99%. However, for some couples, a vasectomy may no longer align with their family planning goals. In these cases, a vasectomy reversal may be an option.

    A vasectomy reversal is a surgical procedure that involves reconnecting the vas deferens, allowing sperm to once again be present in the ejaculate. This procedure is more complex and has a lower success rate compared to a vasectomy, with success rates ranging from 40% to 90%. It also comes with a higher cost, with an average price of $10,000 to $15,000.

    The Benefits of At-Home Insemination After a Reversal

    While a vasectomy reversal may seem like the most obvious solution for couples seeking to conceive after a vasectomy, there are other options to consider, such as at-home insemination. At-home insemination involves using a syringe or a cervical cap to introduce sperm into the vagina during ovulation. This method can be performed at home without the need for medical assistance, making it a more convenient and affordable option for couples.

    Here are some of the benefits of at-home insemination after a vasectomy reversal:

    1. Cost-Effective

    As mentioned earlier, a vasectomy reversal can cost thousands of dollars, which may not be feasible for some couples. At-home insemination, on the other hand, is a more budget-friendly option, with the average cost of a home insemination kit ranging from $50 to $200. This can be a significant advantage for couples who want to conceive but are on a tight budget.

    2. Convenience

    At-home insemination allows couples to have more control over the process of conception. Unlike a vasectomy reversal, which requires a surgical procedure and medical supervision, at-home insemination can be done in the comfort and privacy of one’s home. This eliminates the stress and inconvenience of scheduling appointments and traveling to a medical facility.

    3. Lower Risk of Complications

    Like any surgical procedure, a vasectomy reversal comes with potential risks and complications, such as infection, bleeding, and damage to surrounding tissues. At-home insemination, on the other hand, does not involve any invasive procedures, reducing the risk of complications significantly.

    hands demonstrating steps for using a syringe kit, with instructions listed beside them

    From Vasectomy to Baby: The Benefits of At-Home Insemination After a Reversal

    4. Increased Privacy

    For some couples, the idea of undergoing a medical procedure for conception may feel invasive and uncomfortable. At-home insemination provides a more private alternative, allowing couples to share this intimate moment together without the presence of medical professionals.

    5. Higher Success Rate

    While the success rate of a vasectomy reversal can vary, at-home insemination has a success rate comparable to other fertility treatments, with studies showing a success rate of 10% to 20% per cycle. This makes it a viable option for couples who have undergone a vasectomy reversal but are still struggling to conceive.

    Tips for Successful At-Home Insemination

    While at-home insemination may seem like a simple and straightforward process, there are some tips that can help increase the chances of success:

    1. Consult with a Fertility Specialist

    Before attempting at-home insemination, it is essential to consult with a fertility specialist to ensure that there are no underlying issues that may hinder conception. They can also provide guidance on the best time to inseminate and any other recommendations for increasing the chances of success.

    2. Track Ovulation

    Timing is crucial when it comes to at-home insemination. It is essential to track ovulation using methods such as tracking basal body temperature or using ovulation predictor kits to determine the most fertile days.

    3. Use Quality Sperm

    Using high-quality sperm is crucial for successful at-home insemination. This can be achieved by abstaining from ejaculation for two to five days before insemination and collecting the semen in a sterile container.

    4. Follow Instructions Carefully

    It is essential to follow the instructions provided with the at-home insemination kit carefully. This includes properly preparing the sperm and using the correct technique for insemination.

    In conclusion, while a vasectomy reversal may seem like the most obvious solution for couples seeking to conceive after a vasectomy, at-home insemination can be a more affordable, convenient, and private option. With proper planning and consultation with a fertility specialist, at-home insemination can increase the chances of pregnancy for couples who have undergone a vasectomy reversal. Consider this option before committing to a more expensive and invasive procedure.

  • Vasectomy Reversal Success: How At-Home Insemination Can Increase Your Chances

    Blog Post:

    When it comes to family planning, many couples may choose to undergo a vasectomy as a permanent form of contraception. However, life circumstances can change, and some couples may find themselves wanting to have children after a vasectomy has been performed. In such cases, a vasectomy reversal may be a viable option. While the success rates of vasectomy reversals can vary depending on various factors, at-home insemination has been proven to increase the chances of a successful pregnancy after a vasectomy reversal.

    A vasectomy reversal is a surgical procedure that reconnects the vas deferens, which is the tube that carries sperm from the testicles to the penis. During a vasectomy, the vas deferens is cut or blocked, preventing sperm from entering the semen. A vasectomy reversal aims to undo this process and restore the flow of sperm. However, the success of a vasectomy reversal is not guaranteed, and there are various factors that can affect its success, such as the type of vasectomy performed, the time since the vasectomy, and the age and fertility of the couple.

    One factor that has been found to increase the chances of a successful pregnancy after a vasectomy reversal is at-home insemination. At-home insemination involves collecting semen from the male partner and using a syringe or other device to insert it into the female partner’s vagina, cervix, or uterus. This method can be used for both natural and assisted conception, and it has been proven to be effective in increasing the chances of pregnancy after a vasectomy reversal.

    The success of at-home insemination after a vasectomy reversal is primarily due to the fact that it bypasses any potential blockages or scarring in the vas deferens. In traditional sexual intercourse, sperm must travel through the vas deferens and out through the penis. However, after a vasectomy reversal, the vas deferens may still have some blockages or scarring that can hinder the sperm’s journey. By using at-home insemination, sperm can be directly placed into the female partner’s reproductive system, increasing the chances of fertilization.

    Illustration explaining the Mosie Baby home insemination kit features and design benefits.

    Vasectomy Reversal Success: How At-Home Insemination Can Increase Your Chances

    Additionally, at-home insemination allows for more control over the timing of intercourse and ovulation. In a traditional sexual encounter, sperm may need to travel a long distance to reach the egg, and timing can be crucial. By using at-home insemination, the sperm can be placed closer to the egg, increasing the chances of fertilization. This method also allows for more precise timing of insemination, which can significantly increase the chances of a successful pregnancy.

    Some couples may be concerned about the safety and effectiveness of at-home insemination. However, studies have shown that the success rates of at-home insemination are comparable to those of intrauterine insemination, a method commonly used in fertility clinics. At-home insemination also has a lower risk of infection compared to traditional sexual intercourse, as the sperm is directly placed into the reproductive system.

    It is essential to note that at-home insemination does not guarantee a successful pregnancy after a vasectomy reversal. Other factors such as the quality and quantity of sperm, the female partner’s age and fertility, and any underlying health issues can also affect the chances of conception. Couples should consult with a fertility specialist to assess their individual circumstances and determine if at-home insemination is a suitable option for them.

    In conclusion, while a vasectomy reversal can increase the chances of pregnancy, at-home insemination has been proven to be an effective method in further increasing those chances. Its ability to bypass any potential blockages or scarring in the vas deferens and allow for more precise timing of insemination makes it a popular choice among couples seeking to conceive after a vasectomy reversal. However, it is essential to consult with a fertility specialist to determine if at-home insemination is a viable option based on individual circumstances.

    In summary, at-home insemination can significantly increase the chances of a successful pregnancy after a vasectomy reversal. By bypassing any potential blockages in the vas deferens and allowing for more precise timing of insemination, this method has been proven to be effective in helping couples achieve their dream of having children after a vasectomy. However, it is essential to consult with a fertility specialist to determine if at-home insemination is a suitable option based on individual circumstances.

  • Fertility at Home: Insemination Techniques for Post-Vasectomy Couples

    Blog Post Title: Fertility at Home: Insemination Techniques for Post-Vasectomy Couples

    Introduction:
    For many couples who have undergone vasectomy surgery, the decision to have children later in life can be a complex and emotional journey. While vasectomy is considered a permanent form of birth control, advancements in medical technology have made it possible for post-vasectomy couples to conceive through at-home insemination techniques. In this blog post, we will explore the various options available for post-vasectomy couples looking to start or expand their family.

    Overview of Vasectomy:
    A vasectomy is a surgical procedure that involves cutting or blocking the tubes that carry sperm from the testicles to the penis. This procedure is considered a permanent form of birth control and is used by many couples who have completed their family planning or do not wish to have children. However, life circumstances can change, and some couples may find themselves wanting to have children after a vasectomy.

    Insemination Techniques for Post-Vasectomy Couples:
    1. Retrograde Insemination:
    Retrograde insemination is a technique that involves collecting semen from the male partner through ejaculation and then manually inserting it into the cervix or uterus of the female partner. This method bypasses the blocked tubes and allows the sperm to reach the egg for fertilization.

    2. Intrauterine Insemination (IUI):
    IUI is a commonly used fertility treatment for couples struggling with infertility. In this procedure, the male partner’s sperm is collected, washed, and then inserted directly into the uterus through the cervix. This method is often used in combination with fertility drugs to increase the chances of pregnancy.

    3. Intracytoplasmic Sperm Injection (ICSI):
    ICSI is a more advanced form of insemination that involves injecting a single sperm directly into an egg to fertilize it. This technique is typically used for couples with severe male factor infertility or when other insemination techniques have failed.

    At-home insemination kit packaging featuring syringes and collection cups, labeled for comfort and ease of use.

    Fertility at Home: Insemination Techniques for Post-Vasectomy Couples

    4. Donor Insemination:
    For couples where the male partner’s sperm is not viable, donor insemination is an option. In this method, donor sperm is used for insemination, and the process is similar to IUI.

    5. At-Home Insemination:
    At-home insemination is a popular option for post-vasectomy couples, as it allows them to perform the insemination process in the comfort of their own home. This method involves using a syringe to deposit semen into the vagina, close to the cervix, during the female partner’s ovulation period.

    Factors to Consider:
    Before deciding on an insemination technique, it is essential for couples to discuss their options with a fertility specialist. Factors such as the male partner’s sperm count and quality, the female partner’s ovulation cycle, and any underlying fertility issues should be taken into consideration.

    Preparing for At-Home Insemination:
    If you and your partner have decided to try at-home insemination, there are a few things you can do to prepare for the process. Firstly, track the female partner’s ovulation using an ovulation predictor kit or by monitoring her basal body temperature. Secondly, ensure that the male partner has abstained from ejaculation for two to three days before the planned insemination to increase sperm count. Lastly, make sure to use sterile equipment and follow proper hygiene practices during the insemination process.

    Success Rates:
    The success rates of at-home insemination vary depending on factors such as sperm count, timing, and fertility issues. On average, the success rate for at-home insemination is around 10-15%, which is slightly lower than other fertility treatments such as IUI and IVF.

    Conclusion:
    For post-vasectomy couples, the journey to parenthood may seem daunting, but with the various insemination techniques available, it is possible to conceive and start or expand a family. It is essential to consult with a fertility specialist and discuss all options before deciding on a specific insemination technique. With proper preparation and guidance, at-home insemination can be a successful and cost-effective option for post-vasectomy couples.

    In summary, post-vasectomy couples have several options for conceiving through insemination techniques such as retrograde insemination, IUI, ICSI, donor insemination, and at-home insemination. Factors such as sperm count, ovulation cycle, and underlying fertility issues should be considered before deciding on a specific method. Proper preparation and consulting with a fertility specialist can increase the chances of success with at-home insemination.