Tag: sperm

  • At-Home Insemination for Women with Fertility Issues

    Blog Post:

    At-Home Insemination for Women with Fertility Issues: A Comprehensive Guide

    Fertility issues can be a difficult and emotional journey for many women. Whether it is due to medical conditions, age, or other factors, struggling to conceive can take a toll on both physical and emotional well-being. In recent years, more and more women have turned to at-home insemination as a way to overcome fertility challenges and start or expand their families. In this blog post, we will discuss everything you need to know about at-home insemination for women with fertility issues.

    What is At-Home Insemination?

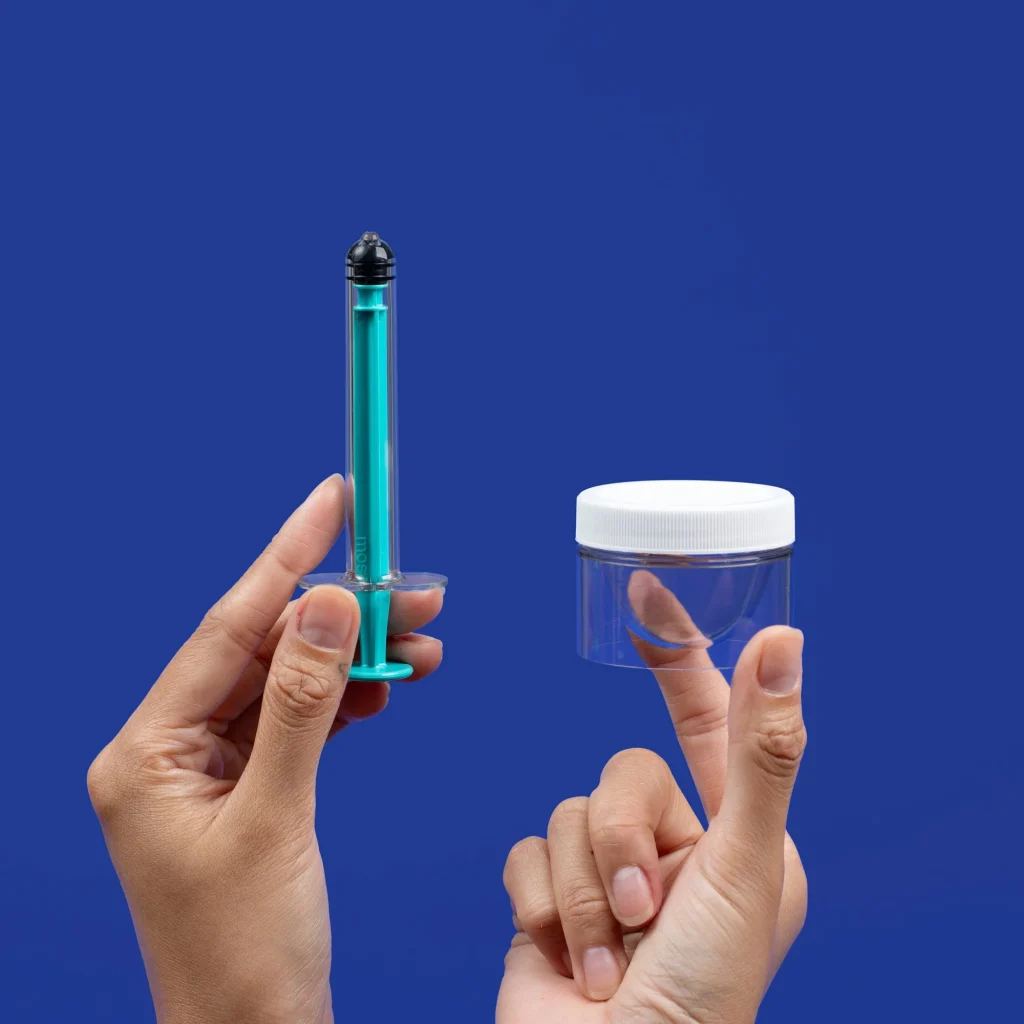
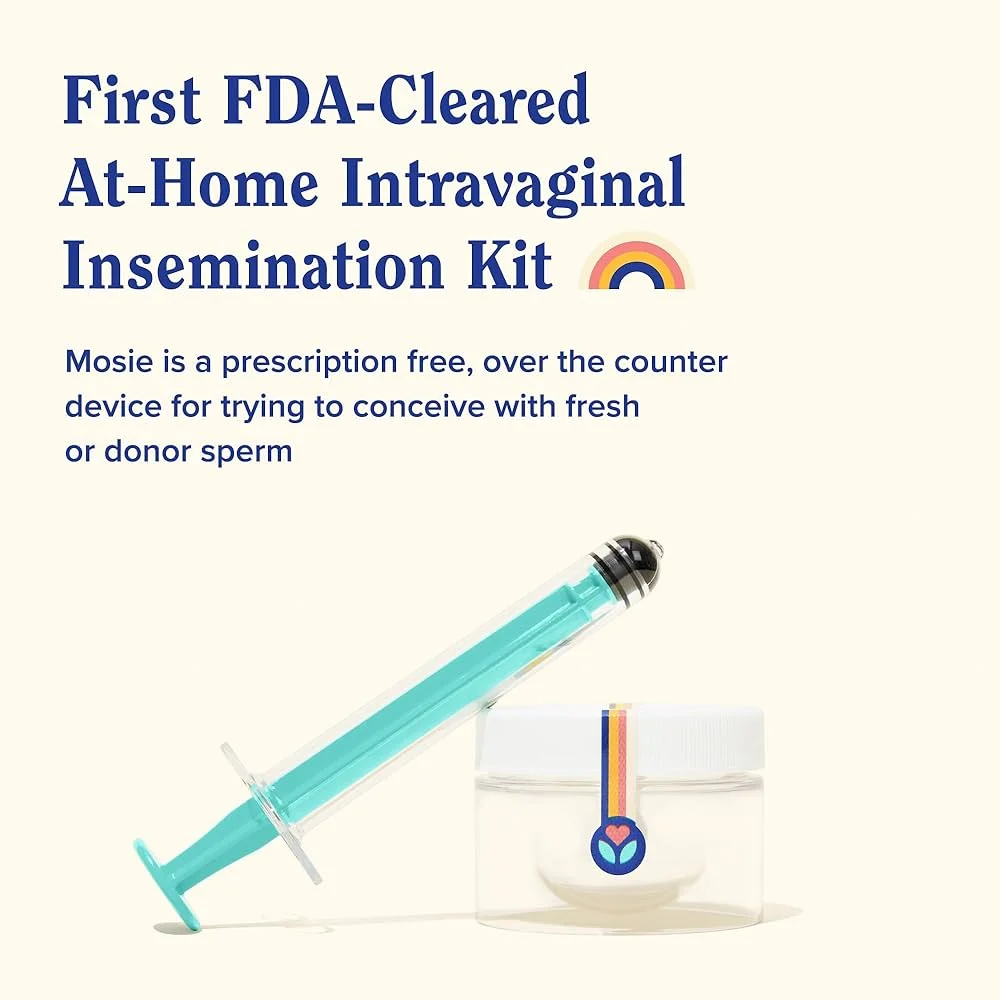
    At-home insemination, also known as self-insemination, is a method of achieving pregnancy without medical assistance or intervention. It involves placing sperm inside the vagina near the cervix during the woman’s fertile window, in hopes of fertilizing an egg and achieving pregnancy. At-home insemination can be done with a partner using a syringe or turkey baster, or with donor sperm purchased from a sperm bank.

    Who Can Benefit from At-Home Insemination?

    At-home insemination can be beneficial for women with a variety of fertility issues, including:

    1. Irregular or Absent Ovulation: For women who have difficulty tracking ovulation or do not ovulate regularly, at-home insemination can help increase the chances of fertilization during their fertile window.

    2. Low Sperm Count or Quality: If a woman’s partner has a low sperm count or poor sperm quality, at-home insemination can bypass any potential issues and increase the chances of fertilization.

    3. Same-Sex Couples: At-home insemination is a popular option for same-sex female couples who want to conceive without using a sperm donor or going through artificial insemination at a clinic.

    4. Single Women: Many single women also choose at-home insemination as a way to achieve pregnancy without a partner.

    How to Prepare for At-Home Insemination

    The first step in preparing for at-home insemination is to track your ovulation. This can be done through various methods such as using ovulation predictor kits, tracking your basal body temperature, or monitoring changes in cervical mucus. Once you have determined your fertile window, you can then purchase donor sperm from a reputable sperm bank or use sperm from a known donor.

    Mosie Baby at-home insemination kit box featuring instructions and details for two attempts.

    At-Home Insemination for Women with Fertility Issues

    It is important to note that at-home insemination carries the risk of sexually transmitted infections (STIs) if using sperm from a known donor. It is recommended to have the donor undergo STI testing before proceeding with the insemination. Additionally, it is crucial to follow proper hygiene and safety measures to reduce the risk of infection during the insemination process.

    Tips for Successful At-Home Insemination

    1. Use Fresh Sperm: Fresh sperm has a higher chance of survival and fertilization compared to frozen sperm. If using a known donor, it is best to perform the insemination immediately after ejaculation.

    2. Use a Syringe or Turkey Baster: These tools can help deliver the sperm closer to the cervix, increasing the chances of fertilization.

    3. Elevate Your Hips: After insemination, it is recommended to elevate your hips on a pillow for 15-20 minutes to help the sperm reach the cervix.

    4. Remain Lying Down: It is also recommended to remain lying down for a few hours after insemination to give the sperm enough time to reach the egg.

    5. Be Patient: Achieving pregnancy through at-home insemination may take multiple attempts, so it is essential to be patient and persistent.

    Risks and Considerations of At-Home Insemination

    While at-home insemination can be an effective method for women with fertility issues, it is essential to consider the potential risks and limitations. These include:

    1. Lower Success Rates: At-home insemination has lower success rates compared to artificial insemination done by a medical professional. This is because the sperm has to travel a longer distance to reach the egg.

    2. No Guarantee of Genetic Screening: Unlike sperm purchased from a sperm bank, using sperm from a known donor does not guarantee genetic screening for potential hereditary diseases.

    3. No Legal Protection: At-home insemination using donor sperm does not offer the legal protection that comes with using a sperm bank. It is essential to have a legal agreement with the donor to avoid any potential legal issues in the future.

    Summary:

    At-home insemination is a popular method for women with fertility issues to achieve pregnancy without medical intervention. It involves placing sperm inside the vagina during the fertile window, and it can be done with a partner or using donor sperm. To increase the chances of success, it is important to track ovulation, use fresh sperm, and follow proper hygiene and safety measures. However, at-home insemination also carries risks and limitations, such as lower success rates and lack of legal protection. It is crucial to weigh these factors before deciding if at-home insemination is the right option for you.

  • The Ins and Outs of At-Home Insemination: A Comprehensive Guide

    Blog Post Title: The Ins and Outs of At-Home Insemination: A Comprehensive Guide

    At-home insemination, also known as self-insemination, is a method of conception where sperm is inserted into the cervix or uterus of a woman without the use of medical professionals. It has become a popular option for couples or individuals who are struggling with fertility issues, same-sex couples, or those who simply prefer a more intimate and less expensive approach to conception. In this comprehensive guide, we will dive into the details of at-home insemination and cover everything you need to know before trying it yourself.

    Preparation for At-Home Insemination
    Before attempting at-home insemination, it is important to do your research and make sure you are fully prepared. This includes understanding the process, gathering the necessary supplies, and being aware of any potential risks or complications.

    The Process
    At-home insemination involves inserting sperm into the vagina, cervix, or uterus using a syringe, turkey baster, or soft cup. The sperm can come from a sperm donor or from a partner’s ejaculate. The timing of insemination is crucial, as it should coincide with ovulation. This can be determined by using ovulation predictor kits or tracking your menstrual cycle.

    Supplies
    The supplies needed for at-home insemination include a sterile syringe, turkey baster, or soft cup, ovulation predictor kits, and a sperm collection cup. It is important to use sterile equipment to reduce the risk of infection. Sperm can be obtained from a sperm bank, a known donor, or from a partner’s ejaculate. If using a known donor or partner’s ejaculate, it is recommended to have a recent STI test and for the sperm to be screened for any genetic conditions.

    Risks and Complications
    While at-home insemination is a relatively safe method of conception, there are some risks and complications to be aware of. These include the risk of infection, sperm allergies, and the possibility of unsuccessful insemination. It is important to follow proper hygiene practices and use sterile equipment to reduce the risk of infection. If you have a known sperm allergy, it is recommended to use a spermicide-free lubricant and to be cautious during the insemination process. Unsuccessful insemination can occur due to various factors such as incorrect timing, low sperm count, or blocked fallopian tubes.

    Methods of At-Home Insemination
    There are several methods of at-home insemination, each with its own benefits and drawbacks.

    hands holding a syringe above a collection cup with instructions for using a home insemination kit

    The Ins and Outs of At-Home Insemination: A Comprehensive Guide

    Syringe Method
    The syringe method involves using a sterile syringe to collect and insert sperm into the vagina, cervix, or uterus. This method is considered to be the most effective, as it allows for precise placement of sperm and reduces the risk of leakage. However, it may require some practice to perfect the technique.

    Turkey Baster Method
    The turkey baster method involves using a clean turkey baster to collect and insert sperm into the vagina, cervix, or uterus. This method is less precise than the syringe method and may result in some leakage. However, it is a popular and affordable option for at-home insemination.

    Soft Cup Method
    The soft cup method involves using a flexible cup that is inserted into the vagina to collect and hold sperm near the cervix for a longer period of time. This method is less invasive and can be left in place for up to 12 hours. However, it may be more difficult to insert and may not be suitable for some individuals.

    Tips for Successful At-Home Insemination
    To increase your chances of successful at-home insemination, here are some tips to keep in mind:

    1. Ensure proper timing by tracking your ovulation or using ovulation predictor kits.
    2. Use sterile equipment to reduce the risk of infection.
    3. Choose the method that best suits your needs and comfort level.
    4. Use a spermicide-free lubricant to avoid potential sperm allergies.
    5. Relax and take your time during the insemination process.

    In conclusion, at-home insemination is a viable option for those looking to conceive without the involvement of medical professionals. It is important to do thorough research, gather the necessary supplies, and be aware of any potential risks or complications before attempting it. By following the proper techniques and tips, at-home insemination can be a successful and intimate way to start a family.

    Summary:

    At-home insemination is a popular method of conception for couples or individuals struggling with fertility issues, same-sex couples, or those who prefer a more intimate and less expensive approach. Proper preparation, understanding the process, gathering necessary supplies, and being aware of potential risks are crucial before attempting at-home insemination. The process involves inserting sperm into the vagina, cervix, or uterus using a syringe, turkey baster, or soft cup. It is important to choose the method that best suits your needs and to follow proper hygiene practices to reduce the risk of infection. Timing, sterile equipment, and relaxation are key factors for successful at-home insemination.

  • The Role of Medical Professionals in Home Insemination: A Step-by-Step Guide

    The Role of Medical Professionals in Home Insemination: A Step-by-Step Guide

    Home insemination, also known as self-insemination, is a method of achieving pregnancy without the assistance of a medical professional. This can be a more affordable and private option for those looking to conceive. However, it is important to note that while home insemination can be successful, there are some risks involved and it is not suitable for everyone. In this blog post, we will discuss the role of medical professionals in home insemination and provide a step-by-step guide for those considering this method.

    Step 1: Consultation with a Fertility Specialist

    Before beginning the process of home insemination, it is important to consult with a fertility specialist. This is especially crucial for individuals or couples who have been trying to conceive for a prolonged period of time, have a history of infertility, or have any underlying medical conditions that may affect their fertility. A fertility specialist will be able to assess your individual situation and provide personalized recommendations for the best course of action.

    Step 2: Gather Necessary Supplies

    The next step is to gather all the necessary supplies for home insemination. This includes a sterile syringe, ovulation predictor kits, and a home insemination kit (if desired). It is important to make sure that all the supplies are sterile to avoid any risk of infection.

    Step 3: Tracking Ovulation

    Timing is crucial when it comes to home insemination. It is important to track ovulation using ovulation predictor kits or by monitoring your basal body temperature. These methods can help determine the best time for insemination to increase the chances of conception.

    hands holding a syringe above a collection cup with instructions for using a home insemination kit

    The Role of Medical Professionals in Home Insemination: A Step-by-Step Guide

    Step 4: Preparing the Sperm

    If using donor sperm, it is important to purchase it from a reputable sperm bank. The sperm will need to be thawed and brought to room temperature before insemination. If using a partner’s sperm, it can be collected and placed in a sterile container.

    Step 5: Insemination Process

    The insemination process can vary depending on the individual’s or couple’s preferences and needs. Some may choose to use a home insemination kit, which typically includes a cervical cap or a soft cup to hold the sperm in place. Others may choose to use a syringe for insemination. It is important to follow the instructions provided with the home insemination kit or consult with a fertility specialist for proper technique.

    Step 6: Rest and Relaxation

    After insemination, it is important to relax and rest for at least 30 minutes to allow the sperm to travel to the fallopian tubes. Some may choose to elevate their hips or use a heating pad to increase blood flow to the pelvic area.

    Step 7: Follow-Up with a Fertility Specialist

    It is recommended to follow-up with a fertility specialist after home insemination to confirm ovulation and assess the success of the insemination. This can also help address any concerns or issues that may have arisen during the process.

    In summary, the role of medical professionals in home insemination is crucial for individuals or couples who are considering this method. A fertility specialist can provide personalized recommendations and guide you through the process to increase the chances of success. It is important to gather all necessary supplies, track ovulation, properly prepare the sperm, and follow proper technique during insemination. Additionally, following up with a fertility specialist can ensure the process is successful and address any concerns. While home insemination can be a viable option for some, it is important to consult with a medical professional to determine if it is the right choice for you.

  • Maximizing Your Chances of Success: A Step-by-Step Guide to Home Insemination

    Summary:

    Insemination can be a daunting and expensive process, especially for those who are unable to conceive naturally. However, with advancements in technology and medical procedures, home insemination has become a viable option for many couples and individuals. Home insemination is a process where sperm is placed into the reproductive tract through the use of a syringe, instead of through traditional methods such as intercourse or intrauterine insemination (IUI). This option is not only cost-effective, but it also allows for more privacy and control over the insemination process.

    While home insemination may seem like a simple process, it is important to understand the steps and precautions needed to maximize your chances of success. In this step-by-step guide, we will discuss everything you need to know about home insemination and how to increase your chances of conceiving.

    Step 1: Consult with a Fertility Specialist

    Before embarking on the home insemination process, it is crucial to consult with a fertility specialist. They can help determine if home insemination is the right option for you and provide guidance on the best methods to use. They can also check for any underlying fertility issues that may affect your chances of conception and offer solutions or treatments to improve your fertility.

    Step 2: Choose a Donor

    Choosing a donor is a significant decision in the home insemination process. You can either use a known donor, such as a friend or family member, or purchase donor sperm from a sperm bank. If using a known donor, it is important to have them undergo medical and genetic testing to ensure the health and quality of their sperm. If purchasing from a sperm bank, be sure to research and choose a reputable one.

    Step 3: Track Your Ovulation

    Timing is crucial in home insemination, as sperm can only survive for a limited time inside the female reproductive tract. Tracking your ovulation can help determine the best time for insemination, as sperm can survive for up to five days in fertile cervical mucus. There are various methods for tracking ovulation, such as using ovulation predictor kits, taking basal body temperature readings, or monitoring changes in cervical mucus.

    Step 4: Prepare the Sperm

    hands holding a syringe above a collection cup with instructions for using a home insemination kit

    Maximizing Your Chances of Success: A Step-by-Step Guide to Home Insemination

    Before the actual insemination process, it is important to properly prepare the sperm. If using donor sperm from a sperm bank, it will come in a frozen state and must be thawed according to instructions. If using fresh sperm from a known donor, it should be collected in a sterile container and kept at room temperature until ready for use. It is also recommended to have the sperm sample checked for motility and quality before insemination.

    Step 5: Prepare the Insemination Kit

    The insemination kit is essential for a successful home insemination. It typically includes a sterile syringe, a speculum, a sterile cup, and lubricant. It is important to follow the instructions carefully and to maintain a sterile environment to avoid any potential infections or complications.

    Step 6: Perform the Insemination

    Once the sperm and insemination kit are prepared, it is time to perform the actual insemination. The process typically involves inserting the sperm into the vagina through the use of a syringe or a soft cup. It is important to follow the instructions and remain in a horizontal position for at least 20 minutes to allow the sperm to travel to the cervix and increase the chances of fertilization.

    Step 7: Stay Healthy and Stress-Free

    After the insemination process, it is crucial to maintain a healthy lifestyle and reduce stress levels. Eating a balanced diet, staying hydrated, and getting enough rest can all contribute to a healthy reproductive system. Stress can also have a negative impact on fertility, so it is important to practice relaxation techniques and find ways to manage stress levels.

    Step 8: Take a Pregnancy Test

    After about two weeks, it is recommended to take a pregnancy test to determine if the insemination was successful. If the test is positive, congratulations! If not, it is important to remain positive and try again in the next cycle.

    In conclusion, home insemination can be an effective and affordable option for those looking to conceive. By following these steps and taking the necessary precautions, you can maximize your chances of success and embark on the journey to parenthood. Remember, it is important to consult with a fertility specialist and to stay healthy and stress-free throughout the process.

  • The Dos and Don’ts of Home Insemination: A Step-by-Step Guide

    Blog Post:

    Home insemination, also known as self-insemination, is a method of trying to conceive without medical assistance. It involves using a syringe to deposit semen into the vagina, cervix, or uterus, with the goal of fertilizing the egg. This method is often preferred by couples who are trying to conceive in the comfort of their own home, or those who are facing fertility challenges. However, it is important to understand the dos and don’ts of home insemination to increase the chances of success and avoid potential risks. In this step-by-step guide, we will discuss the dos and don’ts of home insemination to help you navigate this process with confidence.

    Do: Consult with a Fertility Specialist
    Before starting home insemination, it is crucial to consult with a fertility specialist. They can provide you with personalized advice based on your medical history and guide you through the process. They can also perform tests to determine the best time for insemination and offer other fertility treatments if needed.

    Don’t: Assume Home Insemination is Right for You
    Home insemination is not suitable for everyone. It is essential to understand the potential risks and limitations of this method. For example, if you have a history of sexually transmitted infections (STIs), it is not safe to use home insemination. It is also not recommended for individuals with certain medical conditions or those with unexplained infertility.

    Do: Prepare for the Process
    Preparing for home insemination is essential to ensure a smooth and safe procedure. The following are some steps you should take:

    1. Track Your Ovulation: The most critical step is to track your ovulation to determine the best time for insemination. You can use ovulation predictor kits, track your basal body temperature, or monitor changes in cervical mucus to identify your most fertile days.

    2. Gather Supplies: You will need a sterile syringe, sterile container to collect semen, and a sterile cup to inseminate. It is crucial to use new, unopened supplies to prevent any contamination.

    3. Create a Comfortable Environment: Home insemination is a personal and intimate process, so it is crucial to create a comfortable environment. Make sure you have a private and quiet space, and have everything you need within reach.

    Don’t: Use Non-Sterile Supplies
    The use of non-sterile supplies can increase the risk of infection or damage to the sperm. It is essential to use only sterile supplies provided by your fertility specialist or purchased from a reputable source.

    Do: Collect and Prepare Semen Correctly
    Collecting semen for home insemination should be done correctly to ensure the best chances of success. Here are some tips to follow:

    1. Abstain from ejaculation for 2-5 days before collection to increase sperm count.

    syringe and container for home insemination kit against a blue background

    The Dos and Don'ts of Home Insemination: A Step-by-Step Guide

    2. Collect semen in a sterile container provided by your fertility specialist.

    3. Keep semen at body temperature, preferably in a pocket close to your body, until insemination.

    Don’t: Use Lubricants
    Lubricants can interfere with sperm motility and decrease the chances of fertilization. It is essential to avoid using any lubricants during the home insemination process.

    Do: Follow Proper Insemination Technique
    The following are the steps to follow for home insemination:

    1. Fill the syringe with semen, and remove any air bubbles.

    2. Lie down in a comfortable position with your hips elevated, and insert the syringe into the vagina, aiming towards the cervix.

    3. Slowly push the plunger to deposit the semen into the cervix or uterus.

    4. Remain lying down for 15-20 minutes to allow the sperm to swim towards the egg.

    Don’t: Use Excessive Force
    It is essential to use gentle pressure when depositing the semen to avoid any discomfort or injury. Using excessive force can also push the semen out of the cervix, decreasing the chances of fertilization.

    Do: Take a Pregnancy Test
    After two weeks, take a pregnancy test to determine if the insemination was successful. If the test is positive, schedule an appointment with your fertility specialist for further monitoring. If the test is negative, you can try home insemination again during your next fertile window.

    Don’t: Get Discouraged
    Home insemination may not be successful on the first try. It is essential to stay positive and continue trying during your fertile window. If you have been trying for a few months with no success, consult with your fertility specialist for further guidance.

    In summary, home insemination can be an effective method of trying to conceive, but it is crucial to follow the dos and don’ts to increase the chances of success. Consult with a fertility specialist, prepare for the process, and follow proper technique and hygiene to ensure a safe and effective home insemination.

  • A Beginner’s Guide to Home Insemination: Step-by-Step Instructions

    Blog Post:

    For couples who are looking to conceive a child at home, home insemination can be a great option. This process allows for the collection and insertion of sperm into the vagina at home, eliminating the need for expensive medical procedures. However, home insemination can seem like a daunting process for beginners. In this guide, we will provide step-by-step instructions for home insemination so that you can feel confident and comfortable in this process.

    Step 1: Know Your Cycle
    The first step in home insemination is to have a good understanding of your menstrual cycle. Knowing when you are ovulating is crucial for successful insemination. Ovulation typically occurs around day 14 of a 28-day cycle, but this can vary from person to person. Tracking your cycle and using ovulation prediction kits can help you determine the best time for insemination.

    Step 2: Choose a Donor
    For home insemination, you have the option to choose a known donor or purchase sperm from a sperm bank. If you decide to use a known donor, it is important to have a legal agreement in place to protect all parties involved. If you choose to purchase sperm from a sperm bank, make sure to do your research and choose a reputable one.

    Step 3: Prepare the Sperm
    Before insemination, the sperm needs to be collected and prepared. If using a known donor, the sperm should be collected in a sterile container using a sperm collection kit. If using sperm from a sperm bank, it will typically come in a frozen state and needs to be thawed according to the instructions provided. Once the sperm is collected or thawed, it should be kept at room temperature until ready to use.

    At-home insemination kit packaging featuring syringes and collection cups, labeled for comfort and ease of use.

    A Beginner's Guide to Home Insemination: Step-by-Step Instructions

    Step 4: Prepare the Body
    The recipient of the sperm should also prepare their body for insemination. This can include taking fertility supplements, eating a healthy diet, and abstaining from alcohol and caffeine. It is also important to have a clean and relaxed environment for insemination.

    Step 5: Inserting the Sperm
    There are a few different methods for inserting the sperm, including using a needleless syringe, cervical cap, or soft cup. The most common method is using a needleless syringe, which can be purchased at a pharmacy. The recipient should lay down with their legs elevated and use the syringe to deposit the sperm into the vagina as close to the cervix as possible.

    Step 6: Rest and Relax
    After the sperm has been inserted, it is important to rest and relax for at least 15 minutes. This allows the sperm to swim towards the cervix and increases the chances of conception. Some people also recommend using a heating pad or lying down with a pillow under the hips to help the sperm reach the cervix.

    Step 7: Follow Up
    After insemination, it is important to follow up with a pregnancy test or visit to the doctor to confirm pregnancy. Home insemination may not be successful on the first try, so it is important to be patient and try again during the next ovulation cycle if needed.

    In summary, home insemination can be a simple and effective way for couples to conceive a child at home. By understanding your cycle, choosing a donor, preparing the sperm and body, and using the correct method for insertion, you can increase your chances of success. Remember to rest and follow up after insemination, and don’t be discouraged if it doesn’t work the first time. With patience and perseverance, home insemination can be a great option for starting a family.

  • DIY Home Insemination: A Natural and Holistic Approach to Conception

    Blog post:

    DIY Home Insemination: A Natural and Holistic Approach to Conception

    Conceiving a child is a beautiful and life-changing experience, but for some couples, it can be a long and frustrating journey. While there are many medical interventions available, some couples may prefer a more natural and holistic approach to conception. One alternative method that has gained popularity in recent years is DIY home insemination. This process involves using a syringe or a homemade device to deposit sperm into the vagina, with the goal of achieving pregnancy. In this blog post, we will explore the basics of DIY home insemination, its benefits and risks, and how to do it successfully.

    What is DIY Home Insemination?

    DIY home insemination, also known as self-insemination, is a method of conception that involves depositing sperm into the vagina without the assistance of a medical professional. This can be done using a syringe, a menstrual cup, or a homemade device like a turkey baster. The idea behind this method is to mimic the natural process of intercourse, where sperm is deposited into the vagina and travels to the fallopian tubes to fertilize an egg.

    Benefits of DIY Home Insemination

    One of the biggest benefits of DIY home insemination is the control and privacy it offers. Couples can perform the procedure in the comfort of their own home and at a time that is convenient for them. It also eliminates the need for medical appointments and invasive procedures, which can be costly and emotionally taxing.

    Another advantage of DIY home insemination is its affordability. While fertility treatments can be expensive, DIY home insemination can be done with basic household items, making it a more accessible option for couples on a budget.

    Additionally, DIY home insemination can be a more intimate and personal experience for couples. It allows them to be actively involved in the conception process and can strengthen their bond as they work towards a common goal.

    at-home intravaginal insemination kit with syringe and container for fresh or donor sperm conception

    DIY Home Insemination: A Natural and Holistic Approach to Conception

    Risks of DIY Home Insemination

    As with any method of conception, there are risks associated with DIY home insemination. One of the main concerns is the risk of infection. It is crucial to use sterile equipment and follow proper hygiene practices to reduce the risk of introducing harmful bacteria into the vagina.

    Another potential risk is the reliability of the sperm used. If the sperm is not from a known donor or a fertility clinic, there is a higher chance of it being of low quality or carrying genetic diseases. It is essential to thoroughly screen the donor and perform necessary tests to ensure the safety of the mother and potential child.

    How to Do DIY Home Insemination

    Before starting the DIY home insemination process, it is crucial to track ovulation and have a basic understanding of the menstrual cycle. This will help determine the best time for insemination, as sperm can survive in the female reproductive tract for up to five days, but the egg is only viable for 12-24 hours after ovulation.

    Next, it is essential to choose a suitable method of insemination. A syringe with a long, thin tip is the most commonly used tool, as it allows for precise placement of the sperm. A menstrual cup can also be used, but it does not provide as much control. A homemade device like a turkey baster can also be used, but it may not be as sterile as a syringe.

    Once the equipment is chosen, it is essential to prepare the sperm. The sperm should be placed in a sterile container and kept at body temperature until it is time for insemination. It is crucial to avoid exposing the sperm to extreme temperatures or air, as this can damage it.

    To perform the insemination, the woman should lie on her back with her hips elevated. The sperm should be drawn up into the syringe and then inserted into the vagina. It is essential to avoid touching the vaginal walls to minimize the risk of infection. Once the sperm is deposited, the woman should remain lying down for 15-20 minutes to allow the sperm to travel through the cervix.

    Summary:

    DIY home insemination is a natural and holistic approach to conception that allows couples to perform the insemination process in the comfort of their own home. It offers control, privacy, and affordability, but comes with potential risks such as infection and the reliability of the sperm used. To perform DIY home insemination, it is crucial to track ovulation, choose a suitable method, and prepare the sperm before depositing it into the vagina.

  • How to Create a Comfortable Environment for DIY Home Insemination

    DIY home insemination is becoming an increasingly popular option for individuals and couples who are trying to conceive. It allows for a more intimate and personal experience, and can also be a more affordable option compared to medical procedures. However, to ensure a successful DIY home insemination, it is crucial to create a comfortable environment that is conducive to the process. In this blog post, we will discuss how to create a comfortable environment for DIY home insemination, from preparing the necessary supplies to setting the mood for a relaxed and stress-free experience.

    Step 1 – Prepare the Necessary Supplies
    Before beginning the DIY home insemination process, it is essential to have all the necessary supplies ready. This includes a sterile syringe or turkey baster, specimen cup, ovulation predictor kit, and of course, the donor sperm. It is important to ensure that all supplies are clean and sterile to avoid any potential risks of infection.

    Step 2 – Choose a Comfortable Location
    The location of the insemination should be chosen carefully. It should be a private and quiet space where both partners can feel comfortable and relaxed. It could be a bedroom, bathroom, or any other room that provides enough privacy and has enough space for both partners to move around comfortably.

    Step 3 – Set the Mood
    Creating a calm and relaxed atmosphere is crucial for a successful DIY home insemination. Dimming the lights, lighting candles, and playing some soothing music can help set the mood and alleviate any tension or anxiety. It is also essential to eliminate any distractions, such as turning off phones and TVs, to create a serene environment.

    Step 4 – Prepare the Body
    The person who will be receiving the insemination should prepare their body beforehand. This includes taking a warm bath or shower to relax the muscles and using a water-based lubricant to make the process more comfortable. It may also be helpful to do some relaxation exercises or deep breathing to reduce any stress or tension.

    hand holding a syringe with a blue plunger against a solid blue background

    How to Create a Comfortable Environment for DIY Home Insemination

    Step 5 – Involve Your Partner
    Involving your partner in the DIY home insemination process can also help create a comfortable environment. This could include having them help with preparing the supplies, offering emotional support, and being present during the insemination. It can also be a bonding experience for both partners, making the process more intimate and enjoyable.

    Step 6 – Follow the Instructions Carefully
    It is crucial to follow the instructions for the DIY home insemination carefully. This includes using the correct amount of sperm, following the timing of ovulation, and positioning the syringe or turkey baster correctly. Not following the instructions could result in a failed insemination or decrease the chances of conception.

    Step 7 – Rest and Relax
    After the insemination is complete, it is important to rest and relax for a while. This allows the sperm to travel to the cervix and increases the chances of conception. It is also a good idea to lie down with a pillow under the hips to help keep the sperm in place.

    Step 8 – Communicate and Support Each Other
    Effective communication and support are crucial during the DIY home insemination process. It is essential to talk to each other and address any concerns or worries. This can help reduce any stress and create a more comfortable environment for both partners.

    In conclusion, creating a comfortable environment for DIY home insemination is crucial for a successful and stress-free experience. By following these steps, you can ensure a more intimate and enjoyable process, increasing the chances of conception. Remember to prepare the necessary supplies, choose a comfortable location, set the mood, involve your partner, follow the instructions carefully, rest and relax, and communicate and support each other. With the right environment and mindset, DIY home insemination can be a positive and empowering journey towards starting a family.

  • DIY Home Insemination: Tips for a Successful Pregnancy

    DIY Home Insemination: Tips for a Successful Pregnancy

    Home insemination, also known as self-insemination, is the process of using a kit or homemade methods to deposit sperm into the vagina in order to achieve pregnancy. While this method may not be as common as traditional methods of conception, it has gained popularity as a more affordable and accessible option for those who are unable to conceive through natural means.

    If you are considering DIY home insemination, it is important to understand the process and follow certain tips to increase your chances of a successful pregnancy. In this blog post, we will discuss the steps involved in home insemination, the different methods available, and provide tips for a successful DIY home insemination.

    Step 1: Know Your Fertile Window

    The first and most important step in any conception process is to know your fertile window. This refers to the days in your menstrual cycle when you are most likely to conceive. For most women, this is around the time of ovulation, which usually occurs around day 14 of a 28-day menstrual cycle. However, it is important to track your cycle and symptoms to determine your specific fertile window. This can be done through various methods such as tracking your basal body temperature, monitoring cervical mucus, or using ovulation predictor kits.

    Step 2: Gather Your Supplies

    Before attempting home insemination, it is important to gather all the necessary supplies. These may include a sterile syringe, a specimen cup, a speculum, and a soft cup or menstrual cup. You may also choose to use a home insemination kit, which can be purchased online or from a fertility clinic. These kits typically include all the necessary supplies and instructions for the process.

    Step 3: Prepare the Sperm

    If you are using donor sperm, it is important to obtain it from a reputable source. You may choose to purchase sperm from a sperm bank or ask a trusted friend or family member to be a donor. If using fresh sperm, it is important to collect and use it within an hour. Frozen sperm should be thawed according to the instructions provided by the sperm bank.

    Step 4: Positioning

    Having the right positioning during home insemination is crucial for success. The most common and recommended position is to lie on your back with your hips elevated on a pillow. This allows for the sperm to travel towards the cervix and increases the chances of conception. You may also choose to use a speculum to help facilitate the process.

    Mosie Baby at-home insemination kit box featuring instructions and details for two attempts.

    DIY Home Insemination: Tips for a Successful Pregnancy

    Step 5: Inserting the Sperm

    Using a sterile syringe or the provided applicator in a home insemination kit, insert the sperm into the vagina as close to the cervix as possible. Gently release the sperm and remove the applicator or syringe. You may also choose to use a soft cup or menstrual cup to hold the sperm in place for a longer period of time.

    Methods of Home Insemination

    There are a few different methods for home insemination that you may choose from. The first and most common is the cervical cap method, where the sperm is placed directly into the cervix using a sterile syringe or applicator. The second method is the vaginal insemination method, where the sperm is placed directly into the vagina. This method may be more comfortable for some individuals. Lastly, there is the intracervical insemination method, where the sperm is inserted into the cervix using a catheter or syringe.

    Tips for a Successful DIY Home Insemination

    1. Consult with a healthcare professional. Before attempting home insemination, it is important to consult with a healthcare professional to ensure that you are healthy and ready for pregnancy. They can also provide guidance and answer any questions you may have about the process.

    2. Follow instructions carefully. Whether you are using a home insemination kit or following homemade methods, it is important to carefully follow the instructions provided. This will ensure that the process is done correctly and increases your chances of success.

    3. Be patient. Conception may not happen on the first try, and it is important to be patient and persistent. It may take a few tries before achieving a successful pregnancy.

    4. Consider using fertility supplements. There are various supplements available that can help improve sperm quality and increase fertility. Consult with a healthcare professional before adding any supplements to your routine.

    5. Keep a positive mindset. Stress and anxiety can have a negative impact on fertility, so it is important to stay positive and relaxed during the home insemination process.

    In conclusion, DIY home insemination can be a successful method for achieving pregnancy, but it is important to know the steps involved and follow certain tips to increase your chances of success. Consult with a healthcare professional, gather all necessary supplies, and follow instructions carefully for the best results. Remember to stay patient and positive, and hopefully, you will have a successful pregnancy.

  • Breaking Down the Science of DIY Home Insemination

    Breaking Down the Science of DIY Home Insemination

    DIY home insemination is a popular alternative for couples or individuals who are struggling with fertility issues or wish to become parents without the help of a medical professional. This method involves using at-home tools and techniques to introduce sperm into the female reproductive system for the purpose of fertilization. While it may seem like a simple and cost-effective solution, there is actually a lot of science behind DIY home insemination. In this blog post, we will break down the science behind this process and discuss its effectiveness, safety, and success rates.

    Understanding the Basics of Home Insemination

    Before diving into the science of DIY home insemination, it is important to understand the basics of the process. Home insemination involves the introduction of sperm into the cervix or uterus in order to increase the chances of fertilization. This can be done using a variety of methods, such as using a syringe, cervical cap, or soft cup. The key is to place the sperm as close to the cervix as possible, as this is where the sperm needs to travel in order to reach the egg.

    The Science Behind Sperm Survival and Movement

    One of the most crucial aspects of home insemination is understanding the science behind sperm survival and movement. Sperm are delicate cells that need to be protected and nourished in order to reach the egg. The female reproductive system is designed to support this process by providing a safe and nourishing environment for sperm to survive and travel. This includes the cervical mucus, which helps to protect and nourish sperm as they make their way towards the egg.

    Factors Affecting Sperm Survival and Movement

    There are several factors that can affect the survival and movement of sperm during home insemination. These include the quality and quantity of sperm, the timing of ovulation, and the health and fertility of the female reproductive system. It is important to take these factors into consideration when attempting DIY home insemination, as they can greatly impact the success of the process.

    Sperm Quality and Quantity

    The quality and quantity of sperm can greatly affect the success of home insemination. Sperm need to be healthy and numerous in order to increase the chances of fertilization. Factors that can affect sperm quality and quantity include age, lifestyle choices, and certain medical conditions. It is important to address any issues with sperm quality or quantity before attempting home insemination, as it can greatly impact the success of the process.

    At-home insemination kit packaging featuring syringes and collection cups, labeled for comfort and ease of use.

    Breaking Down the Science of DIY Home Insemination

    Timing of Ovulation

    Timing is crucial when it comes to home insemination. In order for the process to be successful, the sperm needs to be introduced into the female reproductive system during the woman’s fertile window. This is the time frame during which the egg is available for fertilization. Tracking ovulation is key to determining the best time for home insemination and increasing the chances of success.

    Female Reproductive Health and Fertility

    The health and fertility of the female reproductive system can also play a significant role in the success of home insemination. Factors such as blocked fallopian tubes, hormonal imbalances, and endometriosis can make it difficult for the sperm to reach the egg and achieve fertilization. It is important for individuals attempting home insemination to address any potential reproductive health issues before attempting the process.

    Effectiveness and Success Rates of DIY Home Insemination

    There is limited research on the effectiveness and success rates of DIY home insemination, as it is a relatively new method. However, many individuals and couples have reported successful pregnancies from home insemination. The key to increasing the chances of success is to carefully follow the proper techniques, track ovulation, and address any potential fertility issues beforehand.

    Safety Considerations for DIY Home Insemination

    While many people have successfully used DIY home insemination to conceive, it is important to consider the safety of the process. The use of proper tools and techniques is crucial to avoid any potential harm or infection. It is also important to use sterile equipment and to properly clean and disinfect any tools used during the process. In addition, it is recommended to have regular check-ups with a medical professional to ensure the health and safety of both the mother and baby during the pregnancy.

    In conclusion, DIY home insemination is a popular alternative for individuals and couples looking to conceive without the help of a medical professional. However, it is important to understand the science behind the process and to take into consideration factors such as sperm quality, timing of ovulation, and female reproductive health and fertility. While success rates may vary, with proper techniques and precautions, DIY home insemination can be a safe and effective method for achieving pregnancy.

    Summary:

    DIY home insemination is a popular alternative for individuals and couples struggling with fertility issues or wishing to become parents without medical assistance. This process involves introducing sperm into the female reproductive system using at-home tools and techniques. The science behind DIY home insemination includes understanding sperm survival and movement, as well as factors that can affect its success, such as sperm quality and quantity, timing of ovulation, and female reproductive health and fertility. While success rates may vary, with proper techniques and precautions, DIY home insemination can be a safe and effective method for achieving pregnancy.