Friday, January 2

Latest news


fertility


menstrual cycle


reproductive health


home insemination


women's health


conception


pregnancy


ovulation


infertility


self-care


hormones


menstruation


at-home insemination


support
Browse by topic

Stories for you

See all latest

Blog

  • The Role of Support and Resources in DIY Home Insemination

    Blog Post Title: The Importance of Support and Resources in DIY Home Insemination

    DIY home insemination, also known as at-home insemination, is a method used by many couples and individuals to conceive a child without the assistance of a medical professional. It involves using a donor’s sperm to impregnate the intended parent(s) through artificial insemination techniques. While this process may seem simple, it requires careful planning, preparation, and support to increase the chances of success. In this blog post, we will explore the significant role that support and resources play in DIY home insemination and how they can benefit individuals and couples who are looking to start or expand their family through this process.

    1. Emotional Support
    The decision to start a family through DIY home insemination can be an emotional one, and having a strong support system can make a significant difference in the experience. Whether it is a partner, family member, or friend, having someone to talk to and lean on during this process can help alleviate any stress or anxiety. It is essential to have someone who understands and supports your decision and can offer emotional support throughout the journey.

    2. Information and Education
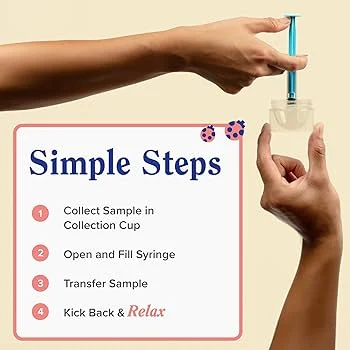
    One of the most critical aspects of DIY home insemination is having access to accurate and reliable information. With the internet at our fingertips, it can be challenging to sift through the vast amount of information available. That is why it is crucial to utilize reputable resources such as fertility clinics, support groups, and online forums. These resources can provide essential information on the steps involved in DIY home insemination, the potential risks and complications, and tips for increasing your chances of success.

    3. Financial Resources
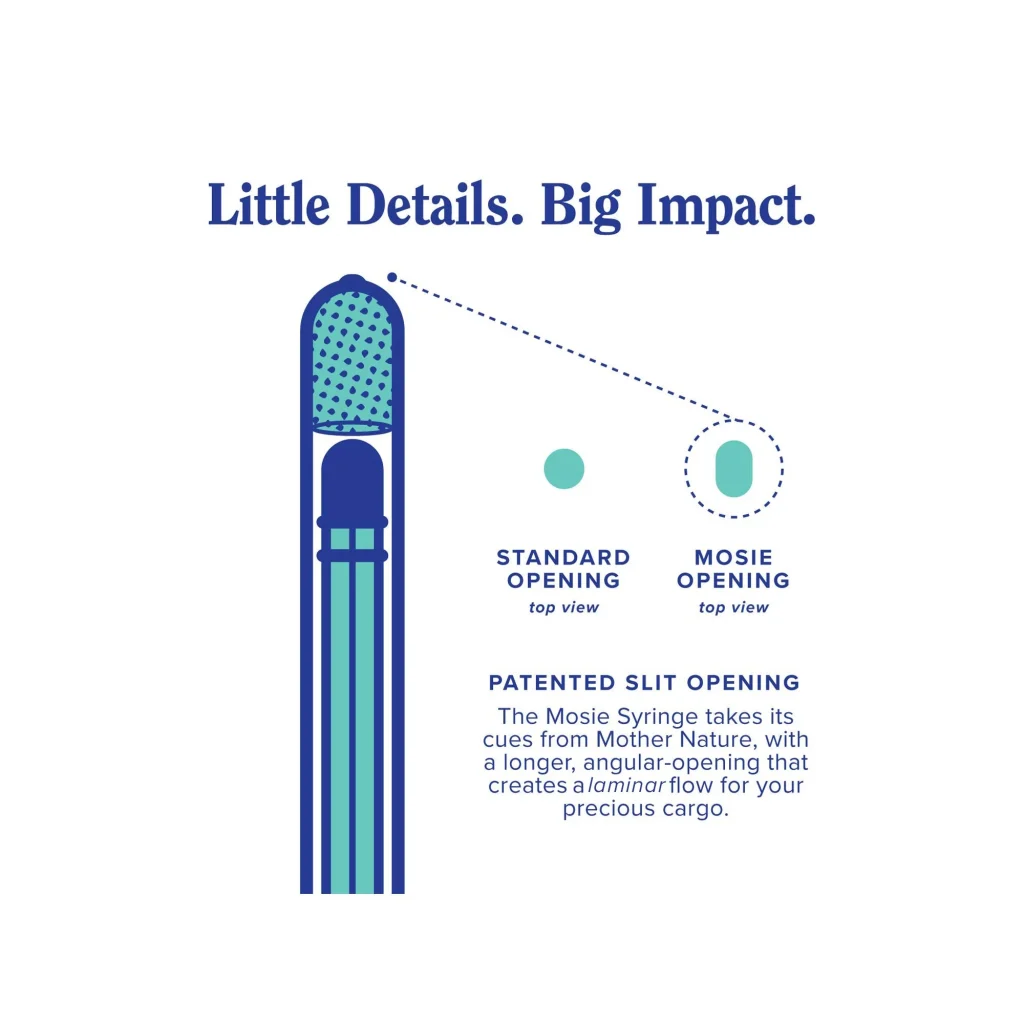
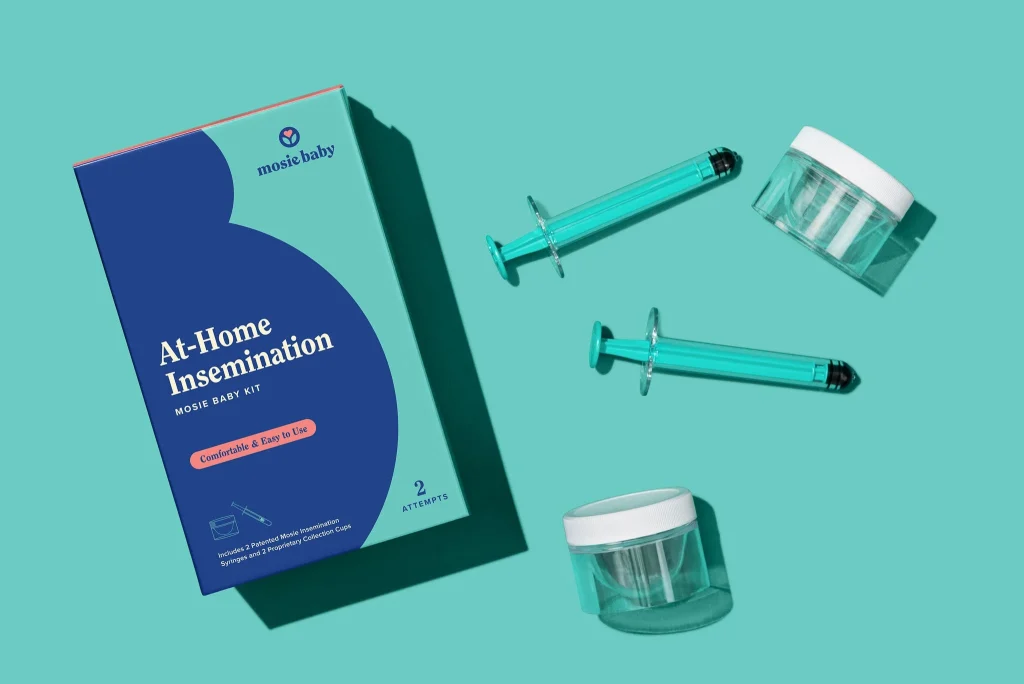
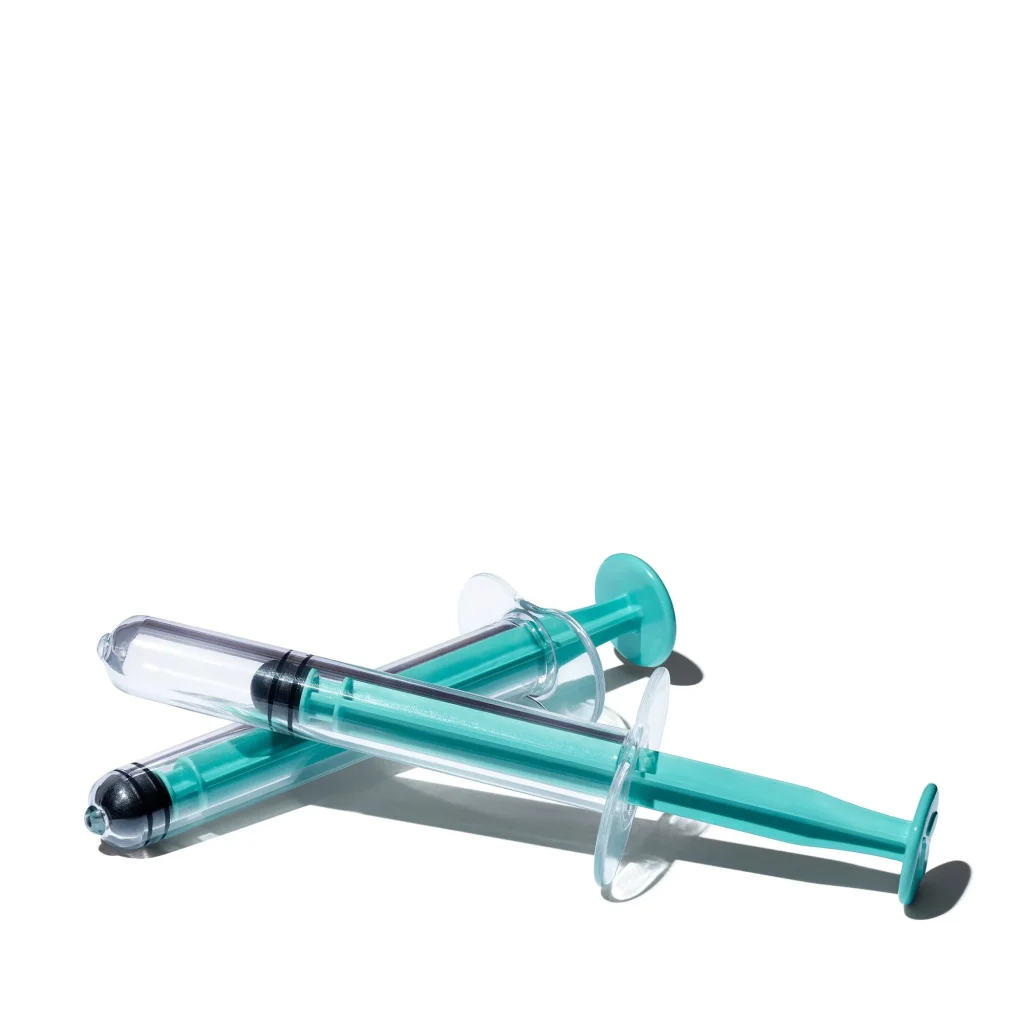
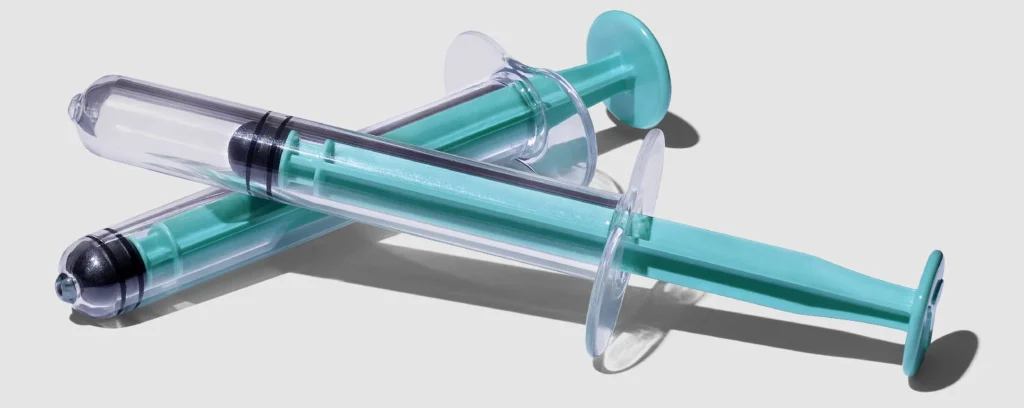
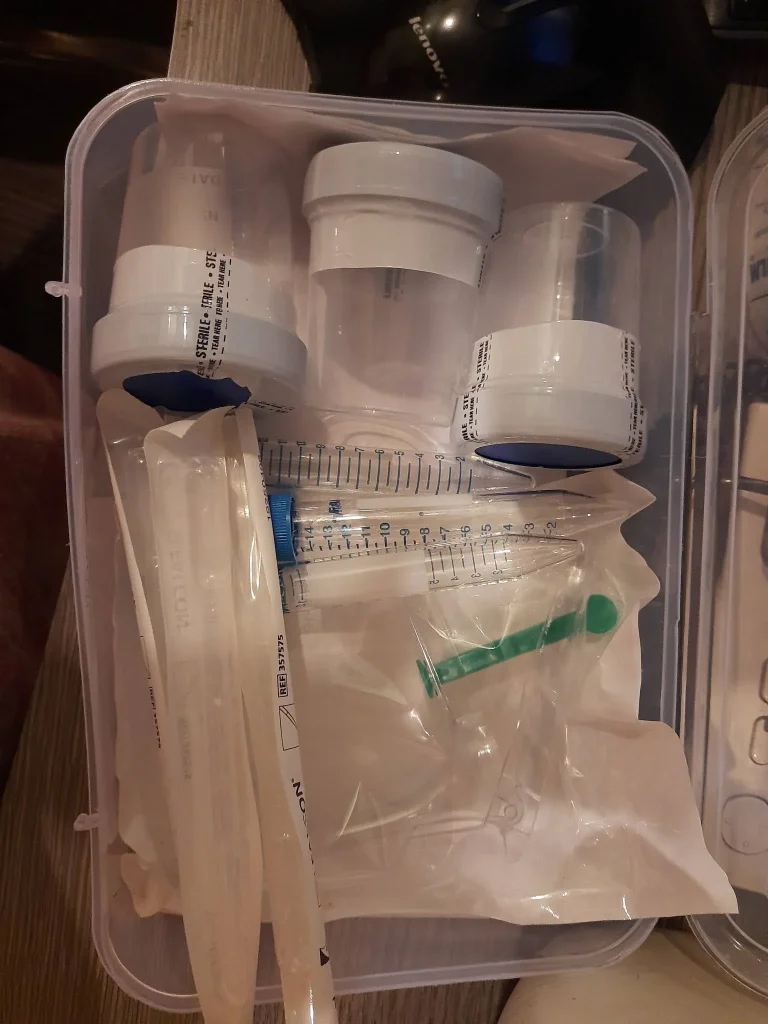
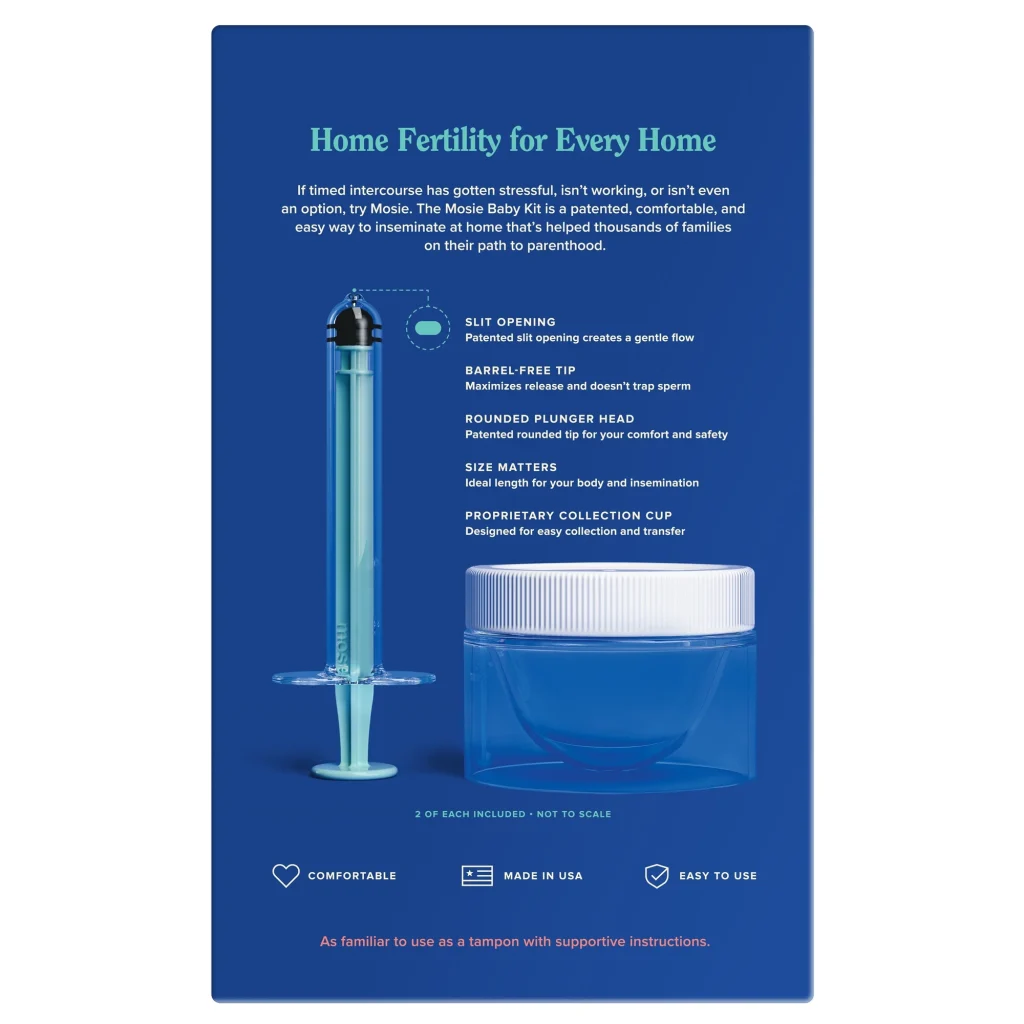
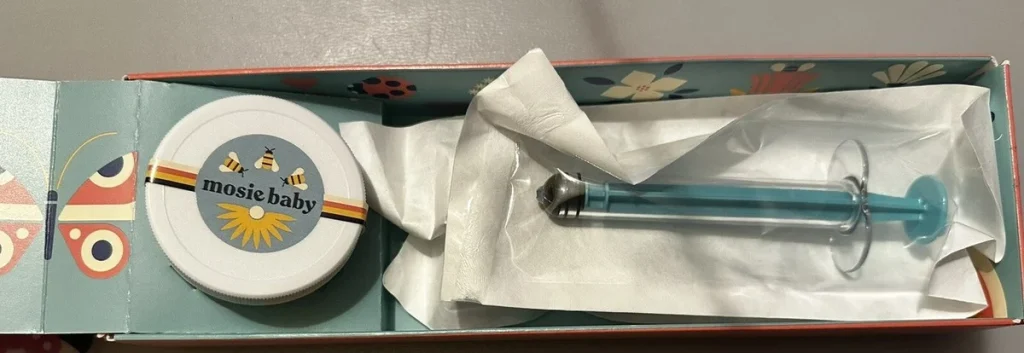
    DIY home insemination can be a more cost-effective option compared to other fertility treatments. However, it still requires financial resources for supplies such as ovulation kits, sperm collection kits, and other necessary tools. It is essential to plan and budget for these expenses beforehand to avoid any financial strain. Additionally, there are organizations and charities that offer financial assistance to individuals and couples who may not have the means to cover the costs of DIY home insemination.

    hands holding a syringe above a collection cup with instructions for using a home insemination kit

    The Role of Support and Resources in DIY Home Insemination

    4. Donor Selection and Screening
    Choosing a sperm donor is a crucial step in the DIY home insemination process. It is essential to have access to reputable sperm banks or donor databases to ensure the quality and health of the donor’s sperm. These resources often include detailed profiles of donors, including their medical history and any genetic conditions or diseases. It is recommended to consult with a fertility specialist or genetic counselor to ensure the donor’s sperm is a suitable match for the intended parent(s).

    5. Legal Support
    Navigating the legalities of DIY home insemination can be overwhelming, especially for those who are not familiar with the process. It is crucial to have access to legal resources to ensure that all necessary legal documents, such as donor agreements and parental rights, are in place to protect the rights of all parties involved. Consulting with a lawyer who specializes in fertility law can provide peace of mind and ensure a smooth process.

    6. Medical Support
    While DIY home insemination does not involve medical procedures, it is still essential to have access to medical support throughout the process. Consulting with a fertility specialist or doctor can help determine any underlying fertility issues and provide guidance on the best course of action. Additionally, it is crucial to have access to medical care during pregnancy to monitor the health of the mother and the developing baby.

    7. Community Support
    One of the most valuable resources for individuals and couples going through DIY home insemination is the support and guidance from others who have gone through or are currently going through the process. Online communities and support groups provide a safe space for individuals to share their experiences, ask questions, and offer support and advice. These communities can also help individuals feel less alone and provide a sense of community during a challenging and emotional process.

    In conclusion, DIY home insemination requires a combination of emotional, informational, financial, legal, and medical support and resources to increase the chances of success. It is essential to have a strong support system, access to reliable information, and a well-planned budget to navigate this process successfully. Additionally, seeking assistance from professionals and connecting with others who have gone through similar experiences can make a significant difference in the overall journey. DIY home insemination may be a challenging and emotional process, but with the right support and resources, it can be a rewarding way to start or expand a family.

    Summary:
    DIY home insemination is a method used by many individuals and couples to conceive a child without the assistance of a medical professional. While this process may seem simple, it requires careful planning, preparation, and support to increase the chances of success. In this blog post, we discussed the significant role of support and resources in DIY home insemination, including emotional support, information and education, financial resources, donor selection and screening, legal support, medical support, and community support. These resources are essential for individuals and couples looking to start or expand their family through this process.

  • DIY Home Insemination: What to Expect During and After

    DIY Home Insemination: What to Expect During and After

    The idea of starting a family can be a daunting experience, especially for those who are unable to conceive naturally. In the past, the only option for individuals or couples facing fertility issues was to seek medical assistance through expensive treatments. However, with the advancement of technology and the increasing acceptance of alternative methods, DIY home insemination has become a popular and accessible choice for many. This method involves using a donor’s sperm to fertilize an egg at home, and it can be a more affordable and intimate option for those trying to conceive. If you are considering DIY home insemination, here are some things to expect during and after the process.

    Before You Begin

    Before starting the process of DIY home insemination, there are a few important steps to take. Firstly, it is crucial to consult with your doctor or a fertility specialist to discuss your options and ensure that this method is safe for you. They can also provide you with any necessary medical advice or guidance. It is also essential to choose a donor that you trust and who has undergone thorough testing to ensure their sperm is healthy and viable. This can be someone you know or a donor from a sperm bank.

    Preparing for Insemination

    Once you have selected a donor and have their sperm ready, it is time to prepare for the insemination process. Before the insemination day, it is recommended to start tracking your ovulation cycle to determine the best time for insemination. This can be done through ovulation predictor kits or tracking your basal body temperature. It is important to note that the chances of conception are higher when insemination is done during ovulation. It is also crucial to ensure that all equipment and materials, such as a syringe, sterile cups, and gloves, are clean and ready for use.

    The Insemination Process

    hands holding a syringe above a collection cup with instructions for using a home insemination kit

    DIY Home Insemination: What to Expect During and After

    On the day of insemination, it is essential to create a comfortable and relaxing environment. It is recommended to have your partner or a trusted friend present to provide emotional support. The process begins with collecting the sperm in a sterile cup and using a syringe to draw it in. Next, you will lie on your back and use a pillow to elevate your hips. This position helps the sperm travel towards the cervix and increases the chances of conception. Using the syringe, you or your partner will then insert the sperm into the vagina, aiming towards the cervix.

    After Insemination

    After the insemination process, it is essential to remain lying down for 10-15 minutes to allow the sperm to travel towards the cervix. It is also recommended to stay in a relaxed state for the rest of the day to give the sperm the best chance to reach the egg. It is crucial to note that pregnancy may not occur after the first attempt, and it may take a few tries before success. It is also essential to manage your expectations and not become discouraged if it does not happen immediately.

    Potential Risks and Precautions

    As with any medical procedure, there are potential risks associated with DIY home insemination. These may include infections, allergic reactions, and the possibility of not being able to conceive. It is vital to take all necessary precautions, such as using sterile equipment and following the instructions provided by your doctor or fertility specialist. It is also recommended to have regular check-ups to ensure that everything is progressing as expected.

    Support and Resources

    Embarking on the journey of DIY home insemination can be an emotional and overwhelming experience, and it is essential to have a support system in place. There are various online communities and support groups that offer advice, guidance, and emotional support for those going through the same process. It is also crucial to have open and honest communication with your partner throughout the process to ensure that you are both on the same page.

    In conclusion, DIY home insemination can be a viable and affordable option for those trying to conceive. It is essential to consult with a medical professional and take all necessary precautions to ensure a safe and successful process. It is also vital to have a support system in place and manage expectations, as pregnancy may not occur after the first attempt. With patience, perseverance, and proper preparation, DIY home insemination can be a fulfilling and rewarding journey towards starting a family.

  • How to Create a Comfortable Environment for DIY Home Insemination

    DIY home insemination is becoming an increasingly popular option for individuals and couples who are trying to conceive. It allows for a more intimate and personal experience, and can also be a more affordable option compared to medical procedures. However, to ensure a successful DIY home insemination, it is crucial to create a comfortable environment that is conducive to the process. In this blog post, we will discuss how to create a comfortable environment for DIY home insemination, from preparing the necessary supplies to setting the mood for a relaxed and stress-free experience.

    Step 1 – Prepare the Necessary Supplies
    Before beginning the DIY home insemination process, it is essential to have all the necessary supplies ready. This includes a sterile syringe or turkey baster, specimen cup, ovulation predictor kit, and of course, the donor sperm. It is important to ensure that all supplies are clean and sterile to avoid any potential risks of infection.

    Step 2 – Choose a Comfortable Location
    The location of the insemination should be chosen carefully. It should be a private and quiet space where both partners can feel comfortable and relaxed. It could be a bedroom, bathroom, or any other room that provides enough privacy and has enough space for both partners to move around comfortably.

    Step 3 – Set the Mood
    Creating a calm and relaxed atmosphere is crucial for a successful DIY home insemination. Dimming the lights, lighting candles, and playing some soothing music can help set the mood and alleviate any tension or anxiety. It is also essential to eliminate any distractions, such as turning off phones and TVs, to create a serene environment.

    Step 4 – Prepare the Body
    The person who will be receiving the insemination should prepare their body beforehand. This includes taking a warm bath or shower to relax the muscles and using a water-based lubricant to make the process more comfortable. It may also be helpful to do some relaxation exercises or deep breathing to reduce any stress or tension.

    hand holding a syringe with a blue plunger against a solid blue background

    How to Create a Comfortable Environment for DIY Home Insemination

    Step 5 – Involve Your Partner
    Involving your partner in the DIY home insemination process can also help create a comfortable environment. This could include having them help with preparing the supplies, offering emotional support, and being present during the insemination. It can also be a bonding experience for both partners, making the process more intimate and enjoyable.

    Step 6 – Follow the Instructions Carefully
    It is crucial to follow the instructions for the DIY home insemination carefully. This includes using the correct amount of sperm, following the timing of ovulation, and positioning the syringe or turkey baster correctly. Not following the instructions could result in a failed insemination or decrease the chances of conception.

    Step 7 – Rest and Relax
    After the insemination is complete, it is important to rest and relax for a while. This allows the sperm to travel to the cervix and increases the chances of conception. It is also a good idea to lie down with a pillow under the hips to help keep the sperm in place.

    Step 8 – Communicate and Support Each Other
    Effective communication and support are crucial during the DIY home insemination process. It is essential to talk to each other and address any concerns or worries. This can help reduce any stress and create a more comfortable environment for both partners.

    In conclusion, creating a comfortable environment for DIY home insemination is crucial for a successful and stress-free experience. By following these steps, you can ensure a more intimate and enjoyable process, increasing the chances of conception. Remember to prepare the necessary supplies, choose a comfortable location, set the mood, involve your partner, follow the instructions carefully, rest and relax, and communicate and support each other. With the right environment and mindset, DIY home insemination can be a positive and empowering journey towards starting a family.

  • DIY Home Insemination: A Safe and Private Option

    DIY Home Insemination: A Safe and Private Option

    For many couples, the journey to starting a family can be challenging and expensive. Traditional methods such as in vitro fertilization (IVF) can cost thousands of dollars and can be emotionally and physically taxing. However, there is a safe and private option that many couples are turning to: DIY home insemination. In this blog post, we will discuss what DIY home insemination is, the benefits and risks, and how you can successfully perform it in the comfort of your own home.

    What is DIY Home Insemination?

    DIY home insemination, also known as at-home insemination or self-insemination, is the process of inserting sperm into the vagina or cervix without the assistance of a medical professional. This method is often used by same-sex couples, single women, and heterosexual couples struggling with fertility issues. It is a cost-effective and convenient alternative to traditional methods of insemination.

    Benefits of DIY Home Insemination

    One of the main benefits of DIY home insemination is cost-effectiveness. Traditional methods of insemination can be very expensive, making it difficult for many couples to afford. With DIY home insemination, all you need is a donor and a few inexpensive supplies, such as a syringe and ovulation predictor kit. This can save couples thousands of dollars in medical fees.

    Another benefit is privacy. Many couples prefer the privacy and comfort of their own home when it comes to such an intimate process. DIY home insemination allows couples to avoid the stress and discomfort of undergoing the procedure in a clinical setting.

    For same-sex couples, DIY home insemination also offers the opportunity for both partners to be involved in the conception process. This can be a meaningful and bonding experience for the couple.

    Risks of DIY Home Insemination

    mosie baby syringe kit with instructions and packaging on a textured surface.

    DIY Home Insemination: A Safe and Private Option

    While DIY home insemination is a safe and effective method for many couples, it is important to note that there are some risks involved. The sperm used for insemination must be healthy and free of any diseases or infections. This is why it is crucial to thoroughly screen and test your donor before proceeding with the insemination process. It is also recommended to have a backup plan in case the first attempt is unsuccessful.

    Another risk to consider is the risk of infection. It is important to maintain proper hygiene and use sterile equipment when performing DIY home insemination. This can greatly reduce the risk of infection.

    How to Perform DIY Home Insemination

    Now that we have discussed the benefits and risks, let’s talk about how to perform DIY home insemination. The first step is to find a donor. This can be a close friend or family member, or you can find a donor through a sperm bank or online sperm donation websites.

    Once you have a donor, you will need to discuss and agree upon the details of the insemination process, such as the frequency of insemination and the method of donation (fresh or frozen sperm).

    Next, you will need to track your ovulation using an ovulation predictor kit to determine the best time for insemination. The sperm can be collected using a sterile cup or condom and then inserted into the vagina or cervix using a syringe. It is recommended to elevate your hips for 15-20 minutes after insemination to allow the sperm to swim towards the cervix.

    It is important to note that DIY home insemination may not be successful on the first attempt. It may take multiple attempts before a pregnancy is achieved.

    Summary

    DIY home insemination is a safe and private option for couples looking to conceive. It is a cost-effective alternative to traditional methods of insemination and allows for privacy and involvement of both partners. However, it is important to thoroughly screen and test your donor and maintain proper hygiene to reduce the risks involved. With proper preparation and tracking, DIY home insemination can be a successful and fulfilling way to start a family.

  • DIY Home Insemination for Busy Couples: Making Time for Parenthood

    Blog Post Title: DIY Home Insemination for Busy Couples: Making Time for Parenthood

    Parenthood is a dream for many couples, but the process of conceiving a child can often be overwhelming and time-consuming. With the hectic schedules of modern-day life, it can be challenging for busy couples to find the time for traditional methods of conception. This is where DIY home insemination comes in as a viable and convenient option for couples who are ready to start a family. In this blog post, we will explore the concept of DIY home insemination and provide a step-by-step guide for busy couples on how to make time for parenthood.

    What is DIY Home Insemination?

    DIY home insemination, also known as at-home insemination, is the process of using a syringe or other tools to insert sperm into the vagina in hopes of achieving pregnancy. This method can be done in the comfort of your own home, without the need for medical intervention or assistance. DIY home insemination is a popular choice for couples in the LGBTQ+ community, single women, and heterosexual couples who are struggling with infertility.

    Step-by-Step Guide to DIY Home Insemination

    Step 1: Track Your Ovulation

    The first step in DIY home insemination is to determine when you are ovulating. This is crucial as it increases the chances of successful conception. There are various ways to track your ovulation, including using ovulation predictor kits, tracking your basal body temperature, or monitoring changes in your cervical mucus.

    Step 2: Collect and Prepare Sperm

    The next step is to collect and prepare the sperm for insemination. If you have a sperm donor, you can collect the sperm using a sterile cup or condom. If you are using frozen donor sperm, you can thaw it according to the instructions provided by the sperm bank. You can also use fresh sperm from your partner, but it is essential to ensure that it is free from any sexually transmitted infections.

    Step 3: Prepare the Insemination Tools

    To perform DIY home insemination, you will need a sterile syringe, a soft cup or menstrual cup, and a lubricant that is sperm-friendly. You can purchase these items at your local pharmacy or online. It is crucial to make sure that all the tools used are sterile to avoid any infections.

    Step 4: Insert the Sperm

    Once you have collected and prepared the sperm, you can insert it into your vagina using the syringe. Gently insert the syringe into your vagina and release the sperm. You can also use a soft cup or menstrual cup to hold the sperm inside the vagina for a longer period, increasing the chances of fertilization.

    illustration comparing standard and Mosie syringe openings with text highlighting design benefits

    DIY Home Insemination for Busy Couples: Making Time for Parenthood

    Step 5: Relax and Wait

    After the insemination process, it is essential to relax and lie down for at least 20-30 minutes. This position allows the sperm to travel towards the cervix and increases the chances of successful fertilization. It is also recommended to avoid any activities that may cause the sperm to leak out, such as using the bathroom.

    Making Time for Parenthood

    Now that we have discussed the process of DIY home insemination, let’s focus on how busy couples can make time for parenthood. Here are some tips to help you balance your busy lifestyle while trying to conceive.

    1. Plan Ahead

    With busy schedules, it is crucial to plan ahead when it comes to DIY home insemination. Keep track of your ovulation cycle and plan accordingly. You can also involve your partner in the process, making it a more intimate and enjoyable experience.

    2. Make it a Priority

    Parenthood is a significant decision, and it is essential to make it a priority. Set aside dedicated time for the insemination process and make sure to follow through with it. It may require some adjustments in your schedule, but it will be worth it in the end.

    3. Involve a Support System

    Having a support system can make a world of difference when trying to conceive. Talk to your friends and family about your plans, and they can offer support and help when needed. You can also join online support groups and forums to connect with other couples going through the same journey.

    4. Consider Alternative Methods

    DIY home insemination may not be the right option for everyone. It is essential to consider alternative methods, such as artificial insemination or in vitro fertilization, if DIY home insemination does not work for you. Consult with a fertility specialist to determine the best course of action for your specific situation.

    In conclusion, DIY home insemination is a convenient and affordable option for busy couples looking to start a family. By following the step-by-step guide and making time for parenthood, couples can increase their chances of successful conception. Remember to remain positive and seek support when needed, and you will soon be on your way to parenthood.

  • Exploring Different DIY Home Insemination Methods

    Title: Exploring Different DIY Home Insemination Methods: A Comprehensive Guide

    Body:

    When it comes to starting a family, there are a variety of paths that couples and individuals can choose from. For some, the traditional route of conception may not be an option, leading them to explore alternative methods such as DIY home insemination. While this may seem like a daunting and complicated process, with the right information and resources, it can be a viable option for those looking to expand their family. In this blog post, we will explore different DIY home insemination methods, their effectiveness, and how to safely and successfully carry out the process.

    What is DIY Home Insemination?

    DIY home insemination, also known as self-insemination, is the process of using at-home methods to introduce sperm into the vagina or cervix in order to fertilize an egg. This can be done with the help of a partner, or as a single individual through the use of donor sperm. It is a popular choice for same-sex couples, single women, and couples facing fertility challenges.

    DIY Home Insemination Methods:

    1. The Turkey Baster Method

    The turkey baster method is one of the most well-known and widely used DIY home insemination methods. It involves using a clean, sterile turkey baster or syringe to collect sperm and then inserting it into the vagina as close to the cervix as possible. This method can be done at home without the assistance of a medical professional and is relatively inexpensive. However, it is important to note that this method does not guarantee the sperm will reach the cervix and can result in a lower success rate.

    2. The Soft Cup Method

    The soft cup method, also known as the menstrual cup method, involves using a soft cup or menstrual cup to collect sperm and then inserting it into the vagina. This method is similar to the turkey baster method but has a higher success rate as the cup is designed to stay in place and keep the sperm closer to the cervix. It is also a more discreet option and can be left in for several hours, giving the sperm more time to reach the egg.

    3. The Syringe Method

    Similar to the turkey baster method, the syringe method involves using a clean, sterile syringe to collect sperm and then inserting it into the vagina. This method allows for more control over the placement of the sperm and can result in a higher success rate. However, it is important to use a syringe that is specifically designed for insemination and to follow proper sterilization techniques to avoid any risk of infection.

    Mosie Baby kit for at-home insemination with syringes and collection cups on a teal background.

    Exploring Different DIY Home Insemination Methods

    4. The Natural Insemination Method

    The natural insemination method involves using sexual intercourse to deposit sperm into the vagina. This can be done with a partner or with a known donor. While this method is the most similar to traditional conception, it does not guarantee fertilization as the sperm may not reach the cervix. It is also important to ensure that all parties involved have been tested for STIs and to use protection to prevent any potential risks.

    Factors to Consider:

    Before choosing a DIY home insemination method, it is important to consider several factors such as cost, success rate, and safety. While these methods may be more affordable than medical interventions, they also come with their own set of risks and limitations. It is important to do thorough research and consult with a medical professional before proceeding with any DIY home insemination method.

    Tips for a Successful DIY Home Insemination:

    1. Timing is key: In order to increase the chances of fertilization, it is important to track ovulation and inseminate during the most fertile days of the menstrual cycle.

    2. Ensure proper hygiene and sterilization: It is crucial to use clean, sterile equipment to avoid any risk of infection.

    3. Follow instructions carefully: Whether using a turkey baster, soft cup, or syringe, it is important to follow the instructions carefully for the best results.

    4. Consider using fertility-friendly lubricants: Some lubricants can harm sperm and decrease the chances of fertilization. It is recommended to use fertility-friendly lubricants or to avoid lubricants altogether.

    5. Remain relaxed: Stress and tension can affect the body’s natural processes, so it is important to remain relaxed and calm during the insemination process.

    In conclusion, DIY home insemination can be a viable option for those looking to start a family. With the right information, resources, and precautions, it can be a safe and effective method. However, it is important to consider all factors and consult with a medical professional before proceeding with any DIY home insemination method.

    Summary:

    DIY home insemination is a popular choice for couples and individuals looking to start a family. It involves using at-home methods to introduce sperm into the vagina or cervix for fertilization. There are several methods to choose from, including the turkey baster, soft cup, syringe, and natural insemination method. Factors such as cost, success rate, and safety should be considered before choosing a method. Following proper instructions and remaining relaxed can increase the chances of success.

  • DIY Home Insemination: Tips for a Successful Pregnancy

    DIY Home Insemination: Tips for a Successful Pregnancy

    Home insemination, also known as self-insemination, is the process of using a kit or homemade methods to deposit sperm into the vagina in order to achieve pregnancy. While this method may not be as common as traditional methods of conception, it has gained popularity as a more affordable and accessible option for those who are unable to conceive through natural means.

    If you are considering DIY home insemination, it is important to understand the process and follow certain tips to increase your chances of a successful pregnancy. In this blog post, we will discuss the steps involved in home insemination, the different methods available, and provide tips for a successful DIY home insemination.

    Step 1: Know Your Fertile Window

    The first and most important step in any conception process is to know your fertile window. This refers to the days in your menstrual cycle when you are most likely to conceive. For most women, this is around the time of ovulation, which usually occurs around day 14 of a 28-day menstrual cycle. However, it is important to track your cycle and symptoms to determine your specific fertile window. This can be done through various methods such as tracking your basal body temperature, monitoring cervical mucus, or using ovulation predictor kits.

    Step 2: Gather Your Supplies

    Before attempting home insemination, it is important to gather all the necessary supplies. These may include a sterile syringe, a specimen cup, a speculum, and a soft cup or menstrual cup. You may also choose to use a home insemination kit, which can be purchased online or from a fertility clinic. These kits typically include all the necessary supplies and instructions for the process.

    Step 3: Prepare the Sperm

    If you are using donor sperm, it is important to obtain it from a reputable source. You may choose to purchase sperm from a sperm bank or ask a trusted friend or family member to be a donor. If using fresh sperm, it is important to collect and use it within an hour. Frozen sperm should be thawed according to the instructions provided by the sperm bank.

    Step 4: Positioning

    Having the right positioning during home insemination is crucial for success. The most common and recommended position is to lie on your back with your hips elevated on a pillow. This allows for the sperm to travel towards the cervix and increases the chances of conception. You may also choose to use a speculum to help facilitate the process.

    Mosie Baby at-home insemination kit box featuring instructions and details for two attempts.

    DIY Home Insemination: Tips for a Successful Pregnancy

    Step 5: Inserting the Sperm

    Using a sterile syringe or the provided applicator in a home insemination kit, insert the sperm into the vagina as close to the cervix as possible. Gently release the sperm and remove the applicator or syringe. You may also choose to use a soft cup or menstrual cup to hold the sperm in place for a longer period of time.

    Methods of Home Insemination

    There are a few different methods for home insemination that you may choose from. The first and most common is the cervical cap method, where the sperm is placed directly into the cervix using a sterile syringe or applicator. The second method is the vaginal insemination method, where the sperm is placed directly into the vagina. This method may be more comfortable for some individuals. Lastly, there is the intracervical insemination method, where the sperm is inserted into the cervix using a catheter or syringe.

    Tips for a Successful DIY Home Insemination

    1. Consult with a healthcare professional. Before attempting home insemination, it is important to consult with a healthcare professional to ensure that you are healthy and ready for pregnancy. They can also provide guidance and answer any questions you may have about the process.

    2. Follow instructions carefully. Whether you are using a home insemination kit or following homemade methods, it is important to carefully follow the instructions provided. This will ensure that the process is done correctly and increases your chances of success.

    3. Be patient. Conception may not happen on the first try, and it is important to be patient and persistent. It may take a few tries before achieving a successful pregnancy.

    4. Consider using fertility supplements. There are various supplements available that can help improve sperm quality and increase fertility. Consult with a healthcare professional before adding any supplements to your routine.

    5. Keep a positive mindset. Stress and anxiety can have a negative impact on fertility, so it is important to stay positive and relaxed during the home insemination process.

    In conclusion, DIY home insemination can be a successful method for achieving pregnancy, but it is important to know the steps involved and follow certain tips to increase your chances of success. Consult with a healthcare professional, gather all necessary supplies, and follow instructions carefully for the best results. Remember to stay patient and positive, and hopefully, you will have a successful pregnancy.

  • The Emotional Side of DIY Home Insemination

    DIY home insemination has become a popular option for couples and individuals who are looking to start or expand their families. With the rise of alternative family planning methods, many people are turning to DIY home insemination as a cost-effective and convenient way to conceive. While the technical aspects of this process are well-documented and easily accessible, what is often overlooked is the emotional side of DIY home insemination.

    The decision to pursue DIY home insemination can be a rollercoaster of emotions. For many, it is an exciting and hopeful journey towards parenthood. However, it can also bring up feelings of anxiety, fear, and uncertainty. This emotional journey is not often talked about, but it is an essential aspect of the DIY home insemination process that should not be overlooked.

    For LGBTQ+ couples and individuals, the decision to pursue DIY home insemination can be particularly emotional. For many in the LGBTQ+ community, starting a family is a dream that has been long fought for. DIY home insemination provides a way for them to have a biological connection to their child, and this can bring up a range of emotions. From excitement and joy to fear and anxiety, the emotional journey of DIY home insemination can be a challenging and complex one.

    One of the most significant emotional challenges of DIY home insemination is the fear of the unknown. Unlike traditional methods of conception, there is no guarantee of success with DIY home insemination. This uncertainty can bring up feelings of doubt and anxiety, especially for those who have been trying to conceive for a long time. The fear of failure and disappointment can be overwhelming, and it is essential to acknowledge and address these feelings throughout the process.

    two teal syringes lying on a white background, designed for at-home insemination use

    The Emotional Side of DIY Home Insemination

    Another emotional aspect of DIY home insemination is the lack of control. Unlike undergoing medical procedures in a clinic, DIY home insemination relies heavily on timing and understanding of ovulation cycles. This lack of control can be frustrating and cause feelings of helplessness, especially if the process takes longer than expected. It is crucial for individuals and couples to find ways to cope with these emotions and remember that they are not alone in this journey.

    The emotional journey of DIY home insemination also includes the strain it can put on relationships. For couples, this process can be a test of their communication and teamwork skills. With the added pressure of trying to conceive, it is not uncommon for conflicts to arise. It is essential to maintain open and honest communication throughout the process and to seek support from each other and loved ones when needed.

    For individuals pursuing DIY home insemination, the emotional journey can also be a lonely one. While it is an empowering decision to take control of one’s fertility, it can also be isolating. The lack of support and understanding from friends and family who may not understand or accept the decision can be emotionally taxing. It is crucial to seek out a support system of like-minded individuals, whether through online forums or support groups, to have a sense of community and understanding.

    Once the DIY home insemination process is successful, the emotional journey is far from over. The joy and excitement of a positive pregnancy test can be quickly followed by feelings of fear and anxiety about the pregnancy and becoming a parent. For many, this process may also bring up unresolved emotions about their own childhood and upbringing. It is essential to address these emotions and seek support from professionals if needed.

    In conclusion, the emotional side of DIY home insemination is a crucial aspect of the process that should not be overlooked. It is essential to acknowledge and address these emotions throughout the journey and to seek support from loved ones and professionals when needed. DIY home insemination is a unique and empowering way to start or expand a family, but it is also a challenging and emotional journey that should be navigated with care and understanding.

  • DIY Home Insemination: An Intimate and Personal Journey

    DIY Home Insemination: An Intimate and Personal Journey

    In recent years, the concept of DIY home insemination has gained popularity among individuals and couples who are trying to conceive. This method involves using a variety of at-home tools and techniques to artificially inseminate oneself or a partner without the assistance of a medical professional. While it may sound unconventional, for many people, DIY home insemination has become an intimate and personal journey towards starting or expanding their family.

    The decision to pursue DIY home insemination often stems from various reasons. Some individuals may not have access to fertility treatments or may prefer a more natural approach. For same-sex couples or single women, it can be a way to fulfill their dream of parenthood without relying on a sperm donor or fertility clinic. Whatever the reason may be, the process of DIY home insemination can be both exciting and daunting. In this blog post, we will explore the basics of DIY home insemination, the different methods and tools used, and the emotional journey that comes with it.

    Understanding the Basics of DIY Home Insemination

    Before delving into the details, it is essential to understand the basics of DIY home insemination. The process involves introducing sperm into the vagina or cervix to fertilize an egg, similar to what happens during sexual intercourse. However, in this case, the sperm is manually introduced into the body using various methods such as a syringe, turkey baster, or cervical cap. Timing is crucial in DIY home insemination, as the sperm needs to be introduced during the ovulation window to increase the chances of pregnancy.

    One of the significant advantages of DIY home insemination is that it can be done in the comfort and privacy of one’s own home. This can be especially appealing for individuals who are not comfortable with the clinical setting of a fertility clinic. Additionally, it can be a cost-effective alternative to expensive fertility treatments, making parenthood more accessible for many.

    Methods and Tools for DIY Home Insemination

    Syringe kit containing various components for assisted baby feeding, including syringes and collection cups.

    DIY Home Insemination: An Intimate and Personal Journey

    When it comes to DIY home insemination, there are various methods and tools that one can use. The most common method involves using a syringe or a turkey baster to introduce the sperm into the vagina or cervix. This method is similar to intrauterine insemination (IUI) used in fertility clinics. However, it requires a bit of practice and precision to get the sperm into the right place.

    Another popular method is the cervical cap method. This involves using a silicone cap that is placed over the cervix to hold the sperm in place, increasing the chances of pregnancy. The cervical cap method may be more appealing to individuals who are not comfortable with inserting objects into their vagina.

    Apart from these methods, there are also at-home insemination kits available in the market that include all the necessary tools and instructions for DIY home insemination. These kits often come with pre-filled syringes, ovulation tests, and other items needed for the process, making it more convenient for those who are new to DIY home insemination.

    The Emotional Journey of DIY Home Insemination

    While DIY home insemination may seem like a straightforward process, the emotional journey that comes with it can be complex and challenging. For many individuals and couples, the decision to pursue DIY home insemination is not an easy one and can be filled with doubts, fears, and uncertainties. The process of insemination itself can be physically and emotionally demanding, especially if it takes several attempts to achieve pregnancy.

    Moreover, the process of DIY home insemination can also bring up various questions and concerns about the child’s genetic makeup and the role of the sperm donor. It is essential to discuss and address these concerns with a partner or a support system to navigate through the emotional journey.

    In the end, the emotional journey of DIY home insemination can be ultimately rewarding when it results in a successful pregnancy and the birth of a child. It can be a beautiful and intimate experience for individuals and couples, creating a strong bond and a unique story to share with their child in the future.

    In conclusion, DIY home insemination can be an intimate and personal journey towards parenthood for many individuals and couples. It offers a more natural and cost-effective alternative to traditional fertility treatments, and the process can be done in the comfort of one’s own home. However, it is essential to understand the basics, explore different methods and tools, and prepare for the emotional journey that comes with it. Ultimately, the decision to pursue DIY home insemination is a personal one, and it is crucial to seek guidance and support from a partner or a healthcare professional throughout the process.

  • The Cost-Effectiveness of DIY Home Insemination

    Blog Post: The Cost-Effectiveness of DIY Home Insemination

    DIY home insemination, also known as at-home artificial insemination, has become a popular method for individuals and couples looking to conceive without the help of a medical professional. This process involves using a syringe or insemination kit to deposit semen into the cervix or vagina, bypassing the need for sexual intercourse. While some may be hesitant to try this method, others have found it to be a cost-effective and convenient alternative to traditional fertility treatments. In this blog post, we will explore the cost-effectiveness of DIY home insemination and why it may be a viable option for those looking to start or expand their family.

    The Cost of Traditional Fertility Treatments

    Traditional fertility treatments, such as intrauterine insemination (IUI) or in vitro fertilization (IVF), can be expensive and not always covered by insurance. On average, an IUI procedure can cost around $300 to $1000 per cycle, while IVF can cost upwards of $12,000 per cycle. These costs can quickly add up, especially for individuals who require multiple cycles or additional treatments. This financial burden can be a significant barrier for those looking to conceive, leading them to explore alternative options such as DIY home insemination.

    DIY Home Insemination: Cost-Effective and Convenient

    One of the main advantages of DIY home insemination is its cost-effectiveness. The materials needed for this procedure, such as a syringe or insemination kit, can be purchased for a fraction of the cost of traditional fertility treatments. In fact, many kits can be purchased for under $100, making it a more affordable option for those on a budget. Additionally, DIY home insemination can be done in the comfort and privacy of one’s own home, eliminating the need for costly medical appointments and procedures.

    Factors to Consider Before Trying DIY Home Insemination

    instructions and warnings for using the Mosie Baby at-home insemination kit

    The Cost-Effectiveness of DIY Home Insemination

    While the cost-effectiveness of DIY home insemination may be appealing, there are some important factors to consider before trying this method. Firstly, it is crucial to know and understand your fertility window to increase the chances of success. This can be done through tracking ovulation and using ovulation predictor kits. Secondly, it is essential to ensure that the sperm used for insemination is of good quality and has been tested for any potential health issues. Lastly, it is crucial to follow proper hygiene and sterile techniques during the insemination process to avoid any risks of infection.

    Success Rates of DIY Home Insemination

    The success rates of DIY home insemination can vary and are dependent on several factors, such as age, fertility health, and timing. However, some studies have shown that this method can have success rates of up to 20%, which is comparable to the success rates of IUI. While it may not be as high as the success rates of IVF, DIY home insemination can still be a viable option for those looking to conceive.

    Other Benefits of DIY Home Insemination

    Aside from its cost-effectiveness, DIY home insemination has other benefits that make it an attractive option for many individuals and couples. For same-sex couples or single individuals, this process allows them to have a biological child without the need for a sperm donor or expensive fertility treatments. It also provides a sense of control and involvement in the conception process, which can be empowering for individuals who may feel a loss of control in their fertility journey.

    In conclusion, DIY home insemination can be a cost-effective and convenient option for those looking to conceive. While it may not be suitable for everyone, it is worth considering for those who are unable to afford or prefer not to undergo traditional fertility treatments. With proper research, preparation, and technique, DIY home insemination can be a successful and fulfilling method of starting or expanding a family.

    Summary:

    DIY home insemination is a cost-effective and convenient alternative to traditional fertility treatments such as IUI and IVF. With an average cost of under $100, it is a more affordable option for individuals and couples looking to conceive. However, proper research, preparation, and technique are crucial for its success. DIY home insemination also provides a sense of control and involvement in the conception process, making it an attractive option for many. While it may not be suitable for everyone, it is worth considering for those looking to start or expand their family.