


Myth: At-home insemination is basically a TV-magic shortcut—one scene, one try, instant pregnancy.

Reality: ICI at home is a logistics-and-timing project. When you treat it like a process (not a plot twist), you can reduce stress, lower infection risk, and make clearer decisions about donor pathways and documentation.
Quick overview: what ICI at home is (and isn’t)
Intracervical insemination (ICI) is a method where sperm is placed near the cervix. It’s often discussed as a home fertility option for people who want an IVF alternative or who aren’t ready for clinical treatment.
It can be part of many family-building paths, including LGBTQ+ pathways using a known donor or a bank donor. What it is not: a replacement for medical evaluation when there are known fertility concerns, recurrent pregnancy loss, or symptoms that need care.
Why everyone’s talking about it lately (and what to take from the buzz)
Pop culture keeps reminding us that pregnancy can be written into a storyline at any time—sometimes for laughs, sometimes for drama. Meanwhile, real life is more practical: people are comparing costs, timelines, and emotional bandwidth, especially when IVF feels like a big leap.
On the policy side, recent coverage has also highlighted legal gray areas around at-home insemination and parental rights. If you’re using a known donor, don’t rely on vibes or verbal promises. Treat the legal piece as part of “safety,” right alongside hygiene.
Timing: the part you can’t “hack”
If you only optimize one thing, optimize timing. ICI is most effective when it’s close to ovulation.
Build a simple timing plan
- Track your cycle for patterns (app + notes helps).
- Use ovulation predictor kits (OPKs) to watch for an LH surge.
- Plan attempts around the surge window, with a second try 12–24 hours later if feasible.
If cycles are irregular, it may take longer to find your rhythm. In that case, consider talking with a clinician about cycle tracking support.
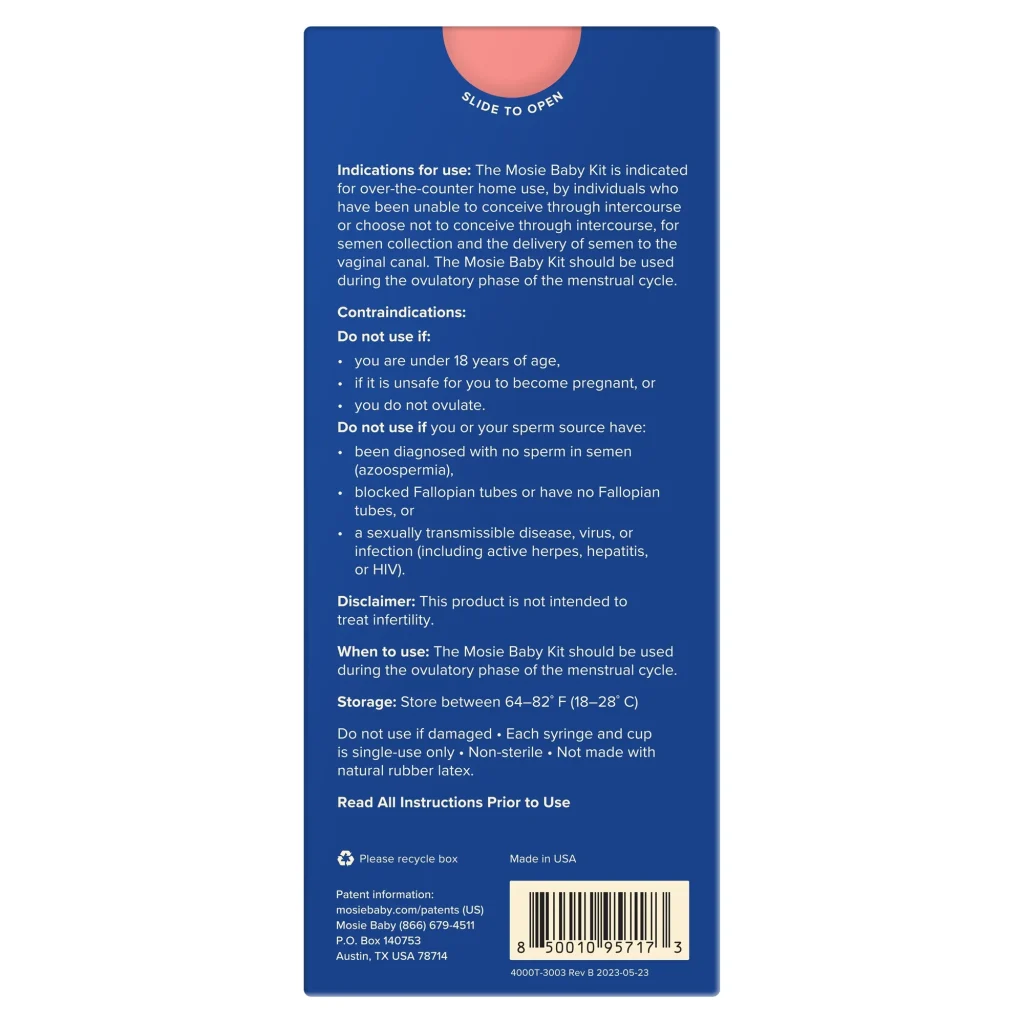
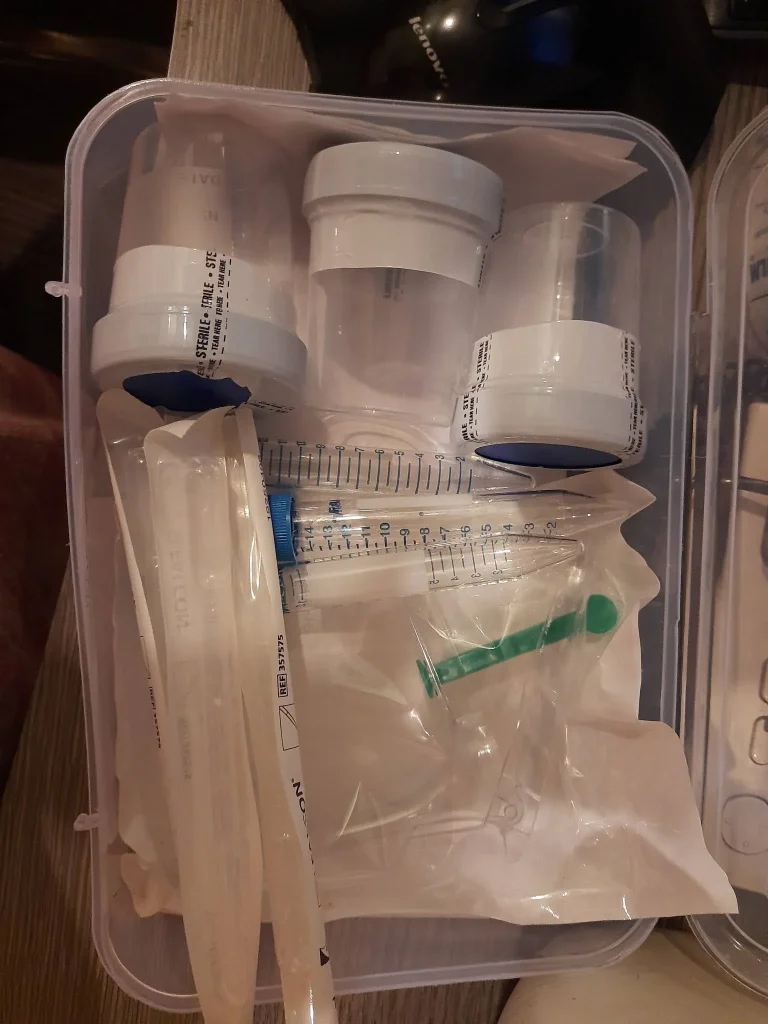
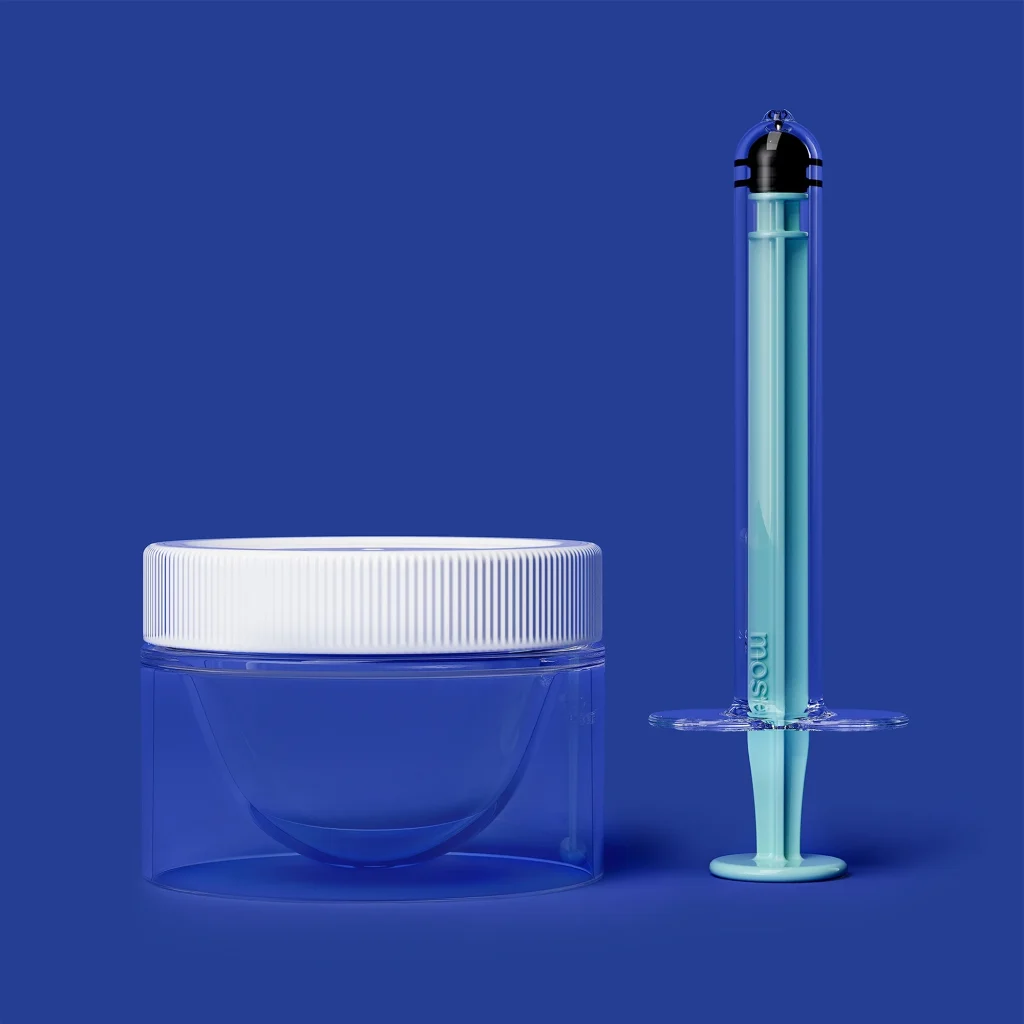
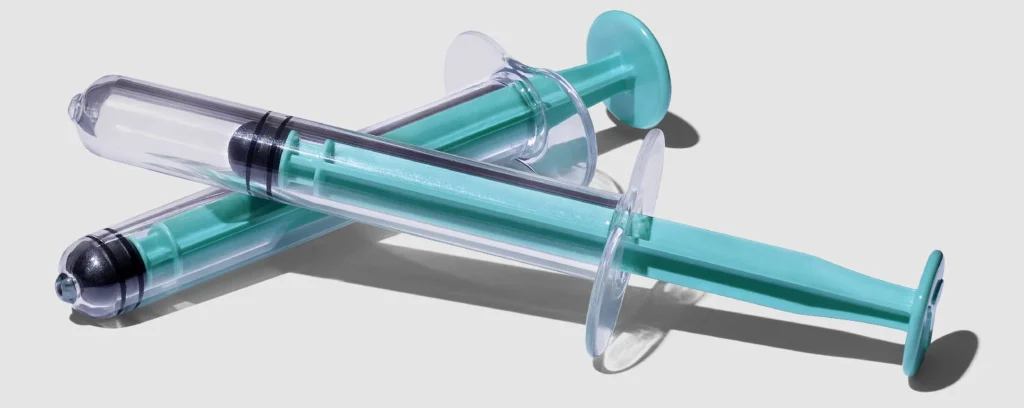
Supplies: what you actually need (and what to skip)
Keep your setup minimal and clean. More gadgets don’t equal better outcomes.
Basic checklist
- Ovulation tests (OPKs)
- Clean, sterile collection container (single-use)
- Needle-free syringe designed for insemination
- Clean towels/pads
- Timer/clock
Helpful extras
- Non-spermicidal, fertility-friendly lubricant (only if needed)
- Disposable gloves (optional, not a substitute for handwashing)
- A written plan for roles and consent (especially with a known donor)
Also, be cautious with supplements. Market reports and women’s health roundups often spotlight fertility supplements, but “popular” doesn’t always mean “proven for your body.” If you’re considering any supplement, check interactions with medications and discuss with a qualified professional.
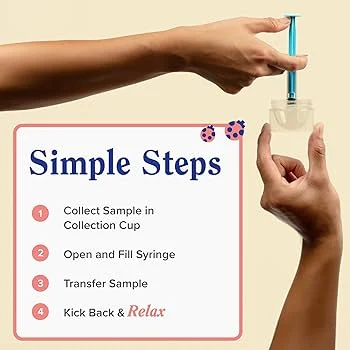
Step-by-step: a practical ICI routine at home
This is a general, educational overview. Follow the instructions for your specific products, and ask a clinician if you have medical questions.
1) Prep the space
Choose a private, calm room. Wash hands thoroughly, lay out supplies, and keep pets/food away from the area.
2) Confirm timing
Use your OPK results and cycle notes. If you’re not near your fertile window, consider waiting rather than “using up” an attempt on a low-probability day.
3) Collect and handle sperm safely
Use a clean, sterile container. Avoid saliva and avoid non-sterile lubricants. Keep everything at room temperature and follow any time limits provided by your donor bank or clinic guidance.
4) Draw into the syringe
Draw slowly to reduce bubbles. Don’t force it. If something touches a non-clean surface, replace it rather than trying to “make it work.”
5) Inseminate (ICI placement)
Get into a comfortable position. Insert the syringe gently and dispense slowly near the cervix. Stop if there is sharp pain or significant bleeding.
6) Rest briefly, then resume normal life
Many people rest for 10–20 minutes. After that, do what helps you feel steady—hydrate, eat, and move on with your day.
Common mistakes that waste cycles (or raise risk)
- Guessing ovulation instead of testing, especially with variable cycles.
- Using non-sterile items or reusing supplies to save money.
- Rushing the legal conversation with a known donor. A recent Florida case in the news cycle is a reminder that parental rights assumptions can backfire.
- Overcomplicating the process with too many add-ons, then feeling overwhelmed.
- Ignoring symptoms like fever, severe pelvic pain, or foul-smelling discharge—those need medical attention.
Safety and screening: reduce infection and legal risk
Hygiene and infection prevention
Use sterile, single-use supplies and wash hands. If using a known donor, discuss STI testing and timing. If anything feels “off” physically afterward, prioritize care.
Documentation and consent (especially with known donors)
Write down what everyone agreed to: roles, boundaries, expenses, and expectations. Then get local legal advice. Headlines about court rulings can be a useful prompt, but your outcome depends on your jurisdiction and your paperwork.
To read more on the legal conversation in the news, see Florida Supreme Court makes ruling in at-home artificial insemination case.
FAQ: quick answers before your next try
What if we miss the surge?
Try not to spiral. Log what happened and adjust next cycle—earlier OPK testing, clearer roles, or a backup plan for scheduling.
Is spotting normal after ICI?
Light spotting can happen from cervical irritation. Heavy bleeding, severe pain, or fever is not “normal”—seek medical care.
Does position matter?
Comfort matters more than gymnastics. Gentle placement and calm pacing are the goal.
CTA: keep it simple, keep it safer
If you want a more controlled, cleaner setup for ICI, consider an at-home insemination kit for ICI that’s designed for home use.
How does at-home insemination (ICI) work?
Medical disclaimer: This article is for general education and is not medical or legal advice. It does not diagnose, treat, or replace care from a qualified clinician. If you have symptoms of infection, severe pain, heavy bleeding, or concerns about fertility, medications, or donor agreements, contact a licensed healthcare professional and a local attorney for guidance.