DIY Home Insemination: Tips for a Successful Pregnancy
Home insemination, also known as self-insemination, is the process of using a kit or homemade methods to deposit sperm into the vagina in order to achieve pregnancy. While this method may not be as common as traditional methods of conception, it has gained popularity as a more affordable and accessible option for those who are unable to conceive through natural means.
If you are considering DIY home insemination, it is important to understand the process and follow certain tips to increase your chances of a successful pregnancy. In this blog post, we will discuss the steps involved in home insemination, the different methods available, and provide tips for a successful DIY home insemination.
Step 1: Know Your Fertile Window
The first and most important step in any conception process is to know your fertile window. This refers to the days in your menstrual cycle when you are most likely to conceive. For most women, this is around the time of ovulation, which usually occurs around day 14 of a 28-day menstrual cycle. However, it is important to track your cycle and symptoms to determine your specific fertile window. This can be done through various methods such as tracking your basal body temperature, monitoring cervical mucus, or using ovulation predictor kits.
Step 2: Gather Your Supplies
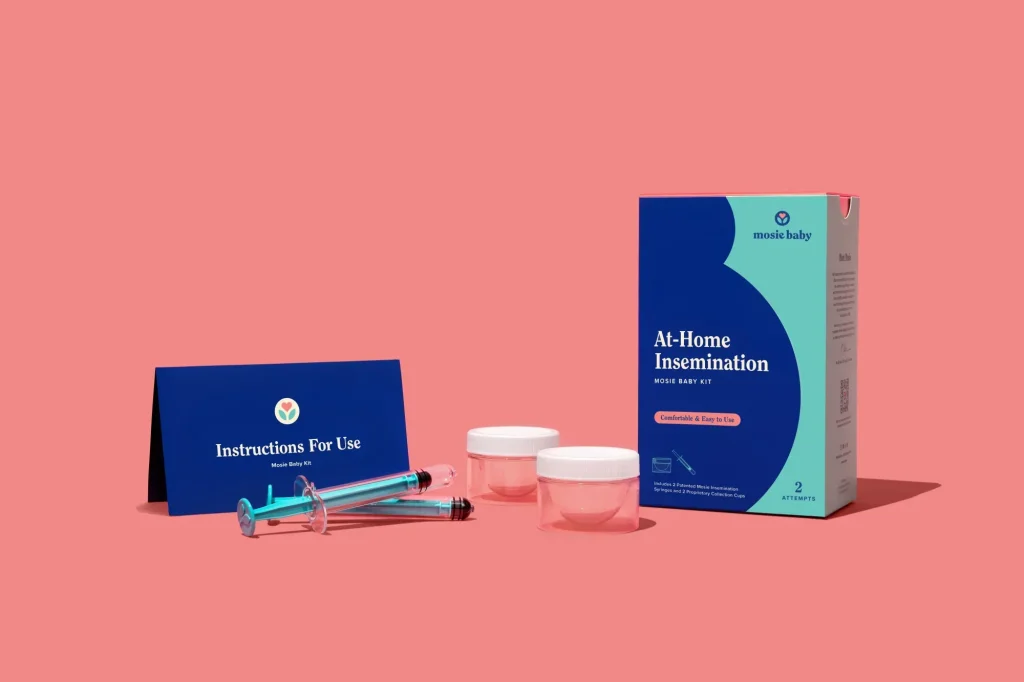
Before attempting home insemination, it is important to gather all the necessary supplies. These may include a sterile syringe, a specimen cup, a speculum, and a soft cup or menstrual cup. You may also choose to use a home insemination kit, which can be purchased online or from a fertility clinic. These kits typically include all the necessary supplies and instructions for the process.
Step 3: Prepare the Sperm
If you are using donor sperm, it is important to obtain it from a reputable source. You may choose to purchase sperm from a sperm bank or ask a trusted friend or family member to be a donor. If using fresh sperm, it is important to collect and use it within an hour. Frozen sperm should be thawed according to the instructions provided by the sperm bank.
Step 4: Positioning
Having the right positioning during home insemination is crucial for success. The most common and recommended position is to lie on your back with your hips elevated on a pillow. This allows for the sperm to travel towards the cervix and increases the chances of conception. You may also choose to use a speculum to help facilitate the process.

DIY Home Insemination: Tips for a Successful Pregnancy
Step 5: Inserting the Sperm
Using a sterile syringe or the provided applicator in a home insemination kit, insert the sperm into the vagina as close to the cervix as possible. Gently release the sperm and remove the applicator or syringe. You may also choose to use a soft cup or menstrual cup to hold the sperm in place for a longer period of time.
Methods of Home Insemination
There are a few different methods for home insemination that you may choose from. The first and most common is the cervical cap method, where the sperm is placed directly into the cervix using a sterile syringe or applicator. The second method is the vaginal insemination method, where the sperm is placed directly into the vagina. This method may be more comfortable for some individuals. Lastly, there is the intracervical insemination method, where the sperm is inserted into the cervix using a catheter or syringe.
Tips for a Successful DIY Home Insemination
1. Consult with a healthcare professional. Before attempting home insemination, it is important to consult with a healthcare professional to ensure that you are healthy and ready for pregnancy. They can also provide guidance and answer any questions you may have about the process.
2. Follow instructions carefully. Whether you are using a home insemination kit or following homemade methods, it is important to carefully follow the instructions provided. This will ensure that the process is done correctly and increases your chances of success.
3. Be patient. Conception may not happen on the first try, and it is important to be patient and persistent. It may take a few tries before achieving a successful pregnancy.
4. Consider using fertility supplements. There are various supplements available that can help improve sperm quality and increase fertility. Consult with a healthcare professional before adding any supplements to your routine.
5. Keep a positive mindset. Stress and anxiety can have a negative impact on fertility, so it is important to stay positive and relaxed during the home insemination process.
In conclusion, DIY home insemination can be a successful method for achieving pregnancy, but it is important to know the steps involved and follow certain tips to increase your chances of success. Consult with a healthcare professional, gather all necessary supplies, and follow instructions carefully for the best results. Remember to stay patient and positive, and hopefully, you will have a successful pregnancy.