Tag: timing

  • The Ultimate Tool for Timing: How an Ovulation Predictor Kit Can Improve Home Insemination Success

    Blog Post Title: The Ultimate Tool for Timing: How an Ovulation Predictor Kit Can Improve Home Insemination Success

    Summary:

    Timing is crucial when it comes to achieving a successful pregnancy, especially through home insemination. For couples or individuals trying to conceive through home insemination, tracking ovulation can be a daunting task. However, with the help of an ovulation predictor kit (OPK), the process can be made much easier and more accurate. In this blog post, we will discuss the importance of timing in home insemination, how an OPK works, and the ways in which using an OPK can improve the success of home insemination.

    The Importance of Timing in Home Insemination:

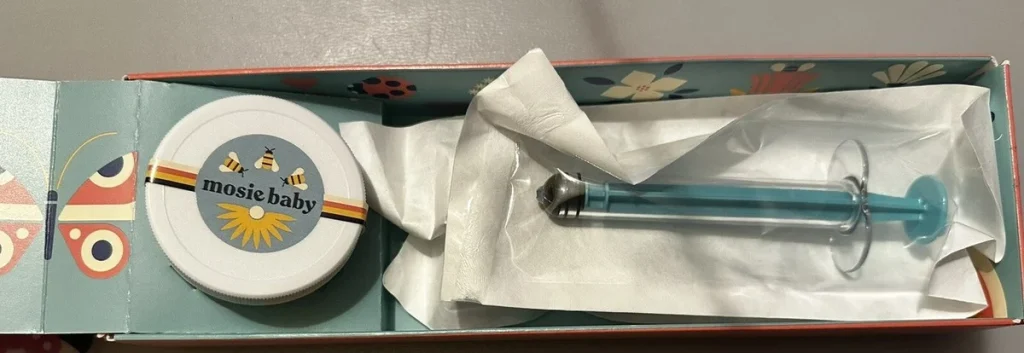
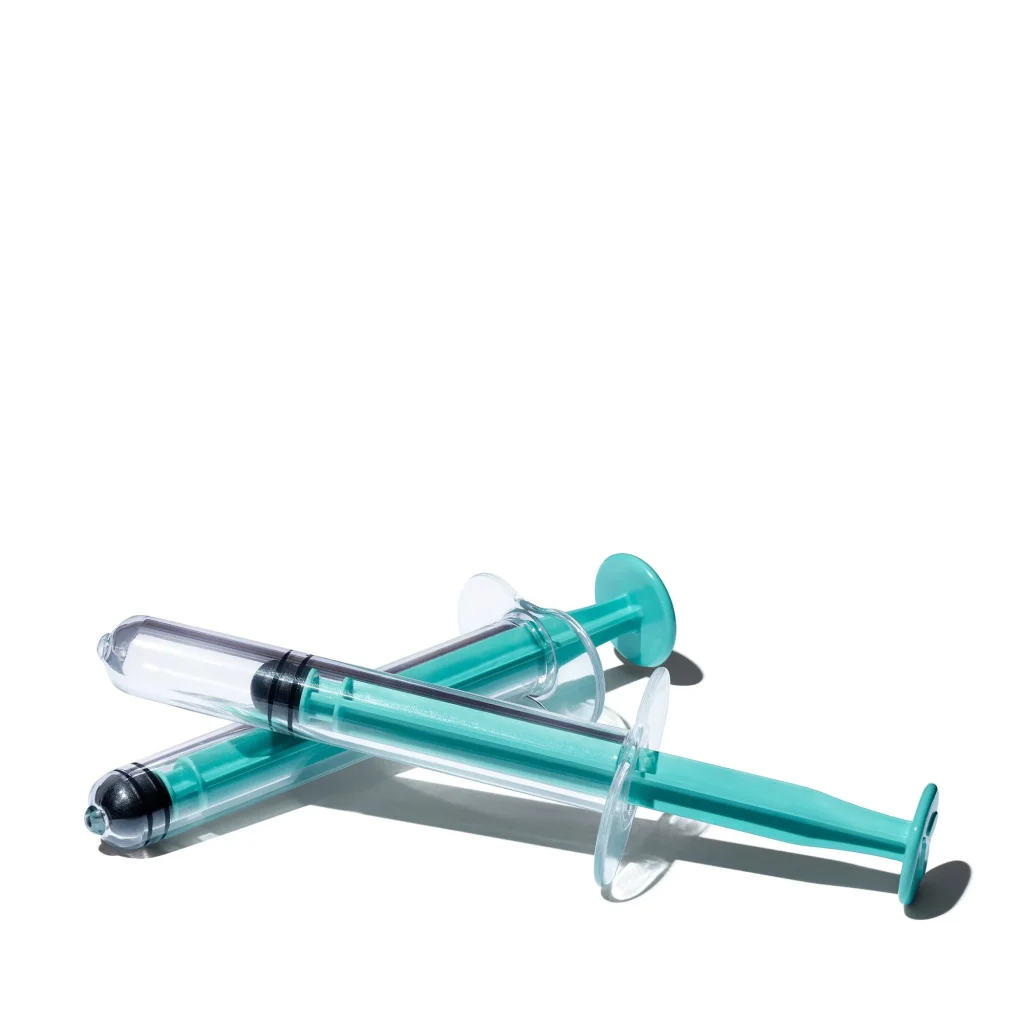
    Home insemination involves manually placing sperm into the cervix or uterus to fertilize an egg. This method of conception requires precise timing, as sperm can only survive for a short amount of time inside the female reproductive tract. Therefore, in order for home insemination to be successful, it is crucial to inseminate during the window of ovulation, when an egg is released from the ovary and is ready to be fertilized.

    How an Ovulation Predictor Kit Works:

    An OPK is a simple and effective tool used to predict ovulation. It works by detecting the levels of luteinizing hormone (LH) in the urine. LH is a hormone that surges just before ovulation occurs. By tracking the rise in LH levels, an OPK can accurately predict when ovulation is about to happen, usually within 12-36 hours. This gives individuals or couples trying to conceive through home insemination a better understanding of when to inseminate to increase their chances of success.

    instructions and warnings for using the Mosie Baby at-home insemination kit

    The Ultimate Tool for Timing: How an Ovulation Predictor Kit Can Improve Home Insemination Success

    Ways in Which Using an OPK Can Improve Home Insemination Success:

    1. Timing is everything:
    As mentioned earlier, timing is crucial in home insemination. An OPK can help determine the most fertile days, increasing the chances of sperm and egg meeting at the right time.

    2. Increased accuracy:
    Unlike other methods of tracking ovulation, such as charting basal body temperature, an OPK can accurately predict ovulation in real-time. This gives individuals or couples a better understanding of their most fertile days, making it easier to plan for insemination.

    3. Cost-effective:
    Compared to other methods of tracking ovulation, an OPK is relatively inexpensive. This makes it a cost-effective option for those trying to conceive through home insemination.

    4. Ease of use:
    An OPK is a simple and user-friendly tool. It comes with clear instructions and can be easily used at home. This makes it a convenient option for those who want to track ovulation in the comfort of their own home.

    5. Can be used with other fertility treatments:
    An OPK can also be used in conjunction with other fertility treatments, such as intrauterine insemination (IUI) or in vitro fertilization (IVF). By accurately predicting ovulation, it can help increase the success rates of these treatments.

    In conclusion, timing is crucial for a successful home insemination, and an OPK can be an invaluable tool in achieving this. By accurately predicting ovulation, an OPK can increase the chances of sperm and egg meeting at the right time, leading to a higher success rate for home insemination. It is a cost-effective, user-friendly, and convenient option that can be used in conjunction with other fertility treatments. If you are considering home insemination, consider using an OPK to improve your chances of success.

  • From Theory to Reality: How to Use an Ovulation Predictor Kit for Successful Home Insemination

    From Theory to Reality: How to Use an Ovulation Predictor Kit for Successful Home Insemination

    For couples who are trying to conceive, the thought of going through expensive fertility treatments can be daunting. Many couples are turning to home insemination as a more affordable and intimate option. However, for the process to be successful, timing is crucial. This is where an ovulation predictor kit (OPK) comes into play. In this blog post, we will discuss the basics of ovulation and how to use an OPK for successful home insemination.

    Understanding Ovulation

    Before diving into the details of using an OPK, it is essential to understand ovulation and its role in conception. Ovulation is the process in which a mature egg is released from the ovary. This usually happens around day 14 of a 28-day menstrual cycle. However, every woman’s body is different, and the timing of ovulation can vary. It is crucial to track your ovulation to increase your chances of getting pregnant.

    What is an Ovulation Predictor Kit?

    An ovulation predictor kit is a tool used to detect the surge of luteinizing hormone (LH) in a woman’s urine. LH is the hormone responsible for triggering ovulation. When the LH surge occurs, it indicates that ovulation is about to happen in the next 24-36 hours. An OPK works similarly to a pregnancy test, but instead of detecting the pregnancy hormone, it detects the LH hormone.

    Using an OPK for Home Insemination

    Step 1: Determine Your Cycle Length

    The first step in using an OPK is to determine your menstrual cycle length. The easiest way to do this is to track your periods for a few months and take the average number of days between each cycle. For example, if your cycle lengths for the past three months were 28, 29, and 30 days, your average cycle length would be 29 days.

    Step 2: Start Testing

    Once you have determined your cycle length, you can start testing with the OPK. It is recommended to start testing a few days before your predicted ovulation date, which is usually around day 14 of a 28-day cycle. If you have a longer or shorter cycle, you may need to adjust the testing dates accordingly.

    at-home insemination kit by Mosie Baby, featuring syringes and storage containers for comfort and convenience.

    From Theory to Reality: How to Use an Ovulation Predictor Kit for Successful Home Insemination

    Step 3: Follow the Instructions

    Each OPK may have different instructions, so it is essential to read the package carefully. Typically, you will need to collect your urine in a cup and then dip the test strip or hold it in the urine stream for a few seconds. After the recommended waiting time, you can read the results.

    Step 4: Interpret the Results

    An OPK has two lines, a control line, and a test line. The control line should always be present, indicating that the test is working correctly. The test line will appear darker or the same color as the control line if the LH surge is detected, which means ovulation is about to occur. If the test line is lighter than the control line, it means that the LH surge has not yet occurred, and you should continue testing for the next few days.

    Step 5: Time Your Home Insemination

    Once you receive a positive result on your OPK, it is time to plan for home insemination. Since the LH surge indicates that ovulation is about to happen, it is best to have intercourse or perform insemination within the next 24-36 hours. This timing is crucial for successful conception.

    Tips for Using an OPK

    – Test with the first urine of the day: The LH hormone is most concentrated in the first urine of the day, making it the best time to test.
    – Test at the same time each day: To get the most accurate results, try to test at the same time each day.
    – Don’t drink too much before testing: Drinking too much liquid before testing can dilute the urine, making it difficult to detect the LH surge.
    – Use a backup method: For more accurate results, it is recommended to use a backup method such as tracking your basal body temperature or cervical mucus changes along with the OPK.

    In conclusion, using an ovulation predictor kit is a simple and effective way to track ovulation and increase your chances of successful home insemination. Remember that every woman’s body is different, and it may take a few cycles to get the hang of using an OPK. Be patient and keep trying, and hopefully, you will achieve your goal of starting a family.

    Summary:

    Home insemination is becoming a popular option for couples trying to conceive, and timing is crucial for its success. An ovulation predictor kit (OPK) is a tool that detects the surge of luteinizing hormone (LH) in a woman’s urine, indicating ovulation is about to occur. To use an OPK for successful home insemination, determine your cycle length, start testing a few days before your predicted ovulation, follow the instructions, interpret the results, and time your home insemination accordingly. Remember to test with the first urine of the day, at the same time each day, and use a backup method for more accurate results.

  • The Role of Ovulation Tracking in Home Insemination

    Blog Post:

    Ovulation tracking, also known as fertility tracking, is the process of monitoring a woman’s menstrual cycle to determine the most fertile days for conception. This method has long been used by couples trying to conceive naturally, but it has also gained popularity in the world of home insemination. In this blog post, we will delve into the role of ovulation tracking in home insemination and how it can increase the chances of success for couples trying to start a family.

    Understanding Ovulation and Fertility Tracking

    Before we dive into the role of ovulation tracking in home insemination, it is essential to understand the basics of ovulation and fertility tracking. Ovulation is the process of an egg being released from the ovaries and is the most fertile time in a woman’s menstrual cycle. This usually occurs around day 14 of a 28-day cycle, but it can vary from woman to woman.

    Fertility tracking involves monitoring various signs and changes in a woman’s body to determine when ovulation is occurring. These signs include changes in cervical mucus, basal body temperature, and ovulation predictor kits. By tracking these signs, a woman can pinpoint her most fertile days and increase her chances of conception.

    The Role of Ovulation Tracking in Home Insemination

    Home insemination involves the process of placing sperm into the vagina or cervix at home, without the assistance of a medical professional. It is a popular option for same-sex couples and those struggling with infertility. Ovulation tracking plays a crucial role in home insemination as it allows couples to time their insemination correctly and increase their chances of success.

    Timing is everything in home insemination, and ovulation tracking is the key to getting it right. By monitoring a woman’s cycle, couples can determine the most fertile days and plan their insemination accordingly. This can be particularly helpful for couples using donor sperm, as it can be expensive and should not be wasted by inseminating on the wrong days.

    In addition to timing, ovulation tracking can also help couples determine the quality of the woman’s cervical mucus. During ovulation, cervical mucus becomes thin and stretchy, creating an ideal environment for sperm to swim through. By tracking this change, couples can ensure that the sperm has the best chance of reaching the egg.

    How to Track Ovulation

    There are several methods for tracking ovulation, and it is essential to find the one that works best for you. Here are the most common methods used in home insemination:

    at-home insemination kit with syringes, collection cups, and instructions on a pink background

    The Role of Ovulation Tracking in Home Insemination

    1. Basal Body Temperature (BBT) Charting: This method involves taking your temperature every morning before getting out of bed and recording it on a chart. A rise in temperature indicates that ovulation has occurred.

    2. Cervical Mucus Monitoring: As mentioned earlier, cervical mucus changes in consistency and volume during ovulation. By monitoring these changes, couples can determine when the most fertile days are.

    3. Ovulation Predictor Kits: These kits work similarly to pregnancy tests but measure the level of luteinizing hormone (LH) in the urine. A surge in LH indicates that ovulation is about to occur.

    4. Fertility Tracking Apps: In today’s digital age, there are numerous apps available that can help track ovulation. These apps use data such as menstrual cycle length, BBT, and cervical mucus to predict the most fertile days.

    The Importance of Accurate Tracking

    Accurate ovulation tracking is crucial for the success of home insemination. It is essential to record data consistently and accurately to determine the most fertile days accurately. This may require some trial and error to find the method that works best for you. Additionally, it is vital to pay attention to any changes in your body and adjust your tracking accordingly.

    Insemination on the Wrong Days

    Inseminating on the wrong days can significantly decrease the chances of success in home insemination. If insemination occurs too early, the sperm may not survive long enough to fertilize the egg. On the other hand, if insemination occurs too late, the egg may have already passed, and fertilization will not occur.

    It is also essential to note that ovulation tracking does not guarantee pregnancy. It merely increases the chances of success by ensuring that the sperm is present during the most fertile days.

    In Conclusion

    Ovulation tracking plays a vital role in home insemination and can increase the chances of success for couples trying to conceive. By accurately monitoring a woman’s cycle and determining the most fertile days, couples can time their insemination correctly and increase their chances of pregnancy. However, it is essential to remember that ovulation tracking is not foolproof and may require some trial and error to find the method that works best for you.

    In summary, ovulation tracking is the process of monitoring a woman’s menstrual cycle to determine the most fertile days for conception. It plays a crucial role in home insemination by helping couples time their insemination correctly and increase their chances of success. There are various methods for tracking ovulation, and it is essential to find the one that works best for you. Accurate tracking is crucial for success, and inseminating on the wrong days can significantly decrease the chances of pregnancy. Ovulation tracking is not a guarantee of pregnancy, but it can greatly increase the chances of success in home insemination.

  • The Risks and Benefits of Home Insemination

    Blog Post: The Risks and Benefits of Home Insemination

    In recent years, home insemination has become a popular option for individuals and couples looking to conceive. This method involves using a donor’s sperm to fertilize an egg at home, rather than in a clinical setting. While home insemination offers a more private and affordable alternative to traditional fertility treatments, it also comes with its own set of risks and considerations. In this blog post, we will explore the potential benefits and risks of home insemination.

    Benefits of Home Insemination:

    1. Privacy and Comfort: Many individuals and couples prefer the privacy and comfort of their own home rather than a clinical setting. Home insemination allows for a more intimate and relaxed environment, which can help reduce stress and anxiety.

    2. Cost-Effective: Compared to other fertility treatments, home insemination is a more affordable option. It eliminates the need for expensive medical procedures and can be done with minimal equipment.

    3. Control Over Timing: With home insemination, individuals and couples have more control over the timing of the insemination. This can be particularly helpful for those with irregular menstrual cycles or for couples trying to time the insemination with ovulation.

    4. No Need for a Donor Clinic: In traditional fertility treatments, donors may need to visit a clinic to provide a sperm sample. With home insemination, donors can provide the sample in the comfort of their own home, making it a more convenient option for all parties involved.

    Risks of Home Insemination:

    1. Lack of Medical Supervision: One of the biggest risks of home insemination is the lack of medical supervision. Unlike traditional fertility treatments, home insemination does not involve a doctor or medical professional. This means that any potential complications may go unnoticed and untreated.

    2. Potential for Infection: Home insemination involves inserting a foreign object (syringe or turkey baster) into the vagina, which can increase the risk of infection. It is essential to follow proper hygiene and sterilization procedures to reduce this risk.

    hands demonstrating steps for using a syringe kit, with instructions listed beside them

    The Risks and Benefits of Home Insemination

    3. Legal Complications: In some countries, home insemination is not regulated, and the legal rights of the donor and intended parents may not be protected. It is crucial to research and understand the laws and regulations surrounding home insemination in your country before proceeding.

    4. Limited Success Rates: While home insemination can be successful, the success rates are lower compared to traditional fertility treatments. This is because the sperm may not survive as long outside of the body, and the timing of ovulation can be challenging to predict accurately.

    Tips for a Safe and Successful Home Insemination:

    1. Choose a Reliable Donor: It is crucial to choose a reliable and healthy donor for home insemination. This can be a known donor or a donor from a reputable sperm bank. Make sure to discuss any medical history or concerns with the donor beforehand.

    2. Follow Proper Hygiene: As mentioned earlier, proper hygiene is essential when performing home insemination. Make sure to clean and sterilize all equipment before use and avoid any contamination.

    3. Use an Ovulation Predictor Kit: To increase the chances of success, it is recommended to use an ovulation predictor kit to track ovulation accurately. This will help determine the best time for insemination.

    4. Seek Medical Advice: While home insemination does not involve medical professionals, it is still essential to seek medical advice before attempting it. A doctor can provide guidance and answer any questions or concerns you may have.

    In conclusion, home insemination can be a viable option for individuals and couples looking to conceive. It offers privacy, control over timing, and is a cost-effective alternative to traditional fertility treatments. However, it is crucial to be aware of the potential risks and take necessary precautions to ensure a safe and successful home insemination.

    Summary:

    Home insemination is a popular alternative to traditional fertility treatments, offering privacy, cost-effectiveness, and control over timing. However, it also comes with risks such as lack of medical supervision, potential for infection, legal complications, and limited success rates. To ensure a safe and successful home insemination, it is essential to choose a reliable donor, follow proper hygiene, use an ovulation predictor kit, and seek medical advice.

  • The Importance of Timing in Home Insemination

    Blog Post:

    When it comes to trying to conceive, timing is everything. Many couples turn to home insemination as a way to start or expand their family, and while it may seem like a simple process, the timing of each step is crucial for success. In this blog post, we will discuss the importance of timing in home insemination and how it can impact your chances of getting pregnant.

    Timing is Key:

    The first and most important factor in home insemination is timing. Unlike natural conception, where sperm can live in the female reproductive system for up to five days, the window of opportunity for home insemination is much smaller. Sperm can only survive for 12-24 hours outside of the body, so it is crucial to time the insemination correctly for the sperm to have a chance at fertilizing an egg.

    Tracking Ovulation:

    One of the main reasons for timing in home insemination is to coincide with ovulation. Ovulation is the release of an egg from the ovaries, and it typically occurs around day 14 of a woman’s menstrual cycle. However, this can vary from person to person, and tracking ovulation is essential to determine the best time for insemination. There are various methods for tracking ovulation, such as using ovulation predictor kits, tracking cervical mucus, or monitoring basal body temperature. Whichever method you choose, it is crucial to track ovulation accurately to get the timing right for home insemination.

    Preparing the Sperm:

    Another essential aspect of timing in home insemination is preparing the sperm. If you are using donor sperm, you must time the arrival of the sperm correctly. Sperm should ideally be collected on the day of insemination and delivered to the home insemination site as soon as possible. If you are using frozen sperm, it is essential to thaw it according to the instructions and time it to be ready for insemination at the optimal moment. Properly preparing the sperm ensures that they are healthy and viable for fertilization.

    hand holding a syringe with a blue plunger against a solid blue background

    The Importance of Timing in Home Insemination

    Insemination Process:

    Once ovulation is tracked, and the sperm is prepared, it is time for the insemination process. The timing of the insemination is crucial, and it should be done within a few hours of ovulation. This timing allows for the sperm to reach the egg at the right time for fertilization. The process itself is relatively straightforward, and it involves using a syringe or a cervical cap to deposit the sperm near the cervix. It is essential to follow the instructions carefully and make sure that the sperm is placed as close to the cervix as possible for the best chance of success.

    Post-Insemination:

    After the insemination, the timing is still essential. It is recommended to stay lying down for at least 20-30 minutes to give the sperm enough time to swim towards the cervix. Some couples even choose to elevate the hips to help the sperm reach the cervix more easily. It is also essential to avoid any physical activity, such as exercise or intercourse, for at least 24 hours after insemination. This time allows the sperm to have the best chance of reaching the egg and fertilizing it.

    Possible Challenges:

    Despite careful planning and timing, there may still be challenges when it comes to home insemination. One of the most common challenges is not being able to determine the exact time of ovulation. In this case, it is beneficial to have regular intercourse during the predicted ovulation window to increase the chances of success. Another challenge may be the quality of the sperm. If the sperm is not of high quality, it may not survive long enough to fertilize the egg, even with perfect timing. In these situations, it may be beneficial to consult a fertility specialist for further guidance.

    In Summary:

    Timing is crucial in home insemination and can significantly impact the chances of success. From tracking ovulation to preparing the sperm and the actual insemination process, every step requires careful timing. It is essential to track ovulation accurately, prepare the sperm correctly, and perform the insemination within a few hours of ovulation. Post-insemination, it is crucial to give the sperm enough time to reach the egg and avoid any physical activity that may hinder the process. While there may be challenges, proper timing can greatly improve the chances of getting pregnant through home insemination.

    SEO Metadata:

  • Insemination Positions for Solo Women Doing Home Insemination

    Blog Post Title: “The Best Insemination Positions for Solo Women Doing Home Insemination”

    When it comes to home insemination, solo women have a unique set of challenges to navigate. From choosing the right donor to preparing for the insemination process, there are many factors to consider. One important aspect of successful home insemination is the position or positions used during the process. In this blog post, we will explore the best insemination positions for solo women doing home insemination, as well as tips for maximizing the chances of success.

    1. The Missionary Position
    The missionary position is a classic and versatile option for home insemination. To perform this position, the woman lies on her back with her knees bent and her feet flat on the bed or other surface. The donor then positions themselves between her legs, facing her, and inserts the syringe or other insemination device. This position allows for deep penetration and easy access to the cervix, making it a popular choice for home insemination.

    2. The Elevator Position
    The elevator position is a variation of the missionary position that can be particularly helpful for solo women doing home insemination. In this position, the woman elevates her hips by placing a pillow or two under her lower back. This slight elevation can help the sperm reach the cervix more easily and increase the chances of conception. It can also be more comfortable for the woman, as it takes the pressure off her lower back and allows for a more relaxed position.

    3. The Doggy Style Position
    The doggy style position is another popular choice for home insemination, as it allows for deep penetration and easy access to the cervix. In this position, the woman gets on her hands and knees, while the donor stands behind her. This position can also be performed on the edge of a bed or other surface, with the woman’s hips elevated for better access. It is important to ensure that the woman’s back is not arched too much, as this can make it more difficult for the sperm to reach the cervix.

    4. The Side-Lying Position
    For women who prefer a more relaxed and comfortable position, the side-lying position can be a great option for home insemination. In this position, the woman lies on her side with her legs slightly bent. The donor can then approach from behind and insert the insemination device. This position allows for deep penetration and easy access to the cervix, while also providing a more comfortable and relaxing position for the woman.

    Syringe kit containing various components for assisted baby feeding, including syringes and collection cups.

    Insemination Positions for Solo Women Doing Home Insemination

    5. The Inverted Position
    The inverted position is a popular choice for women who are using a syringe or other device to inseminate, rather than having intercourse. In this position, the woman lies on her back with her hips elevated and her legs up in the air, resting against a wall or headboard. The donor then inserts the syringe, and the sperm can flow down towards the cervix more easily. This position is particularly helpful for women who have a tilted uterus, as it allows the sperm to reach the cervix more easily.

    Tips for Successful Home Insemination

    1. Use a fertility-friendly lubricant
    When performing home insemination, it is important to use a fertility-friendly lubricant, as regular lubricants can harm sperm and reduce the chances of conception. Look for lubricants that are specifically designed for fertility or use alternatives such as pre-seed or canola oil.

    2. Time it right
    Timing is crucial when it comes to home insemination. If you are using an ovulation predictor kit, make sure to inseminate within 24 hours of a positive result. If you are tracking your ovulation through other methods, aim to inseminate within the 24-hour window of ovulation.

    3. Consider using an insemination kit
    Insemination kits can make the process of home insemination much easier and more effective. These kits typically include an insemination device, such as a syringe or cervical cap, as well as a fertility-friendly lubricant and ovulation predictor kit. They can save you time and effort in sourcing and preparing these items separately.

    4. Relax and stay positive
    Finally, it is important to remember that home insemination may not work on the first try. It is a process that requires patience and perseverance. Stay positive and relaxed during the process, and remember that it may take a few attempts before conception occurs.

    In conclusion, choosing the right position for home insemination is crucial for solo women. The missionary, elevator, doggy style, side-lying, and inverted positions are all popular and effective options. Additionally, using a fertility-friendly lubricant, timing the insemination correctly, and considering an insemination kit can all increase the chances of success. Remember to stay positive and patient during the process, and don’t be discouraged if it takes a few tries to achieve conception.

  • Insemination Positions for Optimal Sperm Delivery during Home Insemination

    Insemination is a method of fertilization where sperm is manually inserted into the reproductive tract of a female. While it is commonly associated with assisted reproductive technology, such as intrauterine insemination (IUI) or in vitro fertilization (IVF), it is also a viable option for couples looking to conceive at home. Home insemination is a simple and cost-effective method that involves the use of a syringe or a soft cup to deposit sperm into the vagina or cervix. However, for successful home insemination, it is crucial to consider the optimal positions for sperm delivery.

    In this blog post, we will discuss the various insemination positions that can increase the chances of sperm reaching the egg and help you achieve your goal of becoming a parent.

    1. Missionary Position:
    The most common position for intercourse, the missionary position, can also be used for home insemination. In this position, the woman lies on her back with her legs bent and the man on top. This position allows for deep penetration, which is essential for optimal sperm delivery. The sperm is able to travel a shorter distance to reach the cervix, increasing the chances of fertilization. Additionally, this position also allows for easy access to the cervix, making it easier to deposit the sperm directly into the cervical opening.

    2. Doggy Style:
    The doggy style position, where the woman is on all fours and the man enters from behind, can also be beneficial for home insemination. This position allows for deeper penetration and also allows for the sperm to be deposited closer to the cervix. Additionally, this position also allows the woman to tilt her pelvis upwards, which can help the sperm to travel towards the cervix more easily.

    3. Side-Lying Position:
    The side-lying position, where both partners lie on their sides facing each other, can also be used for home insemination. This position allows for deeper penetration and also allows for the woman to tilt her pelvis upwards, aiding in sperm delivery. It can also be a more comfortable position for some couples, as it puts less pressure on the woman’s back.

    4. Elevated Hips Position:
    For optimal sperm delivery, it is essential to elevate the hips during insemination. This can be achieved by placing a pillow or cushion under the woman’s hips, elevating them at least 3 inches above the rest of her body. This position allows for gravity to assist in the sperm’s journey towards the cervix, increasing the chances of fertilization.

    hand holding a syringe with a blue plunger against a solid blue background

    Insemination Positions for Optimal Sperm Delivery during Home Insemination

    5. Legs Up Position:
    Similar to the elevated hips position, the legs up position also helps in maximizing the effect of gravity. In this position, the woman lies on her back with her legs up in the air, either resting on the man’s shoulders or against a wall. This position allows for deeper penetration, and the sperm can travel a shorter distance to reach the cervix.

    6. Standing Position:
    While unconventional, the standing position can also be used for home insemination. In this position, the woman stands with her back against a wall, and the man enters from the front. This position allows for a different angle of penetration, and the sperm can travel towards the cervix more easily. It may be helpful to have a chair or stool nearby for the woman to rest her leg on to achieve a better angle.

    7. Sitting Position:
    Similar to the standing position, the sitting position can also be used for home insemination. In this position, the woman sits on the edge of a chair or bed with her legs spread, while the man stands in front of her. This position allows for deep penetration and also allows for the woman to tilt her pelvis upwards, aiding in sperm delivery.

    8. Reverse Cowgirl Position:
    The reverse cowgirl position can also be used for home insemination. In this position, the woman straddles the man while facing away from him. This position allows for deep penetration and also allows for the woman to control the angle and depth of penetration, which can be helpful for sperm delivery.

    When attempting home insemination, it is important to remember that timing is crucial. It is recommended to inseminate around the time of ovulation, as this is when the chances of fertilization are highest. Additionally, it is also important to ensure that the sperm is of good quality and has been stored and transported correctly.

    In conclusion, there are various insemination positions that can increase the chances of sperm reaching the egg during home insemination. It is important to experiment and find the position that works best for you and your partner. Additionally, combining these positions with proper timing and quality sperm can greatly improve your chances of successful home insemination.

  • Insemination Positions for Optimal Sperm Placement during Home Insemination

    Blog Post: Insemination Positions for Optimal Sperm Placement during Home Insemination

    Insemination, also known as artificial insemination, is a process where sperm is inserted into a woman’s reproductive tract in order to aid in fertilization and conception. This procedure can be done at a fertility clinic or at home, depending on personal preferences and circumstances. For couples who choose to do home insemination, it is important to know the best positions for optimal sperm placement in order to increase the chances of success. In this blog post, we will discuss the different insemination positions and how they can affect sperm placement during home insemination.

    Why is Sperm Placement Important?

    Sperm placement is crucial because it determines the sperm’s proximity to the cervix and the eggs. The closer the sperm is to the cervix, the higher the chances of successful fertilization. In order to understand the best positions for optimal sperm placement, it is important to know the anatomy of the female reproductive system.

    The female reproductive system consists of the vagina, cervix, uterus, and fallopian tubes. During ovulation, an egg is released from the ovaries and travels down the fallopian tubes. The sperm must travel through the cervix and into the uterus in order to reach the fallopian tubes and fertilize the egg. Therefore, the closer the sperm is to the cervix, the shorter the distance it has to travel and the higher the chances of successful fertilization.

    Insemination Positions for Optimal Sperm Placement

    1. Missionary Position

    The missionary position is the most common and popular position for home insemination. In this position, the woman lies on her back with her legs spread and the man on top of her. This position allows for deep penetration and direct contact between the sperm and the cervix, making it an ideal position for optimal sperm placement. However, some couples may find this position uncomfortable or awkward, and it may not be suitable for those with back problems or mobility issues.

    2. Elevating the Hips

    Elevating the hips during insemination is another effective way to ensure optimal sperm placement. This can be done in various ways, such as using pillows or placing a small towel under the woman’s hips. By elevating the hips, the cervix is tilted downward, allowing for easier access for the sperm. This position also allows gravity to assist in pulling the sperm towards the cervix, increasing the chances of successful fertilization.

    3. Doggy Style Position

    The doggy style position involves the woman being on her hands and knees, while the man enters from behind. This position allows for deep penetration and direct contact between the sperm and the cervix. Additionally, it allows for easy access to the cervix, making it an ideal position for optimal sperm placement. However, this position may not be suitable for all couples and can be uncomfortable for some women.

    Mosie Baby at-home insemination kit featuring a syringe and a container, presented in a decorative box.

    Insemination Positions for Optimal Sperm Placement during Home Insemination

    4. Side-Lying Position

    The side-lying position is a comfortable and relaxing position for home insemination. In this position, the woman lies on her side with her knees bent towards her chest. This position allows for easy access to the cervix and also allows for the sperm to stay inside the vagina for a longer period of time. This can increase the chances of successful fertilization.

    5. Using a Speculum

    Using a speculum is another way to ensure optimal sperm placement during home insemination. A speculum is a medical tool that is used to open up the vagina and give a clear view of the cervix. By using a speculum, the sperm can be directed towards the cervix, allowing for direct contact and increasing the chances of successful fertilization. However, using a speculum may require some practice and may not be suitable for all couples.

    Other Tips for Successful Home Insemination

    In addition to using the right insemination position, there are a few other tips that can increase the chances of successful home insemination. These include:

    1. Timing: It is important to time home insemination correctly, preferably around the time of ovulation. This increases the chances of the sperm meeting the egg and fertilizing it.

    2. Using a syringe or soft cup: Using a syringe or a soft cup can make the process of insemination easier and more comfortable. It also allows for better control and placement of the sperm.

    3. Staying relaxed: It is important for both partners to stay relaxed and comfortable during home insemination. Stress and tension can affect fertility and decrease the chances of success.

    4. Following proper hygiene: It is crucial to maintain proper hygiene during home insemination to avoid any infections. Both partners should wash their hands thoroughly before and after the procedure.

    In Summary

    Optimal sperm placement is crucial for successful home insemination. By using the right positions and following the tips mentioned above, couples can increase their chances of successful fertilization and conception. The missionary position, elevating the hips, doggy style position, side-lying position, and using a speculum are all effective ways to ensure optimal sperm placement. However, couples should also keep in mind that timing, using a syringe or soft cup, staying relaxed, and maintaining proper hygiene are also important factors for successful home insemination.

    In conclusion, home insemination can be a viable option for couples trying to conceive. By understanding the best positions for optimal sperm placement and following the tips mentioned in this blog post, couples can increase their chances of achieving their dream of starting a family.

  • Creative Ways to Optimize Home Insemination

    Blog Post: Creative Ways to Optimize Home Insemination

    When it comes to starting a family, not everyone has the luxury or access to assisted reproductive technology. This is where home insemination comes into play. Home insemination refers to the process of using a donor’s sperm to fertilize an egg at home, without the involvement of a doctor or clinic. While it may seem like a simple process, there are certain steps and techniques you can use to optimize your chances of success. In this blog post, we will explore some creative ways to optimize home insemination.

    1. Timing is Key
    One of the most important factors for successful home insemination is timing. It’s essential to track your menstrual cycle and know when you are ovulating. This is the best time to inseminate, as it increases the chances of fertilization. You can use ovulation predictor kits or track your basal body temperature to determine when you are ovulating. It’s also important to inseminate within 12-24 hours after ovulation, as the egg only survives for a short period of time.

    2. Prepare the Environment
    Creating the right environment for insemination is crucial. It’s best to have a calm and relaxing atmosphere to reduce stress and increase the chances of success. You can play soft music, light some candles, and dim the lights to set the mood. It’s also important to make sure the room is warm, as colder temperatures can affect sperm motility. Additionally, using a water-based lubricant can also help create a more comfortable environment for the sperm.

    3. Use the Right Tools
    Having the right tools for home insemination can make all the difference. The most commonly used method for home insemination is using a turkey baster or syringe. However, there are more specialized tools available, such as at-home insemination kits. These kits include a speculum, which helps to place the sperm closer to the cervix, increasing the chances of success. They also come with a collection cup, syringe, and a step-by-step guide, making the process more convenient and efficient.

    two teal syringes lying on a white background, designed for at-home insemination use

    Creative Ways to Optimize Home Insemination

    4. Consider Different Positions
    When it comes to insemination, the position you use can also play a role in success. The missionary position is the most common and recommended position for home insemination, as it allows for deeper penetration. However, some experts suggest trying other positions, such as the doggy style or lying on your stomach with a pillow under your hips. These positions can help the sperm reach the cervix more easily, increasing the chances of fertilization.

    5. Focus on Sperm Quality
    The quality of the sperm used for insemination is crucial for success. It’s important to make sure the donor has a healthy lifestyle and has undergone proper screening for any genetic or sexually transmitted diseases. Additionally, it’s recommended to use fresh sperm for insemination, rather than frozen, as frozen sperm may have a lower chance of survival. You can also consider using sperm-friendly lubricants, such as Pre-Seed, to help sperm reach the egg more easily.

    6. Stay Positive
    Home insemination can be a stressful and emotionally taxing process, but it’s important to stay positive and have a supportive partner or friend by your side. Stress can affect hormone levels, making it more difficult to conceive. So, try to stay relaxed and keep a positive mindset throughout the process. You can also consider using relaxation techniques, such as meditation or yoga, to help reduce stress.

    7. Track and Monitor
    Tracking and monitoring your progress can also help optimize home insemination. You can keep a record of your menstrual cycles, ovulation dates, and the timing of insemination. This will help you determine the best time for insemination and track your progress. You can also use fertility tracking apps or calendars to make it easier to keep track of everything.

    In summary, optimizing home insemination involves careful planning and preparation. It’s important to track your menstrual cycle, create a calming environment, use the right tools, try different positions, focus on sperm quality, stay positive, and track your progress. By following these creative ways to optimize home insemination, you can increase your chances of success and start your journey towards parenthood.

  • The Importance of Communication in Home Insemination

    Blog post:

    Communication is a vital aspect of any relationship, and this is especially true when it comes to home insemination. Whether you are a couple trying to conceive or a single individual looking to start a family, clear and effective communication is crucial for a successful home insemination process. In this blog post, we will discuss the importance of communication in home insemination and how it can contribute to a positive and successful experience.

    First and foremost, communication is necessary to ensure that both parties involved are on the same page. When it comes to home insemination, there are many factors to consider and discuss, such as timing, fertility, and personal preferences. It is essential to have open and honest communication about these matters to avoid any misunderstandings or conflicts. For couples, this means discussing their goals and expectations for the process, as well as any concerns or fears they may have. For single individuals, this could involve discussing their decision to pursue home insemination, their support system, and their plans for raising a child. By having these conversations beforehand, both parties can feel more confident and prepared for the insemination process.

    Furthermore, communication is vital when it comes to making decisions about the home insemination process. There are various methods and techniques for home insemination, and it is crucial to discuss and agree upon the one that is best for you and your partner or donor. This could include deciding between artificial insemination or natural insemination, choosing a sperm donor, or discussing any medical procedures or tests that may be necessary. It is also essential to communicate about any potential risks or complications that may arise during the process and how to handle them. Having these discussions can help alleviate any anxiety or uncertainty and ensure that everyone is comfortable and informed about the decisions being made.

    Moreover, communication is essential during the actual insemination process as well. This includes discussing and agreeing upon a schedule, as timing is crucial for successful insemination. It is also vital to communicate about any changes or issues that may arise during the process, such as changes in fertility or unexpected delays. By keeping each other informed and involved, both parties can feel more in control and supported throughout the process.

    instructions and warnings for using the Mosie Baby at-home insemination kit

    The Importance of Communication in Home Insemination

    In addition to the practical aspects of home insemination, communication is also crucial for emotional support. Trying to conceive can be a rollercoaster of emotions, and it is essential to have open and honest communication about these feelings with your partner or donor. This includes discussing any fears, doubts, or anxieties that may arise and finding ways to support each other through these emotions. It is also crucial to communicate about your expectations for the future and how you envision your family dynamic. By having these conversations, you can strengthen your bond and ensure that you are both on the same page emotionally.

    Communication is also necessary when it comes to involving others in the home insemination process. This could include discussing the decision to pursue home insemination with friends and family, as well as involving them in the process. For couples, this could mean discussing the role of each partner’s family in the child’s life, while for single individuals, this could involve finding a support system of friends and family to help during the insemination process and raising a child. Having open and honest communication about these matters can help avoid any conflicts or misunderstandings in the future.

    Finally, communication is crucial for the overall success of the home insemination process. By maintaining clear and effective communication throughout the process, both parties can feel supported and in control. This can lead to a more positive experience and increase the chances of a successful insemination. Additionally, communication can strengthen the relationship between partners or donors, creating a solid foundation for co-parenting or future family dynamics.

    In conclusion, communication is a crucial aspect of home insemination that should not be overlooked. It is necessary for discussing expectations, making decisions, providing emotional support, and involving others in the process. By maintaining open and honest communication, both parties can feel more confident and supported throughout the home insemination journey, leading to a positive and successful experience.

    Summary:

    Communication is essential in the home insemination process, whether you are a couple or a single individual. It is necessary to ensure that both parties are on the same page, make decisions, and provide emotional support. Communication is also crucial in involving others in the process and can contribute to a more positive and successful experience overall.