Tag: DIY

  • DIY Home Insemination: Overcoming Obstacles and Challenges

    DIY Home Insemination: Overcoming Obstacles and Challenges

    For many couples and individuals, the dream of starting a family is a deeply personal and important one. However, for those who struggle with fertility issues or those in the LGBTQ+ community, traditional methods of conception may not be an option. This is where DIY home insemination comes into play. With advancements in technology and a growing acceptance of non-traditional family structures, more and more people are turning to DIY home insemination as a way to overcome obstacles and challenges on their journey to parenthood.

    What is DIY Home Insemination?

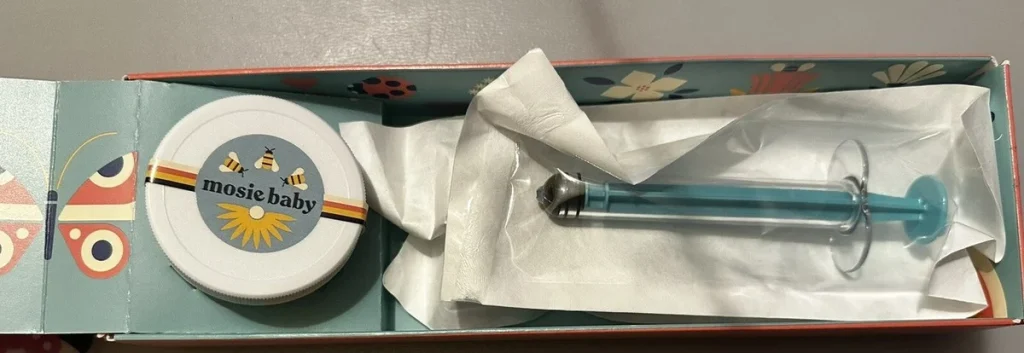
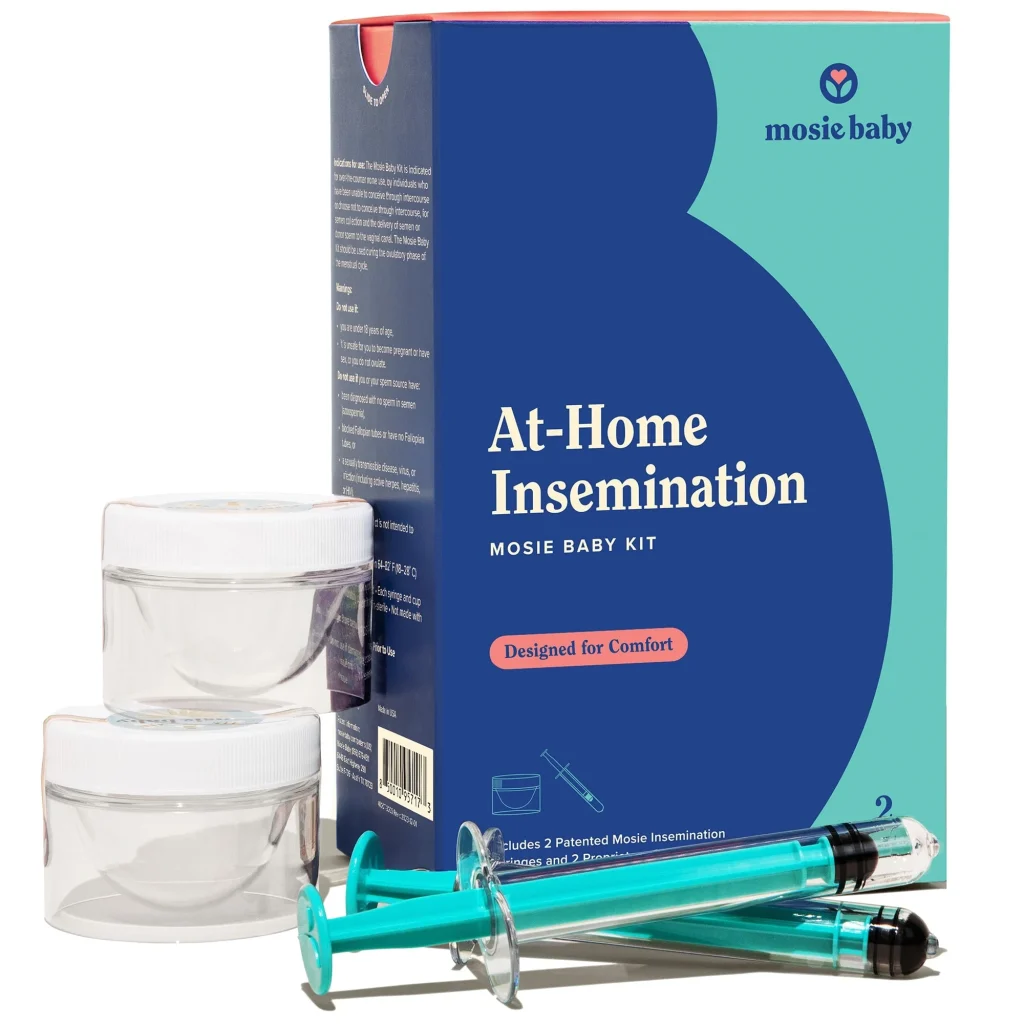
    DIY home insemination, also known as artificial insemination at home, is a method of conception where sperm is inserted into the vagina or cervix without medical intervention. This can be done using a variety of techniques, including using a needleless syringe, a cervical cap, or a menstrual cup. The goal is to place the sperm as close to the cervix as possible to increase the chances of fertilization.

    Why Choose DIY Home Insemination?

    There are many reasons why someone may choose DIY home insemination over traditional methods of conception. For some, it may be due to financial constraints, as the cost of fertility treatments and medical procedures can be prohibitively expensive. Others may choose DIY home insemination for privacy reasons, as the process can be done in the comfort and privacy of one’s own home. Additionally, DIY home insemination allows for more control over the process, as individuals can choose their own sperm donor and timing of insemination.

    Overcoming Obstacles and Challenges

    While DIY home insemination may offer a more accessible and private option for conception, it is not without its obstacles and challenges. One of the main obstacles is obtaining sperm from a donor. For heterosexual couples, this may involve finding a willing and trustworthy sperm donor, while for same-sex couples or individuals, it may involve purchasing donor sperm from a sperm bank. In either case, it can be a difficult and emotional process to find the right donor.

    Hands holding a syringe and a small container against a blue background.

    DIY Home Insemination: Overcoming Obstacles and Challenges

    Another challenge is the preparation and timing of insemination. Unlike traditional methods of conception where timing is closely monitored by medical professionals, DIY home insemination requires individuals to track their ovulation and time the insemination accordingly. This can be a stressful and time-consuming process, but proper timing is crucial for successful conception.

    Safety and Sterility

    One of the biggest concerns with DIY home insemination is safety and sterility. Unlike medical procedures that take place in a sterile environment, home insemination carries a higher risk of infection if proper precautions are not taken. It is essential to make sure that all equipment used is clean and sterile to avoid any potential complications.

    Additionally, it is crucial to ensure that the sperm used is from a healthy and screened donor to avoid any potential health risks. This is where purchasing donor sperm from a reputable sperm bank can offer peace of mind, as they thoroughly screen and test all donors before making their sperm available for purchase.

    The Emotional Journey

    Aside from the physical challenges of DIY home insemination, the emotional journey can also be a challenging aspect. Conception can be a rollercoaster of emotions, and the process of DIY home insemination can amplify those emotions. The waiting game between insemination and finding out if it was successful can be an emotional rollercoaster, and the disappointment that comes with negative results can be difficult to handle.

    Furthermore, for those who are using DIY home insemination as a means of starting a family, there may be societal and personal challenges that come with non-traditional family structures. It is essential to have a strong support system in place to help navigate these challenges and provide emotional support throughout the journey.

    In conclusion, DIY home insemination can be a viable option for couples and individuals looking to start a family. It offers a more accessible, private, and controlled method of conception, but it is not without its obstacles and challenges. From finding a donor to timing insemination and dealing with the emotional journey, DIY home insemination requires careful consideration and preparation. However, with the right resources and support, individuals and couples can overcome these obstacles and achieve their dream of parenthood through DIY home insemination.

    SEO metadata:

  • DIY Home Insemination for Single Women: Empowering Yourself

    DIY Home Insemination for Single Women: Empowering Yourself

    As society continues to evolve and become more accepting of different lifestyles and choices, single women are increasingly choosing to become mothers without a partner. This can be a daunting decision, but with advancements in technology and the availability of resources, it is now possible for single women to conceive a child through DIY home insemination. This method not only empowers women to take control of their reproductive choices, but it also offers a more affordable and private option compared to traditional fertility treatments. In this blog post, we will explore the process of DIY home insemination for single women and how it can be a powerful tool for self-empowerment.

    Why Choose DIY Home Insemination?

    For single women, choosing to become a mother through DIY home insemination can be a liberating and empowering decision. Unlike traditional fertility treatments, which can be expensive and involve multiple medical procedures, home insemination allows women to take charge of their own fertility journey. It also offers a more intimate and private experience, as it can be done in the comfort of one’s own home without the involvement of a medical professional.

    DIY home insemination also offers a more affordable option for single women who may not have the financial means to pursue traditional fertility treatments. With a DIY approach, women can avoid costly medical procedures and instead purchase the necessary supplies at a fraction of the cost. This can be especially beneficial for those who do not have insurance coverage for fertility treatments.

    Preparing for DIY Home Insemination

    Before embarking on the journey of DIY home insemination, it is important for single women to prepare both physically and mentally. The first step is to track ovulation using ovulation predictor kits, basal body temperature charts, or fertility apps. This will help determine the most fertile window for insemination.

    Next, it is crucial to educate oneself about the process of insemination and gather all necessary supplies. The most commonly used method of home insemination is the syringe method, which involves using a sterile syringe to insert sperm into the vagina. Other supplies that may be needed include ovulation kits, sperm-friendly lubricant, and a menstrual cup to aid in holding the sperm in place.

    Finding a Donor

    One of the most important aspects of DIY home insemination is finding a sperm donor. There are a few options available for single women, including known donors (such as a friend or family member), anonymous donors from sperm banks, or co-parenting arrangements with another single person or couple. It is important for women to carefully consider their options and choose a donor who aligns with their values and preferences.

    Mosie Baby at-home insemination kit featuring a syringe and a container, presented in a decorative box.

    DIY Home Insemination for Single Women: Empowering Yourself

    For those who choose to use a sperm bank, it is essential to do thorough research and choose a reputable and accredited institution. This will ensure the quality and safety of the sperm being used for insemination.

    The Insemination Process

    Once everything is in place, it is time to begin the insemination process. This can be done at home, in a private and comfortable environment. It is important to follow the instructions carefully and maintain a sterile environment to avoid any risk of infection.

    After collecting the sperm, it can be inserted into the vagina using a sterile syringe. It is recommended to use a menstrual cup or lie down for at least 20-30 minutes after insemination to help keep the sperm in place and increase the chances of conception.

    The wait for the pregnancy test can be an anxious one, but it is important to remain patient and not get discouraged if the first attempt is unsuccessful. Many women have successfully conceived through DIY home insemination, and it may take a few attempts before achieving a positive result.

    Empowering Yourself through DIY Home Insemination

    Choosing to become a mother through DIY home insemination is a powerful act of self-empowerment for single women. It allows them to take control of their own reproductive choices and fulfill their desire to become a parent without the need for a partner. It also offers a more affordable and private option compared to traditional fertility treatments.

    Through the process of DIY home insemination, women can also learn more about their own bodies and reproductive health. Tracking ovulation and understanding the process of insemination can provide valuable knowledge and help women feel more in tune with their bodies.

    Furthermore, becoming a mother through DIY home insemination can also challenge societal norms and stereotypes surrounding motherhood. It proves that women do not need a partner to create a family and can be independent and self-sufficient in their journey to motherhood.

    In conclusion, DIY home insemination is a powerful tool for single women to take control of their reproductive choices and empower themselves. It offers a more affordable and private option for conception, and allows women to challenge societal norms and stereotypes. With careful preparation and determination, single women can successfully become mothers through DIY home insemination and embrace their journey to motherhood with confidence and empowerment.

  • How to Prepare for DIY Home Insemination

    Blog Post: How to Prepare for DIY Home Insemination

    In recent years, the concept of DIY home insemination has gained popularity among couples and individuals who are trying to conceive. This method involves using at-home insemination kits or donor sperm to facilitate pregnancy without medical intervention. While it may seem like a simple and cost-effective option, there are several important factors to consider and steps to take in order to prepare for a successful DIY home insemination. In this blog post, we will discuss everything you need to know about preparing for DIY home insemination.

    Step 1: Understand the Risks and Benefits

    Before embarking on the journey of DIY home insemination, it is crucial to understand both the risks and benefits associated with this method. On the positive side, it is a more affordable option compared to clinical insemination or in-vitro fertilization (IVF). It also allows for more control and privacy for those who may not be comfortable with medical procedures. However, there are also potential risks such as the lack of medical supervision and potential legal implications if the donor is not properly screened. It is important to carefully weigh these factors and make an informed decision before proceeding with DIY home insemination.

    Step 2: Choose the Right Donor

    Choosing the right sperm donor is a crucial step in the process of DIY home insemination. It is important to consider factors such as genetic health, medical history, and physical traits of the donor. There are several options for obtaining donor sperm, including purchasing from a sperm bank, using a known donor, or finding a donor through online forums or social media groups. It is important to thoroughly research and screen potential donors to ensure the best possible outcome.

    Step 3: Determine the Timing

    Timing is a crucial aspect of home insemination as it increases the chances of conception. Ovulation tracking and monitoring cervical mucus can help determine the most fertile days of the menstrual cycle. It is recommended to inseminate a day or two before ovulation or on the day of ovulation for the best chances of success. It is also important to have the necessary supplies and equipment ready for the insemination process.

    hands holding a teal syringe and a clear container against a blue background

    How to Prepare for DIY Home Insemination

    Step 4: Prepare the Insemination Kit

    There are various at-home insemination kits available in the market, or one can also create a DIY kit with essential items. The kit should include a sterile syringe or insemination cup, sperm-friendly lubricant, and ovulation predictor kits. It is important to read the instructions carefully and have all the necessary items ready before the insemination process.

    Step 5: Create a Comfortable and Sanitary Environment

    Creating a comfortable and sanitary environment is crucial for successful home insemination. The insemination process should take place in a clean and private space. It is recommended to take a shower before the insemination to ensure cleanliness. Additionally, it is important to stay relaxed and stress-free during the process, as stress can affect fertility.

    Step 6: Follow the Insemination Procedure

    The actual insemination process involves placing the sperm into the vagina as close to the cervix as possible. This can be done using a sterile syringe or an insemination cup. It is important to follow the instructions provided with the kit or consult a healthcare professional for proper guidance. After insemination, it is recommended to lie down for 15-30 minutes to allow the sperm to travel towards the cervix.

    Step 7: Take Care of Yourself

    After the insemination, it is important to take care of yourself both physically and emotionally. It may take multiple attempts before achieving a successful pregnancy, so it is important to stay positive and not get discouraged. Engage in self-care activities, eat a healthy diet, and get enough rest to support overall health and well-being.

    In summary, preparing for DIY home insemination involves understanding the risks and benefits, choosing the right donor, determining the timing, preparing the insemination kit, creating a comfortable and sanitary environment, following the insemination procedure, and taking care of oneself. It is important to thoroughly research and prepare for this process to increase the chances of success. Remember to stay positive, patient, and seek professional guidance if needed.

  • DIY Home Insemination: Myths vs. Facts

    Blog Post Title: DIY Home Insemination: Myths vs. Facts

    DIY home insemination is a topic that is often met with a mix of curiosity and skepticism. While the idea of conceiving a child at home may seem appealing to some, there are also many myths and misconceptions surrounding the process. In this blog post, we will explore some of the most common myths about DIY home insemination and provide factual information to help clear up any misunderstandings.

    Myth #1: DIY home insemination is only for same-sex couples or single women.

    Fact: While DIY home insemination is a popular option for same-sex couples and single women who want to conceive, it is not exclusive to them. Many heterosexual couples also choose to use this method for various reasons, such as fertility issues or privacy concerns. DIY home insemination is a viable option for any couple or individual who wants to conceive a child.

    Myth #2: DIY home insemination is unsafe and can lead to health risks.

    Fact: This myth stems from the belief that DIY home insemination involves using unsanitary or unsterilized equipment. However, with proper precautions and following the necessary steps, DIY home insemination can be just as safe as any medical procedure. It is crucial to use sterile equipment, follow the correct procedures, and maintain proper hygiene to reduce the risk of infection or other health issues.

    Myth #3: DIY home insemination is not as effective as medical procedures.

    Fact: While it is true that DIY home insemination may not have the same success rate as medical procedures, it can still be an effective method for conception. Studies have shown that DIY home insemination can have a success rate of up to 80% when done correctly. It is essential to understand that the success rate may vary depending on various factors, such as fertility levels and timing.

    Myth #4: DIY home insemination is complicated and requires medical knowledge.

    illustration comparing standard and Mosie syringe openings with text highlighting design benefits

    DIY Home Insemination: Myths vs. Facts

    Fact: With the internet and various resources available, DIY home insemination is no longer as complicated as it may seem. There are many step-by-step guides and instructional videos that can help individuals or couples understand the process and perform it correctly. Additionally, there are also at-home insemination kits available that come with all the necessary equipment and instructions, making the process even more accessible.

    Myth #5: DIY home insemination is illegal.

    Fact: This is a common misconception, as DIY home insemination is legal in most countries. However, it is crucial to check the laws and regulations in your specific region before proceeding with the process. It is also essential to note that the laws may differ for same-sex couples or single individuals, so it is best to do thorough research beforehand.

    Myth #6: DIY home insemination is a cheaper alternative to medical procedures.

    Fact: While DIY home insemination may be more affordable than medical procedures, it is essential to consider all the costs involved. There may be expenses for purchasing equipment, fertility testing, and ovulation kits, among others. It is crucial to weigh the cost against the success rate and potential risks to determine if DIY home insemination is the right option for you.

    Myth #7: DIY home insemination guarantees pregnancy.

    Fact: Just like any other method of conception, DIY home insemination does not guarantee pregnancy. There are various factors that can affect the success rate, such as fertility levels, timing, and health conditions. It is essential to understand that conception is not always immediate, and it may take several tries before achieving a successful pregnancy.

    Myth #8: DIY home insemination is only for individuals or couples who cannot conceive naturally.

    Fact: While this may be true for some, there are also many individuals and couples who choose DIY home insemination as their preferred method of conception. Some may have privacy concerns, while others may prefer a more intimate and personal experience. DIY home insemination is a valid option for anyone who wants to conceive, regardless of their ability to conceive naturally.

    In summary, DIY home insemination is a viable option for individuals and couples who want to conceive a child. Despite the myths and misconceptions surrounding it, it can be a safe and effective method when done correctly. It is crucial to do thorough research, follow the necessary steps, and consult with a doctor if needed to ensure a successful and healthy conception.

  • The Benefits of Choosing DIY Home Insemination

    Blog Post: The Benefits of Choosing DIY Home Insemination

    In recent years, more and more couples and individuals have turned to DIY home insemination as a way to start or expand their families. While some may view this method as unconventional or risky, there are actually many benefits to choosing this option. In this blog post, we will explore the various advantages of DIY home insemination and why it may be the right choice for you.

    1. Cost-Effective

    One of the biggest benefits of DIY home insemination is the cost-effectiveness. Traditional methods of insemination, such as intrauterine insemination (IUI) or in vitro fertilization (IVF), can cost thousands of dollars and may not be covered by insurance. On the other hand, DIY home insemination is a much more affordable option, with most supplies costing less than $100. This makes it a viable choice for those who may not have the financial means for more expensive fertility treatments.

    2. Increased Privacy and Control

    Another advantage of DIY home insemination is the privacy and control it offers. Many people feel uncomfortable with the idea of a doctor or medical professional being involved in such an intimate process. With DIY home insemination, you have complete control over the process and can choose to do it in the comfort and privacy of your own home. This can be especially beneficial for those who may have experienced trauma or anxiety related to medical procedures.

    3. Flexibility in Timing

    When undergoing traditional fertility treatments, you are often limited by the timing of appointments and procedures. However, with DIY home insemination, you have the flexibility to choose when to inseminate based on your ovulation cycle. This can be a huge advantage for those with irregular cycles or those who may have difficulty scheduling appointments due to work or other commitments.

    hands holding a syringe and container with text promoting Mosie Baby's support for pregnancy assistance

    The Benefits of Choosing DIY Home Insemination

    4. Less Invasive

    Compared to other fertility treatments, DIY home insemination is a much less invasive option. In traditional methods, a catheter is inserted into the uterus, which can be uncomfortable for some individuals. DIY home insemination involves a simple process of using a syringe or soft cup to deposit the sperm near the cervix. This can be a more comfortable and less daunting experience for those who may have a fear of medical procedures.

    5. Increased Connection with Partner

    DIY home insemination can also be a great way for couples to bond and feel more connected during the conception process. Unlike traditional methods, where the sperm is collected and inserted by a medical professional, DIY home insemination allows both partners to be involved in the process. This can bring a sense of intimacy and strengthening of the relationship, as both parties are actively working towards the same goal.

    6. Option for LGBTQ+ Couples and Single Parents

    Another significant benefit of DIY home insemination is that it is an accessible option for LGBTQ+ couples and single parents. Many fertility clinics may have restrictions or barriers for these individuals, making it difficult for them to pursue traditional methods. DIY home insemination offers a more inclusive and welcoming approach to starting a family, allowing individuals and couples from all backgrounds to have a chance at parenthood.

    7. Reduced Risk of Multiple Births

    One of the risks associated with traditional fertility treatments is the possibility of multiple births. While this may be a desired outcome for some, for others, it can be overwhelming and pose health risks to both the mother and babies. DIY home insemination reduces this risk, as you have more control over the amount of sperm being used and the timing of insemination, reducing the chances of multiple eggs being fertilized.

    In summary, DIY home insemination offers a cost-effective, private, and flexible option for those looking to start or expand their families. It is a less invasive and more intimate experience, with the potential to strengthen the bond between partners. It is also a more inclusive option for LGBTQ+ couples and single parents, and reduces the risk of multiple births. While it may not be the right choice for everyone, it is certainly worth considering for those looking for a more natural and personalized approach to conception.

  • Breaking Down the Science of DIY Home Insemination

    Breaking Down the Science of DIY Home Insemination

    DIY home insemination is a popular alternative for couples or individuals who are struggling with fertility issues or wish to become parents without the help of a medical professional. This method involves using at-home tools and techniques to introduce sperm into the female reproductive system for the purpose of fertilization. While it may seem like a simple and cost-effective solution, there is actually a lot of science behind DIY home insemination. In this blog post, we will break down the science behind this process and discuss its effectiveness, safety, and success rates.

    Understanding the Basics of Home Insemination

    Before diving into the science of DIY home insemination, it is important to understand the basics of the process. Home insemination involves the introduction of sperm into the cervix or uterus in order to increase the chances of fertilization. This can be done using a variety of methods, such as using a syringe, cervical cap, or soft cup. The key is to place the sperm as close to the cervix as possible, as this is where the sperm needs to travel in order to reach the egg.

    The Science Behind Sperm Survival and Movement

    One of the most crucial aspects of home insemination is understanding the science behind sperm survival and movement. Sperm are delicate cells that need to be protected and nourished in order to reach the egg. The female reproductive system is designed to support this process by providing a safe and nourishing environment for sperm to survive and travel. This includes the cervical mucus, which helps to protect and nourish sperm as they make their way towards the egg.

    Factors Affecting Sperm Survival and Movement

    There are several factors that can affect the survival and movement of sperm during home insemination. These include the quality and quantity of sperm, the timing of ovulation, and the health and fertility of the female reproductive system. It is important to take these factors into consideration when attempting DIY home insemination, as they can greatly impact the success of the process.

    Sperm Quality and Quantity

    The quality and quantity of sperm can greatly affect the success of home insemination. Sperm need to be healthy and numerous in order to increase the chances of fertilization. Factors that can affect sperm quality and quantity include age, lifestyle choices, and certain medical conditions. It is important to address any issues with sperm quality or quantity before attempting home insemination, as it can greatly impact the success of the process.

    At-home insemination kit packaging featuring syringes and collection cups, labeled for comfort and ease of use.

    Breaking Down the Science of DIY Home Insemination

    Timing of Ovulation

    Timing is crucial when it comes to home insemination. In order for the process to be successful, the sperm needs to be introduced into the female reproductive system during the woman’s fertile window. This is the time frame during which the egg is available for fertilization. Tracking ovulation is key to determining the best time for home insemination and increasing the chances of success.

    Female Reproductive Health and Fertility

    The health and fertility of the female reproductive system can also play a significant role in the success of home insemination. Factors such as blocked fallopian tubes, hormonal imbalances, and endometriosis can make it difficult for the sperm to reach the egg and achieve fertilization. It is important for individuals attempting home insemination to address any potential reproductive health issues before attempting the process.

    Effectiveness and Success Rates of DIY Home Insemination

    There is limited research on the effectiveness and success rates of DIY home insemination, as it is a relatively new method. However, many individuals and couples have reported successful pregnancies from home insemination. The key to increasing the chances of success is to carefully follow the proper techniques, track ovulation, and address any potential fertility issues beforehand.

    Safety Considerations for DIY Home Insemination

    While many people have successfully used DIY home insemination to conceive, it is important to consider the safety of the process. The use of proper tools and techniques is crucial to avoid any potential harm or infection. It is also important to use sterile equipment and to properly clean and disinfect any tools used during the process. In addition, it is recommended to have regular check-ups with a medical professional to ensure the health and safety of both the mother and baby during the pregnancy.

    In conclusion, DIY home insemination is a popular alternative for individuals and couples looking to conceive without the help of a medical professional. However, it is important to understand the science behind the process and to take into consideration factors such as sperm quality, timing of ovulation, and female reproductive health and fertility. While success rates may vary, with proper techniques and precautions, DIY home insemination can be a safe and effective method for achieving pregnancy.

    Summary:

    DIY home insemination is a popular alternative for individuals and couples struggling with fertility issues or wishing to become parents without medical assistance. This process involves introducing sperm into the female reproductive system using at-home tools and techniques. The science behind DIY home insemination includes understanding sperm survival and movement, as well as factors that can affect its success, such as sperm quality and quantity, timing of ovulation, and female reproductive health and fertility. While success rates may vary, with proper techniques and precautions, DIY home insemination can be a safe and effective method for achieving pregnancy.

  • The Dos and Don’ts of DIY Home Insemination

    Blog Post: The Dos and Don’ts of DIY Home Insemination

    In recent years, DIY home insemination has become a popular option for individuals and couples looking to start a family. It allows them to bypass the high costs and waiting times of traditional fertility treatments and gives them more control over the process. However, while DIY home insemination may seem like a simple and convenient solution, there are certain dos and don’ts that need to be considered to ensure a safe and successful experience. In this blog post, we will discuss the key dos and don’ts of DIY home insemination.

    DO: Understand the Risks and Limitations

    Before embarking on DIY home insemination, it is important to understand the potential risks and limitations involved. DIY home insemination is not as effective as fertility treatments performed by medical professionals, and there is a higher chance of unsuccessful attempts or complications. It is crucial to consult with a healthcare provider and fully understand the risks and limitations before proceeding.

    DON’T: Use Unreliable or Unsafe Methods

    One of the biggest mistakes people make when attempting DIY home insemination is using unreliable or unsafe methods. This includes using homemade insemination devices or using unsterilized equipment. These methods can increase the risk of infection and decrease the chances of success. It is important to invest in high-quality, sterile insemination devices and follow proper hygiene practices to ensure a safe and successful insemination.

    DO: Track Your Ovulation Cycle

    Timing is crucial when it comes to home insemination. Unlike traditional fertility treatments, DIY home insemination does not involve monitoring by medical professionals. Therefore, it is important to track your ovulation cycle carefully. This can be done through tracking your basal body temperature, cervical mucus, or using ovulation predictor kits. Knowing when you are ovulating will increase the chances of success and reduce the number of attempts needed.

    DON’T: Use Unscreened Donors

    Using a donor who has not been properly screened for health and genetic conditions can pose serious risks to both the donor and the recipient. It is essential to use a trusted donor who has undergone proper medical and genetic screening. This will not only ensure the health and safety of all parties involved but also increase the chances of a successful insemination.

    Mosie Baby Kit with syringe and container, highlighting safety and usability features on a blue background.

    The Dos and Don'ts of DIY Home Insemination

    DO: Create a Comfortable Environment

    Creating a comfortable and stress-free environment is key to a successful DIY home insemination. This includes choosing a quiet and private location, playing soothing music, and using relaxation techniques before and during the insemination. Stress and anxiety can negatively affect fertility, so it is important to create a calm and comfortable atmosphere for the best chances of success.

    DON’T: Neglect Proper Communication with Your Partner

    DIY home insemination involves a lot of communication between partners. It is crucial to have open and honest discussions about the process, expectations, and concerns. It is also important to keep each other updated on the progress and to provide support and understanding throughout the journey. Neglecting proper communication with your partner can lead to misunderstandings and added stress, which can hinder the success of DIY home insemination.

    DO: Consider Seeking Professional Help

    While DIY home insemination can be a viable option for some, it is not suitable for everyone. It is important to consider seeking professional help if you have been unsuccessful after several attempts, have underlying medical conditions, or have concerns about the process. Fertility specialists can provide valuable insights and guidance to ensure the best chances of success.

    DON’T: Overlook Legal Considerations

    When using a donor for DIY home insemination, it is important to consider the legal implications. In some countries, the donor may have parental rights, and it is crucial to have a legal agreement in place to protect all parties involved. It is advisable to seek legal advice before proceeding with DIY home insemination to ensure all legal considerations are addressed.

    Summary:

    DIY home insemination can be a convenient and cost-effective option for starting a family, but it is important to understand the risks and limitations involved. It is crucial to use safe and reliable methods, track your ovulation cycle, and communicate openly with your partner. Seeking professional help and considering legal implications are also important factors to consider for a successful DIY home insemination experience.

  • Budget-Friendly DIY Home Insemination Techniques

    Blog Post Title: Budget-Friendly DIY Home Insemination Techniques: A Comprehensive Guide

    Summary:

    In recent years, more and more couples and individuals have turned to home insemination as a way to conceive a child. This method involves using readily available materials to inseminate at home, rather than going through expensive medical procedures. While home insemination may not be suitable for everyone, it can be a budget-friendly and convenient option for those who are unable to conceive through traditional means. In this blog post, we will discuss various budget-friendly DIY home insemination techniques, along with tips and precautions to ensure a safe and successful experience.

    First, it is important to understand the basics of home insemination. It involves placing sperm directly into the cervix or vagina during ovulation, allowing the sperm to travel to the fallopian tubes and fertilize an egg. This can be done with the help of a partner or through self-insemination. The success rate of home insemination varies, but with proper techniques and timing, it can be as high as 15-20%.

    One of the most popular DIY home insemination techniques is the “turkey baster” or syringe method. This involves using a sterile syringe, without a needle, to insert sperm into the vagina or cervix. It is important to make sure the syringe is sterile to avoid any risk of infection. This method can be done with a partner or can be self-inseminated using a mirror and a comfortable position.

    Another option is the cervical cap method, which involves using a cervical cap (a small silicone cup) to hold the sperm near the cervix for a longer period of time. This method is more effective than the syringe method as it allows the sperm to stay in the body for a longer duration, increasing the chances of conception. Cervical caps can be purchased online or at a pharmacy and are reusable, making them a cost-effective option in the long run.

    at-home insemination kit by Mosie Baby, featuring syringes and storage containers for comfort and convenience.

    Budget-Friendly DIY Home Insemination Techniques

    For those who prefer a more natural approach, the “soft cup” method can be used. This involves using a menstrual cup, which is a flexible cup used to collect menstrual fluid, to hold the sperm close to the cervix for several hours. This method has a success rate of around 30%, making it a popular choice for DIY home insemination.

    In addition to these methods, there are a few key tips to keep in mind for a successful home insemination experience. Firstly, it is important to track ovulation carefully using methods such as ovulation predictor kits or basal body temperature charting. This will help determine the most fertile days for insemination. Secondly, the sperm used for insemination should be fresh and high-quality. It is recommended to use sperm from a known donor or a reputable sperm bank.

    It is also crucial to maintain proper hygiene and sterilization during the insemination process. This includes washing hands, using sterile equipment, and avoiding any contamination. It is also recommended to stay in a lying position for at least 15-20 minutes after insemination to give the sperm enough time to travel to the fallopian tubes.

    While home insemination can be a budget-friendly option, it is important to note that it is not without risks. Infection and allergic reactions to sperm can occur, so it is important to consult with a healthcare provider before attempting home insemination. Additionally, it is important to have open and honest communication with any potential donor to ensure that both parties are comfortable and safe.

    In conclusion, home insemination can be a cost-effective and convenient option for couples and individuals who are trying to conceive. With proper techniques, timing, and precautions, it can be a successful method for achieving pregnancy. However, it is important to consider all factors and consult with a healthcare provider before attempting home insemination.

    SEO metadata:

  • DIY Home Insemination: A Step-by-Step Tutorial

    DIY Home Insemination: A Step-by-Step Tutorial

    Are you and your partner looking to start a family but struggling with traditional methods of conception? Or maybe you’re a single person who dreams of becoming a parent? Whatever your situation may be, DIY home insemination is a viable and affordable option for anyone looking to conceive. In this blog post, we will guide you through the step-by-step process of DIY home insemination, including the necessary supplies, preparation, and timing for optimal success.

    Step 1: Gather Supplies

    The first step in DIY home insemination is to gather all the necessary supplies. These include a sterile cup, a sterile syringe, and a sterile container to hold the semen. It’s important to use sterile supplies to reduce the risk of infection and ensure the safety of both the donor and the recipient.

    Step 2: Choose a Donor

    Choosing a donor is a crucial step in the home insemination process. Options for donors include a partner, a known donor, or a sperm bank. If using a partner or known donor, it’s vital to have open and honest communication about expectations, boundaries, and any legal agreements. If using a sperm bank, make sure to do thorough research and choose a reputable and trustworthy one.

    Step 3: Prepare the Donor

    Before collecting the semen, the donor should abstain from ejaculation for at least 2-3 days. This will ensure a higher sperm count and increase the chances of success. The donor should also wash their hands thoroughly and sanitize the genital area before collecting the semen.

    Step 4: Collect the Semen

    The donor can collect the semen in the sterile cup provided. It’s essential to avoid any contact with the cup or the genital area to maintain the sterility of the sample. If using a known donor, it’s recommended to use a condom or sterile cup to collect the semen.

    Step 5: Load the Syringe

    hand holding a syringe with a blue plunger against a solid blue background

    DIY Home Insemination: A Step-by-Step Tutorial

    Using a sterile syringe, carefully draw the semen from the cup and load it into the syringe. It’s crucial to avoid touching the tip of the syringe to maintain sterility. If using a sperm bank, the semen will already be loaded into a sterile container, and you can skip this step.

    Step 6: Prepare the Recipient

    The recipient should lie down on their back with their legs elevated and hips slightly tilted. This position will help the sperm travel towards the cervix. It’s also recommended to insert a menstrual cup or soft cup into the vagina to keep the semen close to the cervix.

    Step 7: Insert the Syringe

    Using a sterile syringe, carefully insert the tip into the vagina and slowly push the plunger to release the semen near the cervix. It’s essential to avoid pushing too hard or too deep to prevent any discomfort.

    Step 8: Rest and Relax

    After insemination, the recipient should remain in the same position for at least 20-30 minutes to allow the sperm to swim towards the cervix. This time is also an excellent opportunity for the recipient to relax and stay calm, which can increase the chances of successful conception.

    Step 9: Repeat the Process

    For optimal success, it’s recommended to repeat the insemination process for 2-3 consecutive days, starting a day before ovulation. This will ensure a better chance of sperm meeting the egg.

    Step 10: Take a Pregnancy Test

    After insemination, the recipient should wait until the expected time of their period to take a pregnancy test. If the test is positive, congratulations, you’re pregnant! If not, don’t be discouraged and try again in the next ovulation cycle.

    In summary, DIY home insemination is a simple and affordable option for anyone looking to conceive. With the right supplies, preparation, and timing, the chances of successful conception are high. However, it’s essential to keep in mind that DIY home insemination may not work for everyone, and seeking the advice of a healthcare professional is always recommended.