Tag: ovulation tracking

  • Maximizing Your Chances of Success with DIY IUI

    Maximizing Your Chances of Success with DIY IUI

    DIY (Do-It-Yourself) IUI (Intrauterine Insemination) is a popular method for couples struggling with infertility to increase their chances of conceiving without expensive medical procedures. However, it requires careful planning and execution to be successful. In this blog post, we will discuss the steps you can take to maximize your chances of success with DIY IUI.

    1. Understand the Process

    The first step to success with DIY IUI is to fully understand the process. Intrauterine insemination involves placing sperm directly into the uterus during the woman’s ovulation period to increase the chances of fertilization. It is important to know the timing and techniques involved to increase the chances of success.

    2. Track Ovulation

    Timing is crucial for successful DIY IUI. Tracking ovulation is the key to determining the best time for insemination. There are various methods to track ovulation, such as using ovulation predictor kits, monitoring basal body temperature, or tracking changes in cervical mucus. By knowing your ovulation period, you can plan the IUI procedure accordingly.

    3. Prepare the Sperm

    The quality of the sperm used in DIY IUI plays a significant role in its success. It is important to prepare the sperm correctly before insemination. The sperm should be washed and concentrated to remove any immotile sperm or debris, which can affect the success rate. This can be done at home or by purchasing pre-washed sperm from a sperm bank.

    4. Create a Sterile Environment

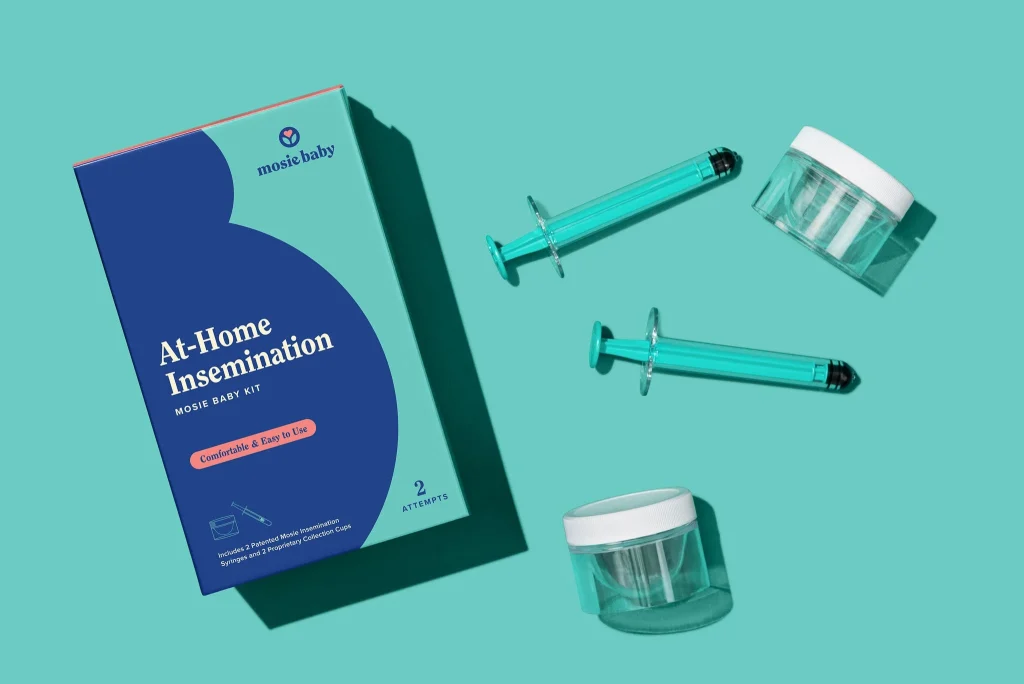
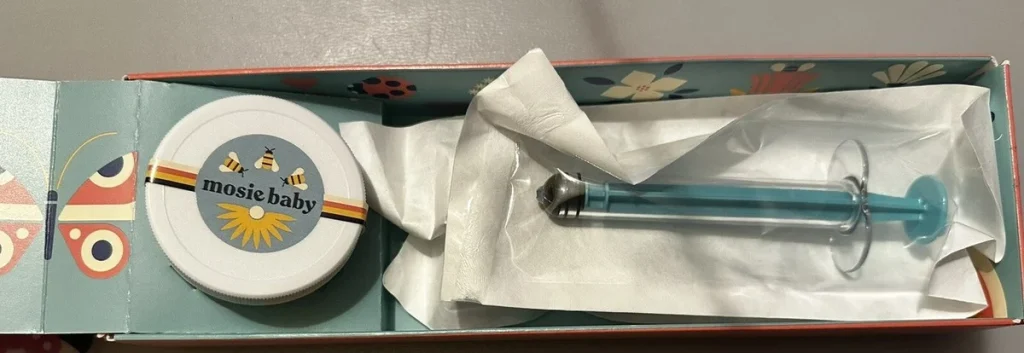
    To avoid any risk of infection, it is crucial to create a sterile environment for the DIY IUI procedure. This can be achieved by thoroughly washing your hands and using sterile equipment. It is recommended to use a sterile catheter or syringe for the insemination process.

    Mosie Baby Kit with syringe and container, highlighting safety and usability features on a blue background.

    Maximizing Your Chances of Success with DIY IUI

    5. Positioning Matters

    The position during insemination can also impact the success rate. It is best to lie down with your hips slightly elevated for at least 20-30 minutes after insemination. This allows the sperm to travel towards the cervix and increases the chances of fertilization.

    6. Consider Using Supplements

    Certain supplements can improve the quality of sperm and increase the chances of conception. Supplements like Coenzyme Q10, Vitamin C, and Zinc have been shown to improve sperm count, motility, and morphology. It is recommended to consult with a doctor before taking any supplements.

    7. Stay Positive and Reduce Stress

    Stress can affect fertility and reduce the chances of success with DIY IUI. It is important to stay positive and relaxed during the process. You can try relaxation techniques like deep breathing, yoga, or meditation to reduce stress levels.

    8. Be Patient and Persistent

    DIY IUI may not be successful on the first try. It is important to be patient and persistent. It may take multiple attempts to achieve pregnancy. It is recommended to wait at least a month before trying again.

    9. Consult with a Doctor

    It is always advisable to consult with a doctor before attempting DIY IUI. They can provide guidance and support, as well as perform necessary tests to ensure the procedure is safe and appropriate for your situation.

    In summary, DIY IUI can be a successful method for couples struggling with infertility to conceive. By understanding the process, tracking ovulation, preparing the sperm correctly, creating a sterile environment, using proper positioning, considering supplements, reducing stress, and being patient and persistent, you can maximize your chances of success with DIY IUI. However, it is important to consult with a doctor before attempting this procedure to ensure it is safe and appropriate for your situation.

  • Inseminating with a Known Donor at Home: A LGBTQ+ Perspective

    Blog post:

    Inseminating with a Known Donor at Home: A LGBTQ+ Perspective

    Insemination, or artificial insemination, is a popular method of assisted reproduction for LGBTQ+ couples and individuals who wish to conceive. While there are various options available for insemination, many members of the LGBTQ+ community choose to use a known donor and perform the insemination at home. In this blog post, we will explore the process of inseminating with a known donor at home from a LGBTQ+ perspective.

    First and foremost, it is important to understand the reason behind choosing a known donor and performing the insemination at home. For many LGBTQ+ individuals and couples, the process of conception can be a daunting and expensive journey. By using a known donor, they are able to have a closer connection to the child and be more involved in the conception process. Additionally, performing the insemination at home can save them thousands of dollars compared to going through a fertility clinic.

    The first step in the process of inseminating with a known donor at home is finding a suitable donor. This can be a friend, family member, or someone from a known donor registry. It is important to have open and honest communication with the donor, discussing expectations and boundaries. It is also recommended to have a legal contract drawn up to protect all parties involved.

    Once a donor has been chosen, the next step is to track the recipient’s ovulation cycle. This can be done through various methods such as tracking basal body temperature, ovulation predictor kits, or monitoring cervical mucus. It is important to have a good understanding of the recipient’s cycle in order to time the insemination correctly.

    On the day of insemination, it is important to have all necessary supplies ready. This includes a sterile insemination kit, sperm collection container, and a syringe. It is also recommended to have a quiet and comfortable space for the insemination to take place.

    Illustration explaining the Mosie Baby home insemination kit features and design benefits.

    Inseminating with a Known Donor at Home: A LGBTQ+ Perspective

    Before the insemination, the sperm donor will need to provide a fresh sample. This can be done through masturbation or using a special condom that collects the sperm during intercourse. Once the sample is collected, it should be kept at body temperature and used within an hour for optimal results.

    The insemination process itself is relatively simple and can be done by the recipient or with the assistance of their partner. The sperm is drawn into the syringe and then inserted into the vagina, close to the cervix. It is important to remain still for at least 20-30 minutes after the insemination to give the sperm a chance to reach the egg.

    After the insemination, the recipient may experience some mild cramping or spotting, which is completely normal. It is also recommended to rest for the remainder of the day and avoid strenuous activities.

    The success rates of inseminating with a known donor at home can vary, but studies have shown that it can be just as effective as going through a fertility clinic. However, it is important to keep in mind that there are risks involved, such as the potential for sexually transmitted infections or legal issues if the donor decides to claim parental rights.

    In addition to the physical process of insemination, there are also emotional and psychological aspects to consider. It is important for all parties involved to have open communication and set clear boundaries. This can help avoid any potential conflicts or misunderstandings in the future.

    In conclusion, inseminating with a known donor at home can be a viable and cost-effective option for LGBTQ+ individuals and couples who wish to conceive. However, it is important to carefully consider and plan for all aspects of the process, including legal and emotional implications. With proper research, communication, and preparation, this method of assisted reproduction can be a beautiful and intimate experience for all involved.

    Summary:

    Insemination is a popular method of assisted reproduction for LGBTQ+ individuals and couples who wish to conceive. Many choose to use a known donor and perform the insemination at home to have a closer connection to the child and save money. The process involves finding a suitable donor, tracking ovulation, preparing for the insemination, and performing the insemination itself. It is important to have open communication, set boundaries, and consider all legal and emotional implications before proceeding with inseminating with a known donor at home.

  • One Size Doesn’t Fit All: Personalizing Home Insemination for Success

    Blog Post:

    One Size Doesn’t Fit All: Personalizing Home Insemination for Success

    For many people, starting a family is a dream that they hold dear to their hearts. However, for some, this dream may not come as easily as it does for others. In these cases, home insemination can be a viable option to help achieve pregnancy. While home insemination can be a great alternative for couples and individuals wanting to conceive, it is important to understand that there is no “one size fits all” approach to this method. Each person’s body and fertility journey is unique, and it is crucial to personalize the home insemination process for success. In this blog post, we will explore the various factors that need to be considered for successful home insemination and how personalization can make all the difference.

    Understanding Home Insemination

    Home insemination, also known as self-insemination, is the process of placing sperm into the vagina or cervix at home in order to achieve pregnancy. This method can be used by couples or individuals who are trying to conceive without the assistance of a medical professional. It can be done using a variety of techniques, such as using a syringe or a cervical cap, and can be done with fresh, frozen, or donor sperm.

    Factors to Consider for Successful Home Insemination

    1. Fertility Health

    The first step to successful home insemination is ensuring that both parties involved have good fertility health. This includes having regular ovulation cycles and no underlying medical conditions that may affect fertility. If you are unsure about your fertility health, it is always best to consult with a healthcare professional before attempting home insemination.

    2. Ovulation Tracking

    Timing is crucial when it comes to home insemination. It is important to track your ovulation cycle to determine the best time to attempt insemination. This can be done through various methods such as tracking your basal body temperature, using ovulation predictor kits, or monitoring changes in cervical mucus. Personalizing the timing of insemination based on your ovulation cycle can greatly increase the chances of success.

    3. Sperm Quality

    The quality of sperm used for home insemination is another important factor to consider. If using a sperm donor, it is crucial to screen for any potential genetic or health issues. For fresh sperm, it is important to ensure that the sperm is of good quality and has been properly stored and handled. Frozen sperm should be obtained from a reputable sperm bank.

    4. Preparation and Technique

    Proper preparation and technique can greatly impact the success of home insemination. This includes using sterile equipment, following instructions for thawing frozen sperm, and ensuring that the sperm reaches the cervix or fallopian tubes for optimal chances of fertilization. Personalizing the preparation and technique based on individual needs and preferences can increase the comfort and effectiveness of the process.

    at-home insemination kit by Mosie Baby, featuring syringes and storage containers for comfort and convenience.

    One Size Doesn't Fit All: Personalizing Home Insemination for Success

    5. Emotional and Mental Well-being

    Home insemination can be an emotionally and mentally challenging process, especially for those who have been struggling with fertility. It is important to take care of your emotional and mental well-being throughout the process. This can include seeking support from loved ones, joining support groups, or seeking professional counseling. A positive mindset can greatly impact the success of home insemination.

    Personalizing Home Insemination for Success

    Now that we have explored the various factors that need to be considered for successful home insemination, let’s dive into how personalization can make all the difference.

    1. Tailored Timing and Techniques

    As mentioned earlier, timing and technique are crucial for successful home insemination. By personalizing these factors, you can increase the chances of success. For example, if you have irregular ovulation cycles, you may need to use additional ovulation tracking methods or try insemination at different times throughout your cycle. Additionally, different techniques may work better for different individuals, so it is important to find what works best for your body.

    2. Customized Sperm Selection

    With the option of using fresh, frozen, or donor sperm, personalization is key. For some, fresh sperm may be the best option, while others may have better success with frozen sperm. It is important to consider personal preferences and any potential health concerns when selecting sperm for home insemination.

    3. Individualized Emotional Support

    As mentioned earlier, emotional and mental well-being is crucial during the home insemination process. By personalizing your support system, you can ensure that you have the necessary emotional support throughout this journey. This can include involving your partner, friends, or family, or seeking professional counseling.

    4. Unique Fertility Plans

    Every person’s fertility journey is unique, and it is important to personalize your approach to home insemination based on your individual needs. This can include seeking guidance from a fertility specialist, using alternative fertility methods such as acupuncture or herbal remedies, or incorporating lifestyle changes to improve fertility health.

    In conclusion, home insemination can be a successful method for achieving pregnancy, but it is not a one-size-fits-all approach. By understanding and considering the various factors that influence the success of home insemination and personalizing the process based on individual needs, you can increase your chances of success and make your dreams of starting a family a reality.

    Summary:

    Home insemination is a viable option for couples and individuals wanting to conceive, but it requires personalization for success. Factors such as fertility health, ovulation tracking, sperm quality, preparation and technique, and emotional and mental well-being need to be considered. Personalization can be achieved through tailored timing and techniques, customized sperm selection, individualized emotional support, and unique fertility plans.

  • Maximizing Your Chances of Conception with Cervical Cap Insemination

    Blog Post: Maximizing Your Chances of Conception with Cervical Cap Insemination

    When it comes to trying to conceive, many couples may feel overwhelmed and frustrated with the process. While there are various methods and techniques available, one option that has been gaining popularity is cervical cap insemination. This method involves using a small silicone cap to insert semen directly into the cervix, bypassing the vagina and increasing the chances of conception. In this blog post, we will discuss the ins and outs of cervical cap insemination and how to maximize your chances of conceiving with this method.

    Understanding Cervical Cap Insemination

    Cervical cap insemination, also known as the “cap method,” is a technique used to aid in conception. It involves using a small silicone cap, similar to a menstrual cup, to collect semen and deposit it directly into the cervix. This method is often recommended for couples struggling with fertility issues, but it can also be used by same-sex couples or single women who are trying to get pregnant.

    The cervix is the narrow opening at the bottom of the uterus that connects to the vagina. During intercourse, sperm must travel through the vagina and into the cervix to reach the egg in the fallopian tubes. However, with cervical cap insemination, the cervix is bypassed, and semen is deposited directly into the cervical canal, increasing the chances of sperm reaching the egg.

    How to Use a Cervical Cap for Insemination

    Using a cervical cap for insemination is a simple process but requires some preparation. Here are the steps to follow:

    1. Choose the Right Cervical Cap: There are various brands of cervical caps available in the market, each with its own instructions. It is essential to choose the right size and type of cap for your body to ensure a proper fit and effective insemination.

    2. Prepare the Cap: Before using the cap, it must be cleaned and sterilized. Boil the cap in hot water for 3-5 minutes, and let it cool before use.

    3. Collect the Semen: The semen can be collected during intercourse or by using a sperm donor. Using a sterile syringe, aspirate the semen and transfer it into the cap.

    4. Insert the Cap: Once the cap is filled with semen, it is time to insert it into the cervix. This can be done by squatting, lying down, or propping one leg up on a chair or bed. Gently insert the cap into the vagina, pushing it up towards the cervix until it is snug.

    at-home insemination kit with syringes, collection cups, and instructions on a pink background

    Maximizing Your Chances of Conception with Cervical Cap Insemination

    5. Leave the Cap in Place: The cap should be left in place for 4-6 hours to allow the sperm to travel into the cervix and towards the egg. After this time, the cap can be removed, and you can go about your day as usual.

    Maximizing Your Chances of Conception

    While cervical cap insemination can increase the chances of conception, there are some steps you can take to further maximize your chances of success. Here are some tips to keep in mind:

    1. Track Ovulation: It is crucial to know when you are ovulating to time the insemination correctly. Ovulation usually occurs around day 14 of a 28-day menstrual cycle, but it can vary for each woman. There are various methods for tracking ovulation, such as using ovulation predictor kits, monitoring basal body temperature, or tracking cervical mucus changes.

    2. Use Fertility-Friendly Lubricants: Some lubricants can interfere with sperm motility, making it difficult for them to reach the egg. It is recommended to use fertility-friendly lubricants or natural alternatives, such as coconut oil or egg whites, when trying to conceive.

    3. Maintain a Healthy Lifestyle: A healthy lifestyle can have a significant impact on fertility. Eating a balanced diet, exercising regularly, and reducing stress levels can improve your chances of conceiving. Avoiding alcohol, smoking, and excessive caffeine consumption can also help.

    4. Consider Using Fertility Supplements: Certain supplements, such as folic acid, vitamin D, and CoQ10, can help improve fertility in both men and women. Consult with your doctor before starting any supplements.

    5. Have Patience: Trying to conceive can be a challenging and emotional journey. It is essential to have patience and not get discouraged if you don’t conceive right away. Keep trying, and remember that it can take a few cycles for cervical cap insemination to be successful.

    In Conclusion

    Cervical cap insemination can be an effective method for increasing the chances of conception. By following the steps outlined in this blog post, you can maximize your chances of success. Remember to track ovulation, use fertility-friendly lubricants, maintain a healthy lifestyle, and have patience. If you do not conceive after a few cycles, it is recommended to consult with a fertility specialist for further guidance.

    Summary: Cervical cap insemination is a method that involves using a small silicone cap to deposit semen directly into the cervix, increasing the chances of conception. To use this method effectively, it is essential to choose the right cap, track ovulation, use fertility-friendly lubricants, maintain a healthy lifestyle, and have patience. If unsuccessful after a few cycles, consult with a fertility specialist for further guidance.

  • From Start to Finish: The Cervical Cap Insemination Process

    From Start to Finish: The Cervical Cap Insemination Process

    Cervical cap insemination, also known as cervical insemination or intracervical insemination, is a fertility treatment method that involves placing sperm directly into the cervix to increase the chances of pregnancy. This process can be done at home or in a medical setting and is a popular choice for those looking for a less invasive and more natural way to conceive. In this blog post, we will take a closer look at the cervical cap insemination process from start to finish.

    The first step in the cervical cap insemination process is to determine if this is the right option for you. This method is typically recommended for couples who have been trying to conceive for at least a year without success and have no known fertility issues. It is also a good option for same-sex female couples or single women who wish to become pregnant.

    Once you have decided to try cervical cap insemination, the next step is to obtain the necessary materials. You will need a cervical cap, which is a small, flexible silicone cup that fits over the cervix, and a syringe to insert the sperm. These can be purchased online or at a pharmacy.

    Next, you will need to track your ovulation cycle. Cervical cap insemination is most effective when done around the time of ovulation. This can be determined by tracking your basal body temperature, using ovulation predictor kits, or monitoring changes in your cervical mucus.

    On the day of insemination, it is important to thoroughly wash your hands and the materials you will be using. This helps to reduce the risk of infection. The sperm should be collected either from a donor or from a partner through masturbation. It is important to use a sterile container to collect the sperm and keep it at room temperature until ready to use.

    syringe kit with a screw top lid and non-tip safety wall, designed for sperm insemination.

    From Start to Finish: The Cervical Cap Insemination Process

    Before inserting the cervical cap, it is recommended to insert a small amount of sperm into the cup using the syringe. This helps to ensure that enough sperm reaches the cervix and increases the chances of pregnancy. The cervical cap can then be folded in half and inserted into the vagina, similar to a tampon. It should be placed over the cervix and left in for 6-8 hours to allow the sperm to reach the cervix and potentially fertilize an egg.

    After the recommended time has passed, the cervical cap can be removed by gently pulling on the stem. Any remaining sperm can be discarded, and the cap should be thoroughly washed and sterilized before its next use. It is important to note that the cervical cap should not be used for more than six hours at a time, and it is not recommended to use it for more than two consecutive days.

    The success rates of cervical cap insemination vary depending on various factors such as age, fertility status, and timing of insemination. However, studies have shown that the success rates can range from 10-20% per cycle. Many couples may choose to try cervical cap insemination for a few cycles before seeking other fertility treatments.

    Some potential benefits of cervical cap insemination include its affordability, natural process, and the ability to be done at home. However, there are also some potential risks and limitations to consider. Cervical cap insemination does not guarantee pregnancy, and it may not be suitable for those with certain medical conditions such as cervical abnormalities or a history of pelvic infections.

    In conclusion, the cervical cap insemination process can be a viable option for couples and individuals looking to conceive. It is a simple and relatively inexpensive method that can be done at home. However, it is important to consult with a healthcare provider before trying cervical cap insemination, as well as to carefully follow the instructions and recommended guidelines for the best chances of success.

    Summary:

    Cervical cap insemination is a fertility treatment method that involves placing sperm directly into the cervix to increase the chances of pregnancy. This process can be done at home or in a medical setting and is recommended for couples who have been trying to conceive for at least a year without success. The process involves tracking ovulation, obtaining necessary materials, and inserting the cervical cap with sperm into the vagina. Success rates vary, and it is important to consult with a healthcare provider before trying this method.

  • What to Expect: The Process of At-Home Insemination with Frozen Sperm

    Blog Post Title: What to Expect: The Process of At-Home Insemination with Frozen Sperm

    In recent years, more and more couples and individuals are turning to at-home insemination as a way to start or expand their families. This process involves using frozen sperm, often from a sperm bank, to fertilize an egg in the comfort and privacy of your own home. While it may seem like a daunting task, at-home insemination is a safe and effective option for those looking to conceive. In this blog post, we will discuss what to expect during the process of at-home insemination with frozen sperm.

    Step 1: Choosing a Sperm Donor
    The first step in the process of at-home insemination is selecting a sperm donor. This can be done through a sperm bank or through a known donor. If using a sperm bank, you will have access to information such as the donor’s physical characteristics, medical history, and personal statement. It is important to thoroughly research and consider all factors before making a decision. If using a known donor, it is important to have a legal contract in place and to ensure that the donor has undergone proper medical screenings.

    Step 2: Ordering Frozen Sperm
    Once you have chosen a sperm donor, the next step is to order the frozen sperm. This can be done through a sperm bank or fertility clinic. The sperm will be shipped in a cryogenic tank to maintain its viability. It is important to carefully follow the instructions for handling and thawing the sperm to maintain its quality.

    Step 3: Tracking Ovulation
    Timing is crucial when it comes to at-home insemination. It is important to track your ovulation cycle to determine the best time to inseminate. This can be done through methods such as tracking basal body temperature, using ovulation predictor kits, or monitoring cervical mucus changes. It is recommended to have the insemination within 24 hours of ovulation for the best chances of success.

    Mosie Baby kit for at-home insemination with syringes and collection cups on a teal background.

    What to Expect: The Process of At-Home Insemination with Frozen Sperm

    Step 4: Preparing for Insemination
    Before insemination, it is important to prepare the necessary supplies. This includes a sterile cup to collect the sperm, a sterile syringe to transfer the sperm, and a speculum to help position the syringe correctly. It is also recommended to have a warm towel and lubricant on hand to make the process more comfortable.

    Step 5: Insemination Process
    The actual insemination process is relatively simple and can be done at home with the help of a partner or alone. The sperm should be thawed according to the instructions provided by the sperm bank or clinic. Using the sterile syringe, the sperm is then drawn up and transferred to the sterile cup. The speculum is inserted into the vagina to help guide the syringe to the cervix. The sperm is then slowly injected into the cervix using the syringe.

    Step 6: Resting and Monitoring
    After the insemination, it is recommended to remain lying down for at least 15-20 minutes to give the sperm time to reach the fallopian tubes. It is also important to monitor any symptoms or changes in the following days and weeks. Some common early signs of pregnancy include nausea, breast tenderness, and fatigue.

    Step 7: Taking a Pregnancy Test
    The waiting game can be difficult, but it is important to wait at least two weeks after insemination to take a pregnancy test. This allows enough time for the fertilized egg to implant and for the body to produce enough pregnancy hormones to be detected on a test. It is recommended to take a home pregnancy test first, and if positive, to follow up with a blood test at a doctor’s office for confirmation.

    At-home insemination with frozen sperm can be a successful and fulfilling option for those looking to start a family. It is important to do thorough research, follow instructions carefully, and seek medical advice if needed. By following these steps and being patient, you can increase your chances of a successful pregnancy and bring a new life into your home.

    In summary, at-home insemination with frozen sperm involves choosing a sperm donor, ordering frozen sperm, tracking ovulation, preparing for insemination, the actual insemination process, resting and monitoring, and taking a pregnancy test. With patience, research, and proper preparation, at-home insemination can be a successful and rewarding option for those looking to conceive.

  • Breaking the Silence: Sharing Your Journey of DIY Insemination with Frozen Sperm

    Summary:

    Deciding to start a family is a big step and for many LGBTQ+ couples, it can involve navigating the world of DIY insemination with frozen sperm. It’s a journey that is often shrouded in silence and secrecy, but breaking that silence and sharing your experience can be incredibly empowering and helpful for others who are also considering this option.

    In this blog post, we will dive into the process of DIY insemination with frozen sperm, from the initial decision to the ups and downs of the journey. We’ll also discuss the importance of breaking the silence and sharing your story, as well as tips for doing so in a safe and positive way.

    Making the Decision:

    The decision to start a family through DIY insemination with frozen sperm is not one that is made lightly. It often involves a lot of research, discussions, and weighing of options. For LGBTQ+ couples, it may also involve navigating societal expectations and prejudices.

    One of the first steps in this journey is choosing a sperm bank. This can be a daunting task, as there are many options out there and it’s important to find one that is reputable and meets your specific needs. It’s also important to consider the cost and the legal implications of using a sperm bank.

    The DIY Insemination Process:

    Once you have chosen a sperm bank and have the frozen sperm in hand, the next step is the insemination process itself. This can be done at home or with the help of a medical professional. If you choose to do it at home, it’s important to carefully follow the instructions provided by the sperm bank and to be aware of the potential risks involved.

    Tracking ovulation is a crucial part of the DIY insemination process. There are various methods for tracking ovulation, such as using ovulation predictor kits or monitoring your basal body temperature. It’s important to find a method that works for you and to stay consistent with it.

    The emotional rollercoaster of DIY insemination with frozen sperm:

    The journey of DIY insemination with frozen sperm can be emotionally challenging. The process itself can be physically demanding, with the need for frequent inseminations and the pressure of tracking ovulation. It can also be financially draining and may involve making difficult decisions about how many attempts to try before seeking medical assistance.

    Mosie Baby at-home insemination kit featuring a syringe and a container, presented in a decorative box.

    Breaking the Silence: Sharing Your Journey of DIY Insemination with Frozen Sperm

    On top of these challenges, there may also be feelings of disappointment and frustration if the insemination is not successful. It’s important to acknowledge and process these emotions, and to have a support system in place for when things get tough.

    Breaking the Silence and Sharing Your Journey:

    One of the biggest challenges faced by couples going through DIY insemination with frozen sperm is the silence and secrecy surrounding the process. Many people choose to keep this journey private, out of fear of judgment or misunderstanding from others. However, breaking this silence and sharing your experience can be incredibly empowering and helpful for others.

    Sharing your journey can help to break down the stigma and misconceptions surrounding DIY insemination and same-sex parenting. It can also provide support and guidance for others who are considering this option. By sharing your story, you are not only helping yourself but also contributing to a more inclusive and understanding society.

    Tips for Sharing Your Story:

    While sharing your journey can be a positive and healing experience, it’s important to do so in a safe and positive way. Here are some tips for sharing your story:

    1. Decide on your comfort level: Before sharing your journey, take some time to reflect on your comfort level. How much do you want to share? Are there certain aspects of your journey that you want to keep private? It’s important to respect your own boundaries and only share what feels right to you.

    2. Find a supportive community: Look for online or in-person support groups for LGBTQ+ couples going through DIY insemination. These communities can provide a safe and understanding space to share your story and connect with others who are going through a similar experience.

    3. Be mindful of language: When sharing your story, be mindful of the language you use. Using inclusive and respectful language can help to educate and break down stereotypes.

    4. Educate others: Use your story as an opportunity to educate others about DIY insemination and same-sex parenting. Be open to questions and discussions, and try to calmly address any misconceptions or prejudices.

    5. Take care of yourself: Sharing your story can be emotionally draining, so make sure to prioritize self-care. Take breaks when needed and reach out for support if you need it.

    In conclusion, DIY insemination with frozen sperm is a journey filled with ups and downs, but breaking the silence and sharing your story can be incredibly empowering and helpful for others. By educating and advocating for this option, we can work towards a more inclusive and understanding society for LGBTQ+ families.

  • Optimizing Fertility: The Role of Insemination Timing and Ovulation Tracking

    Optimizing Fertility: The Role of Insemination Timing and Ovulation Tracking

    Fertility is a complex process that involves several factors, and when it comes to trying to conceive, timing is crucial. Insemination timing, along with ovulation tracking, plays a significant role in optimizing fertility. Whether you are trying to conceive naturally or going through assisted reproductive technology (ART) procedures like intrauterine insemination (IUI) or in vitro fertilization (IVF), understanding the importance of timing and using ovulation tracking methods can significantly increase the chances of a successful pregnancy. In this blog post, we will discuss the role of insemination timing and ovulation tracking in optimizing fertility.

    Insemination Timing:

    Insemination timing refers to the timing of sexual intercourse or an ART procedure in relation to ovulation. Ovulation is the process in which a mature egg is released from the ovary and is ready to be fertilized by a sperm. The window of opportunity for fertilization is relatively short, usually around 24 hours after ovulation. Therefore, the timing of insemination is crucial to ensure that sperm is available to fertilize the egg.

    Timing for Natural Conception:

    For couples trying to conceive naturally, knowing when ovulation occurs is essential. One way to track ovulation is by using an ovulation predictor kit (OPK). These kits detect the surge in luteinizing hormone (LH) that occurs 24-48 hours before ovulation. Once the kit shows a positive result, it is recommended to have intercourse within the next 24 to 36 hours to optimize the chances of conception.

    Another way to track ovulation is by monitoring basal body temperature (BBT). BBT is the lowest body temperature that is reached during rest. It is recommended to take your temperature first thing in the morning before getting out of bed. A rise in BBT indicates ovulation has occurred. For women with regular menstrual cycles, ovulation usually occurs around day 14, but this can vary. By tracking BBT for a few months, you can identify your pattern and pinpoint when ovulation is most likely to occur.

    Timing for ART Procedures:

    Couples undergoing ART procedures like IUI or IVF rely on medical professionals to determine the timing of insemination. In IUI, a washed and concentrated sample of sperm is placed directly into the uterus. The procedure is usually done within 24-36 hours after a positive OPK or a surge in LH. In IVF, the timing of insemination is crucial as the eggs are retrieved from the ovaries and fertilized in the lab before being transferred back into the uterus. The eggs need to be retrieved just before ovulation to ensure that they are mature and ready for fertilization.

    Ovulation Tracking:

    Ovulation tracking is a vital tool for optimizing fertility. It not only helps in timing insemination, but it also provides valuable information about the woman’s menstrual cycle and any potential issues that may affect fertility. Here are some methods for ovulation tracking:

    1. Ovulation Predictor Kits (OPKs):

    at-home insemination kit with syringes, collection cups, and instructions on a pink background

    Optimizing Fertility: The Role of Insemination Timing and Ovulation Tracking

    As mentioned earlier, OPKs detect the surge in LH, which triggers ovulation. These kits are readily available over-the-counter and are relatively easy to use. However, they may not be as accurate for women with irregular menstrual cycles or those with conditions like polycystic ovary syndrome (PCOS).

    2. Basal Body Temperature (BBT) Charting:

    BBT charting involves taking your temperature every morning and recording it on a chart. A rise in BBT indicates ovulation has occurred. BBT charting can help identify patterns in the menstrual cycle and confirm ovulation. However, it can be challenging to track accurately, especially for women with irregular sleep patterns.

    3. Cervical Mucus Monitoring:

    Cervical mucus is a fluid produced by the cervix that changes in consistency and appearance throughout the menstrual cycle. As ovulation approaches, cervical mucus becomes thin, clear, and stretchy, resembling egg whites. This type of mucus is ideal for sperm to travel through to reach the egg. Monitoring changes in cervical mucus can help predict ovulation.

    4. Transvaginal Ultrasound:

    Transvaginal ultrasound involves inserting a probe into the vagina to visualize the ovaries and monitor follicle growth. This method is commonly used in ART procedures to determine the timing of egg retrieval.

    5. Blood Tests:

    Blood tests can measure the levels of hormones like LH, follicle-stimulating hormone (FSH), and estrogen, which play a crucial role in ovulation. These tests can help identify hormonal imbalances that may affect fertility.

    In Conclusion:

    Optimizing fertility requires understanding the importance of insemination timing and ovulation tracking. Whether you are trying to conceive naturally or going through ART procedures, being aware of when ovulation occurs and using various methods to track it can significantly increase the chances of a successful pregnancy. It is essential to consult with a healthcare professional to determine the best approach for your individual situation and address any underlying fertility issues that may be present.

    Summary:

    Optimizing fertility involves understanding the role of insemination timing and ovulation tracking. Insemination timing refers to the timing of intercourse or an ART procedure in relation to ovulation. For natural conception, methods like ovulation predictor kits and basal body temperature charting can help identify the best time for insemination. For ART procedures, medical professionals determine the timing of insemination. Ovulation tracking is a vital tool for optimizing fertility and involves methods like ovulation predictor kits, basal body temperature charting, cervical mucus monitoring, transvaginal ultrasound, and blood tests. It is crucial to consult with a healthcare professional to determine the best approach for your individual situation and address any underlying fertility issues.

  • Navigating the Challenges: Overcoming Obstacles in At-Home Insemination

    Blog Post:

    In recent years, at-home insemination has become a popular option for couples and individuals looking to start a family. With advances in technology and more accessible resources, it has become a viable alternative to traditional fertility treatments. However, like any other process, there are challenges and obstacles that may arise when navigating at-home insemination. In this blog post, we will discuss the common challenges and how to overcome them, making your journey towards parenthood a little bit smoother.

    Challenge #1: Finding a Sperm Donor

    One of the first challenges that individuals or couples face when considering at-home insemination is finding a suitable sperm donor. While some may opt for known donors, others may want to use a sperm bank. No matter which route you choose, there are a few factors to consider. First, it is essential to ensure that the donor has undergone all necessary medical and genetic testing to avoid any potential risks. Additionally, it is crucial to establish clear legal agreements and documentation to protect all parties involved.

    To overcome this challenge, it is helpful to do thorough research and connect with others who have gone through the same process. There are online communities and support groups that can provide valuable insights and recommendations. It is also crucial to communicate openly and honestly with your partner (if applicable) about your expectations and preferences when it comes to choosing a sperm donor.

    Challenge #2: Timing and Tracking Ovulation

    Timing is crucial when it comes to at-home insemination. Unlike traditional fertility treatments, you do not have a medical professional monitoring your ovulation or timing the insemination. This means that you and your partner are responsible for tracking your ovulation and ensuring that you are inseminating at the right time.

    To overcome this challenge, it is essential to track your ovulation carefully. There are various methods for tracking ovulation, such as using ovulation predictor kits, tracking basal body temperature, or monitoring cervical mucus changes. It is also helpful to keep a menstrual cycle calendar and use an ovulation calculator to determine the best time for insemination. Additionally, it is crucial to communicate effectively with your partner and have a plan in place to ensure that you are both available during the ovulation window.

    Challenge #3: Proper Insemination Technique

    Mosie Baby at-home insemination kit box featuring instructions and details for two attempts.

    Navigating the Challenges: Overcoming Obstacles in At-Home Insemination

    Another challenge that individuals or couples face during at-home insemination is mastering the proper technique. While it may seem straightforward, proper insemination technique is crucial for increasing the chances of success. It is essential to ensure that the sperm reaches the cervix and fallopian tubes for fertilization to occur.

    To overcome this challenge, it is recommended to do a trial run before attempting insemination with the actual donor sperm. This will help you and your partner become familiar with the process and identify any potential issues that may arise. It is also helpful to have all necessary supplies ready, such as a sterile cup, syringe, and speculum. Additionally, it is essential to follow instructions carefully and consider seeking guidance from a healthcare professional if needed.

    Challenge #4: Dealing with Negative Pregnancy Tests

    At-home insemination can be an emotional rollercoaster, especially when dealing with negative pregnancy tests. It is essential to understand that it may take multiple attempts before achieving pregnancy, and it is not uncommon to experience disappointment and frustration along the way.

    To overcome this challenge, it is essential to have a support system in place. Lean on your partner, friends, and family for emotional support. It is also helpful to stay positive and focus on the end goal – starting a family. Remember that every attempt is a step closer to success, and do not be afraid to seek professional help if needed.

    Challenge #5: Managing Expectations and Pressures

    Lastly, another common challenge when it comes to at-home insemination is managing expectations and pressures. When you are trying to conceive, it is natural to feel pressure and have high expectations. However, putting too much pressure on yourself and your partner can cause unnecessary stress and may even hinder the process.

    To overcome this challenge, it is crucial to have open and honest communication with your partner about your expectations and concerns. Set realistic goals and remain patient throughout the process. Remember that everyone’s fertility journey is unique, and it is essential to focus on your own path rather than comparing yourself to others.

    In summary, at-home insemination can be a challenging but rewarding journey towards parenthood. By addressing common challenges and taking the necessary steps to overcome them, you can increase your chances of success and make the process more manageable. Remember to do thorough research, communicate openly with your partner, and seek support when needed. With determination and patience, you can navigate the obstacles and achieve your dream of starting a family.

  • The DIY Approach: Exploring the World of At-Home Insemination

    The DIY Approach: Exploring the World of At-Home Insemination

    In recent years, there has been a growing trend towards do-it-yourself (DIY) methods for various aspects of life, including healthcare. One area that has gained attention is the process of at-home insemination, where individuals or couples attempt to conceive without the help of a medical professional. While this may seem like a daunting and risky endeavor, many people have found success and satisfaction in taking control of their fertility journey. In this blog post, we will explore the world of at-home insemination, including its benefits, risks, and how to navigate this process.

    What is At-Home Insemination?

    At-home insemination, also known as self-insemination or DIY insemination, is the process of using donor sperm to conceive without the assistance of a medical professional. This can involve using a syringe or cervical cap to deposit the sperm into the vagina or using a home insemination kit, which typically includes a syringe, sterile cup, and instructions. Some couples may also choose to use a known donor, while others may opt for donor sperm from a sperm bank.

    Benefits of At-Home Insemination

    One of the main benefits of at-home insemination is cost-effectiveness. The average cost of an intrauterine insemination (IUI) procedure can range from $300 to $1,000, while at-home insemination can cost as little as $50. This makes it a more accessible option for those who may not have the financial means to seek medical assistance. Additionally, at-home insemination allows individuals or couples to have more control over the process, as they can choose the timing and method that works best for them.

    Another advantage of at-home insemination is privacy. For some individuals or couples, the idea of going to a fertility clinic and discussing their personal matters with a medical professional can be intimidating or uncomfortable. At-home insemination offers a more private and intimate option for conceiving, which can be especially appealing for LGBTQ+ couples or single individuals.

    Risks of At-Home Insemination

    A person using a syringe from an at-home insemination kit on a wooden table.

    The DIY Approach: Exploring the World of At-Home Insemination

    While at-home insemination may offer benefits, there are also risks to consider. The most significant risk is the lack of medical supervision. Without a doctor or fertility specialist monitoring the process, there is a higher chance of potential health complications, such as infections or allergic reactions. Additionally, there is no way to determine the quality of the sperm used in at-home insemination, which could lead to a lower success rate in conception.

    Navigating the At-Home Insemination Process

    Before embarking on the at-home insemination process, it is essential to do thorough research and consult with a medical professional. It is essential to understand the different methods of at-home insemination and the potential risks involved. Consulting with a doctor or fertility specialist can also provide valuable insight into any underlying medical conditions that may affect fertility.

    When selecting a donor, whether known or from a sperm bank, it is crucial to consider the donor’s medical history and any potential genetic risks. It is also recommended to have the donor undergo STD and genetic testing to ensure the safest and healthiest outcome.

    Proper timing and tracking of ovulation are crucial for successful at-home insemination. This can be done through ovulation predictor kits or by tracking basal body temperature. It is also recommended to have a backup plan in case the first attempt is not successful.

    In conclusion, at-home insemination can be an affordable and private option for individuals or couples looking to conceive. However, it is essential to consider the risks and take necessary precautions to ensure a safe and successful experience. Consulting with a medical professional and thoroughly researching the process can help navigate the at-home insemination journey.

    Summary:

    The DIY Approach: Exploring the World of At-Home Insemination is a blog post that delves into the growing trend of using self-insemination methods to conceive without the help of a medical professional. While it offers benefits such as cost-effectiveness and privacy, there are also risks to consider, such as lack of medical supervision. The post discusses the process of at-home insemination, including its benefits, risks, and how to navigate it effectively.