Tag: preparing for insemination

  • Preparing for a Home Insemination Cycle as a Single Parent

    Preparing for a Home Insemination Cycle as a Single Parent

    Becoming a parent is a dream for many individuals, and for some, that dream may be achievable through home insemination. While the process of home insemination can be overwhelming and intimidating, it is a viable option for single individuals who want to become parents. In this blog post, we will discuss the steps and preparations involved in a home insemination cycle for single parents, so you can feel confident and prepared to begin this journey.

    What is Home Insemination?

    Home insemination, also known as self-insemination, is the process of placing sperm into the vagina or cervix in order to achieve pregnancy. This can be done at home without the assistance of a medical professional, making it a convenient and private option for single individuals. It is important to note that home insemination does not guarantee pregnancy and may require multiple attempts.

    Preparing Mentally

    The decision to become a single parent through home insemination is a big one, and it is essential to prepare yourself mentally for this journey. It is normal to experience a range of emotions, from excitement to fear and uncertainty. It is important to take the time to process your feelings and address any concerns you may have before starting the insemination process. Consider seeking support from friends, family, or a therapist to help you navigate this emotional journey.

    Choosing a Donor

    One of the first steps in preparing for a home insemination cycle is choosing a sperm donor. This can be a personal and challenging decision, as you want to find the right match for you and your future child. There are several options for finding a sperm donor, including using a known donor, purchasing sperm from a sperm bank, or using a donor through a fertility clinic. It is important to thoroughly research and consider all your options before making a decision. You may also want to consult with a lawyer to ensure that you understand the legal implications and rights of the donor and yourself as a single parent.

    Tracking Ovulation

    In order for home insemination to be successful, timing is crucial. You will want to track your ovulation cycle to determine the best time for insemination. This can be done through various methods, such as tracking your basal body temperature, using ovulation predictor kits, or monitoring changes in your cervical mucus. It is important to be diligent in tracking your ovulation to increase your chances of success.

    Preparing Your Body

    Preparing your body for home insemination is essential for a successful cycle. This includes maintaining a healthy lifestyle, eating a nutritious diet, and avoiding harmful substances such as alcohol and tobacco. Additionally, it is recommended to take prenatal vitamins to ensure your body has the necessary nutrients for a healthy pregnancy. It may also be helpful to engage in stress-reducing activities such as yoga or meditation to prepare your body for the insemination process.
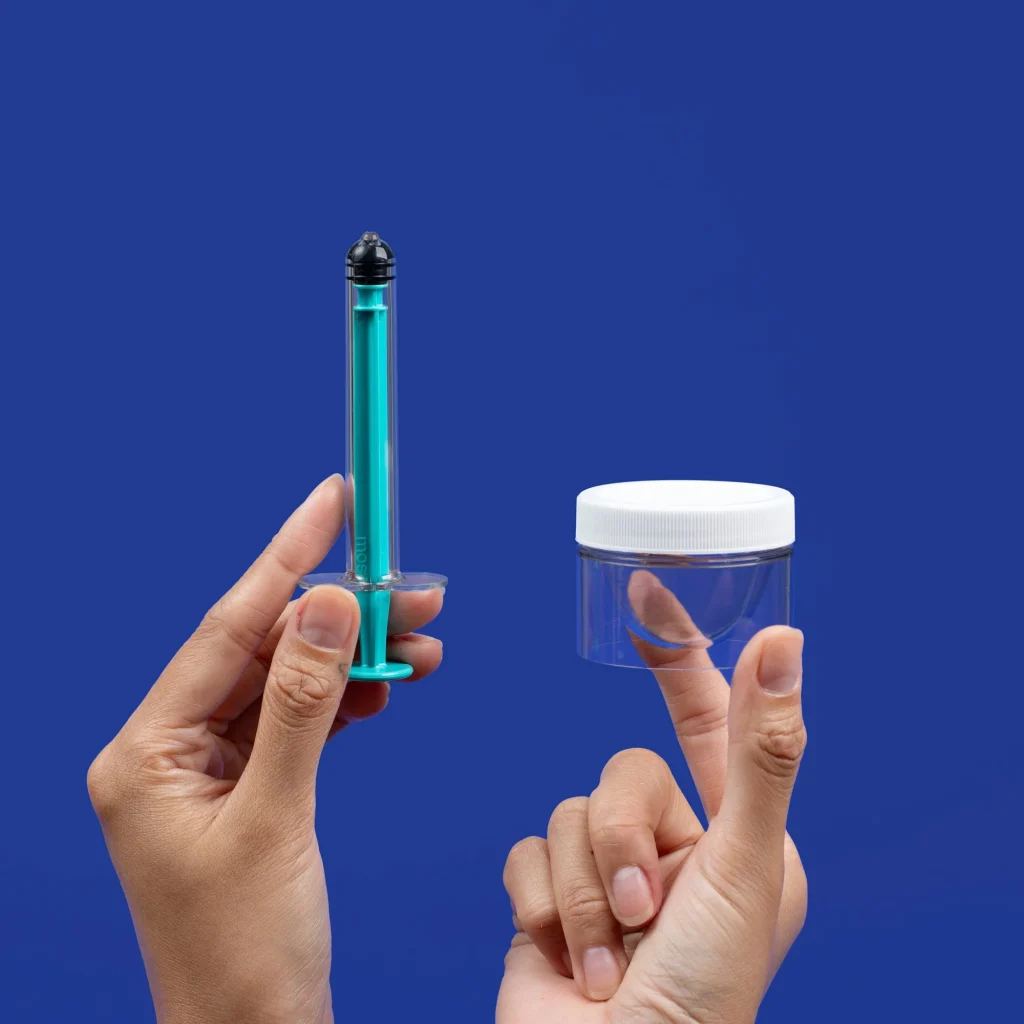
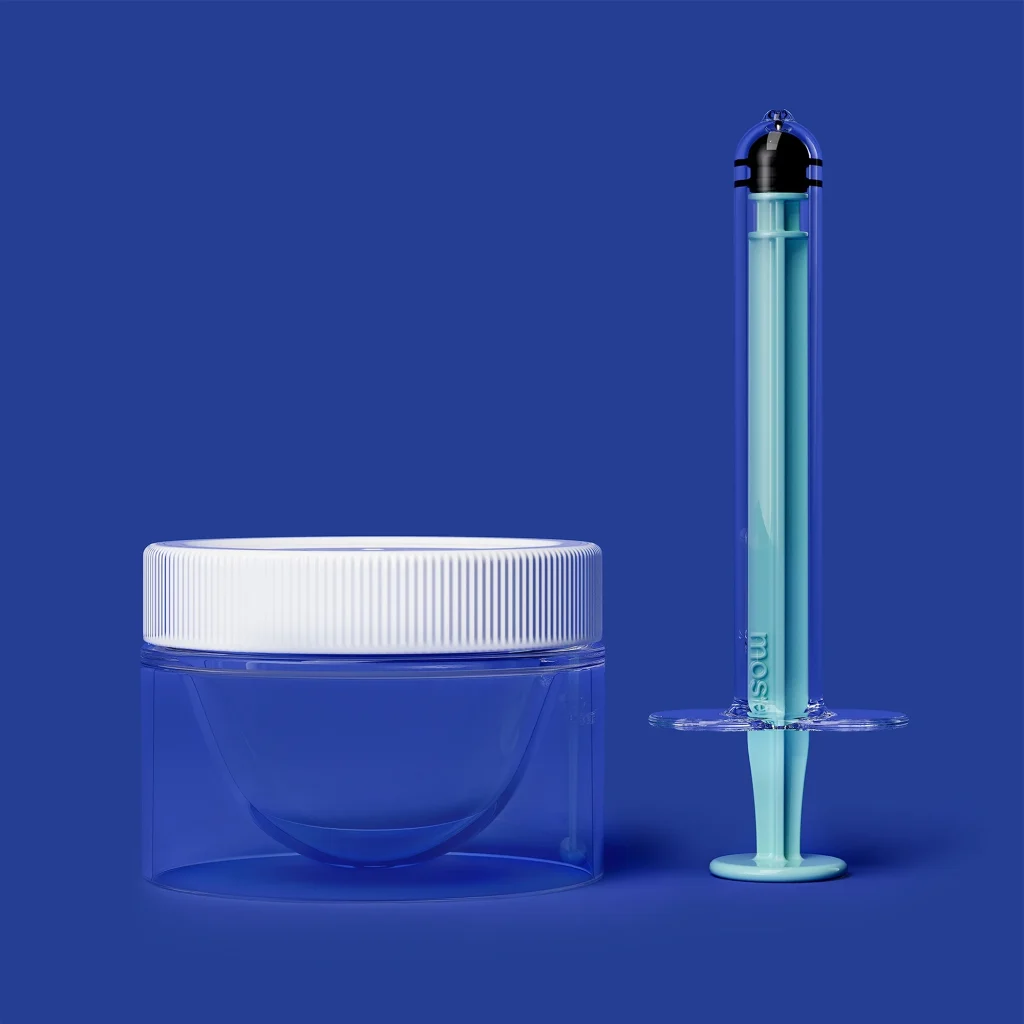
    Gathering Supplies

    Illustration explaining the Mosie Baby home insemination kit features and design benefits.

    Preparing for a Home Insemination Cycle as a Single Parent

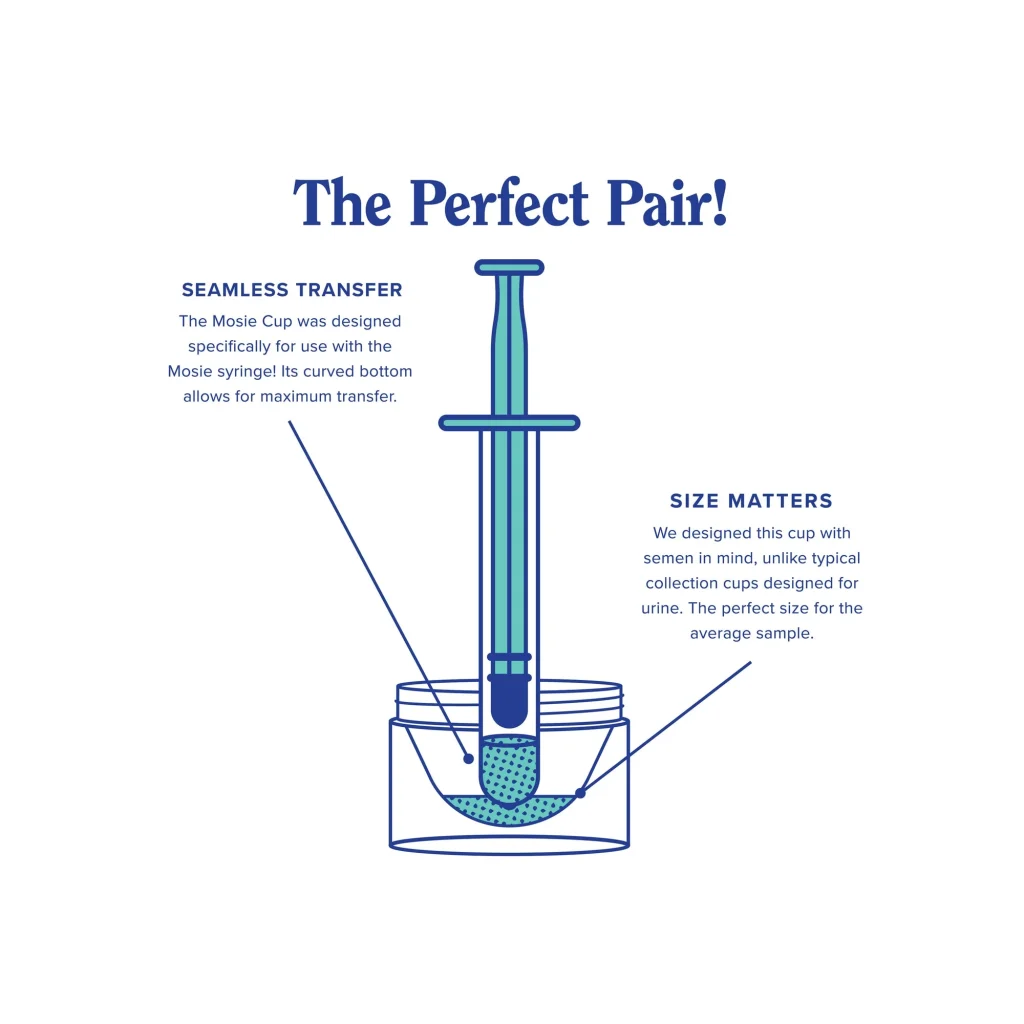
    Before starting the home insemination process, it is important to gather all the necessary supplies. These may include a sterile syringe or insemination cup, ovulation predictor kits, and sperm. It is important to ensure that all supplies are sterile and have not expired to avoid any potential complications.

    The Insemination Process

    The actual insemination process may vary slightly depending on the method you choose, but the general steps are as follows:

    1. Prepare the sperm: If you are using fresh sperm from a known donor, you will need to collect it and place it into a sterile container. If you are using sperm from a sperm bank, it will come in a vial that is ready for insemination.

    2. Prepare yourself: Wash your hands thoroughly and assume a comfortable position, either lying down with your hips elevated or standing with one leg on a chair.

    3. Insert the sperm: Using a sterile syringe or insemination cup, gently insert the sperm as close to your cervix as possible. Some women may choose to use a menstrual cup to hold the sperm in place for a longer period of time.

    4. Stay elevated: After the insemination, remain in an elevated position for 10-15 minutes to increase the chances of the sperm reaching the cervix.

    5. Rest: It is recommended to rest for at least 30 minutes after the insemination process to allow the sperm to swim towards the cervix.

    6. Repeat if necessary: If you are tracking your ovulation, you may want to repeat the process for a couple of days to increase your chances of pregnancy.

    After the Insemination

    After the insemination process, it is important to take care of yourself both physically and emotionally. It is normal to experience a range of feelings and anxieties during the two-week wait before taking a pregnancy test. It is important to continue taking care of your body and practicing self-care during this time.

    In conclusion, preparing for a home insemination cycle as a single parent is a process that requires patience, determination, and support. It is important to prepare yourself mentally, choose a donor, track ovulation, prepare your body, gather supplies, and follow the insemination process carefully. Remember to take care of yourself during the two-week wait and seek support from loved ones or a professional if needed. With proper preparation and support, home insemination can be a successful and fulfilling journey towards parenthood for single individuals.

    Summary:

    Home insemination is a viable option for single individuals who want to become parents. It involves placing sperm into the vagina or cervix without the assistance of a medical professional. Before starting the process, it is important to prepare mentally and choose a donor. Tracking ovulation, preparing the body, and gathering supplies are essential steps to increase the chances of success. The actual insemination process involves inserting the sperm into the cervix and staying in an elevated position for a period of time. After the insemination, it is important to take care of oneself both physically and emotionally. With proper preparation and support, home insemination can be a successful journey towards parenthood for single individuals.

  • At-Home Insemination and Allergies: How to Prepare Your Body for Potential Triggers

    At-Home Insemination and Allergies: How to Prepare Your Body for Potential Triggers

    In recent years, there has been a rise in the number of couples turning to at-home insemination as a method of conceiving. This process involves using a donor’s sperm to inseminate oneself or one’s partner at home, rather than in a clinical setting. While this method can offer a more relaxed and intimate approach to the conception process, it is important for those with allergies to take certain precautions to ensure a safe and successful insemination. In this blog post, we will explore the potential triggers for allergies during at-home insemination and provide tips on how to prepare your body for a safe and successful experience.

    Understanding Allergies and Their Triggers

    Before delving into the specifics of at-home insemination, it is important to have a basic understanding of allergies and their triggers. Allergies occur when the body’s immune system overreacts to a harmless substance, such as pollen, pet dander, or certain foods. The body produces antibodies to fight off these substances, leading to a range of symptoms including sneezing, itching, and congestion.

    The triggers for allergies can vary greatly from person to person, and some may be more sensitive to certain substances than others. It is also possible for individuals to develop allergies later in life, even if they have not experienced them before. This is why it is crucial to be aware of potential triggers and take necessary precautions to avoid allergic reactions during at-home insemination.

    Potential Allergens During At-Home Insemination

    When it comes to at-home insemination, there are a few potential allergens that individuals should be aware of. These include:

    1. Latex Allergies: Many at-home insemination kits come with latex gloves, which can be a problem for those with latex allergies. It is important to check the ingredients of any products included in the kit and opt for latex-free options if needed.

    2. Chemical Sensitivities: Some individuals may be sensitive to certain chemicals used in lubricants or sperm collection cups. It is important to read the labels and opt for natural and hypoallergenic options.

    3. Sperm Allergies: It is possible for individuals to be allergic to sperm itself, which can lead to discomfort and allergic reactions during insemination. This is more common in those who have had multiple sexual partners and have been exposed to different types of sperm.

    Hands holding a syringe and a small container against a blue background.

    At-Home Insemination and Allergies: How to Prepare Your Body for Potential Triggers

    4. Environmental Allergens: During at-home insemination, individuals may be more exposed to environmental allergens such as dust, pet dander, or pollen. It is important to keep the space clean and free of potential triggers, especially if the individual has known allergies to these substances.

    Preparing Your Body for At-Home Insemination

    Now that we have identified the potential allergens during at-home insemination, let’s explore how to prepare your body for a safe and successful experience.

    1. Get Tested for Allergies: If you have a history of allergies or suspect that you may be allergic to certain substances, it is important to get tested before attempting at-home insemination. This will help identify any potential triggers and allow you to take necessary precautions.

    2. Use Natural and Hypoallergenic Products: When selecting lubricants or sperm collection cups, opt for natural and hypoallergenic options. These products are less likely to cause allergic reactions and are gentler on the body.

    3. Avoid Potential Triggers: Keep the space where you will be performing the insemination clean and free of potential allergens. This may involve vacuuming, dusting, and keeping pets out of the room.

    4. Consider Allergy Medication: If you have known allergies, it may be helpful to take allergy medication before the insemination process. This can help prevent any potential reactions and allow you to relax and focus on the experience.

    5. Communicate with Your Partner or Donor: If you are using a donor’s sperm for at-home insemination, it is important to communicate with them about any known allergies. This will allow them to take necessary precautions before providing the sperm.

    Conclusion

    At-home insemination can be a beautiful and intimate way to conceive, but it is important to be aware of potential allergens and take necessary precautions to ensure a safe and successful experience. By understanding allergies and their triggers, using natural and hypoallergenic products, and communicating with your partner or donor, you can prepare your body for at-home insemination and minimize the risk of allergic reactions.

    In summary, at-home insemination is a popular method of conception, but individuals with allergies must take certain precautions to ensure a safe and successful experience. This blog post explored the potential allergens during at-home insemination, such as latex, chemicals, sperm, and environmental allergens, and provided tips on how to prepare your body for this process. By getting tested for allergies, using natural and hypoallergenic products, avoiding potential triggers, considering allergy medication, and communicating with your partner or donor, you can prepare your body for at-home insemination and minimize the risk of allergic reactions.

  • Essential Vitamins and Minerals for Preparing Your Body for At-Home Insemination

    Blog Post Title: Essential Vitamins and Minerals for Preparing Your Body for At-Home Insemination

    Summary:

    In recent years, at-home insemination has gained popularity as an alternative for couples trying to conceive. This method involves using a donor’s sperm and self-administering it in the comfort of one’s own home. However, preparing your body for at-home insemination requires more than just the physical process. It also involves ensuring that your body is in a healthy state to increase the chances of a successful pregnancy. One crucial aspect of this preparation is the intake of essential vitamins and minerals.

    In this blog post, we will discuss the essential vitamins and minerals that can help prepare your body for at-home insemination. These nutrients play a crucial role in reproductive health and can improve fertility, increase sperm count, and regulate ovulation. By incorporating these vitamins and minerals into your diet, you can enhance your chances of a successful at-home insemination.

    1. Folic Acid

    Folic acid, also known as vitamin B9, is vital for both men and women who are trying to conceive. It helps in the proper development of the embryo and reduces the risk of birth defects. For men, folic acid can improve sperm count and motility, making it easier to fertilize an egg. Women who are planning for insemination should take folic acid at least three months before the procedure.

    You can find folic acid in foods like leafy greens, citrus fruits, beans, and peas. It is also available in supplement form, but it is best to consult with your doctor before taking any supplements.

    2. Vitamin D

    Vitamin D is crucial for maintaining healthy bones and teeth, but it also plays an essential role in fertility. Research has shown that women with vitamin D deficiency have a higher risk of infertility and miscarriage. On the other hand, men with sufficient levels of vitamin D have better sperm quality and motility.

    The best source of vitamin D is sunlight, but it can also be found in foods like fatty fish, eggs, and fortified dairy products. If you have low levels of vitamin D, your doctor may recommend taking supplements to boost your levels.

    3. Zinc

    Zinc is a mineral that is essential for both men and women when trying to conceive. It helps improve sperm count and motility in men and regulates ovulation in women. Zinc also plays a crucial role in DNA synthesis, making it vital for the healthy development of the embryo.

    Foods rich in zinc include oysters, beef, chicken, beans, and nuts. You can also take zinc supplements, but make sure not to exceed the recommended daily intake as too much zinc can be harmful.

    4. Iron

    mosie syringe kit comparison highlighting patented slit opening for deeper spray versus standard shallow spray.

    Essential Vitamins and Minerals for Preparing Your Body for At-Home Insemination

    Iron is a mineral that is essential for the production of healthy red blood cells. It also helps carry oxygen to all parts of the body, including the reproductive organs. Women with iron deficiency may experience irregular periods, which can affect ovulation and conception.

    To increase your iron intake, include foods like dark leafy greens, lean red meat, beans, and fortified cereals in your diet. If you have low iron levels, your doctor may prescribe iron supplements.

    5. Vitamin C

    Vitamin C is a powerful antioxidant that can boost your immune system and protect your cells from damage. For women, vitamin C can help regulate ovulation and increase the production of cervical mucus, making it easier for sperm to reach the egg. For men, it can improve sperm quality and motility.

    Foods rich in vitamin C include citrus fruits, bell peppers, kiwi, and strawberries. You can also take vitamin C supplements, but make sure not to exceed the recommended daily intake.

    6. Selenium

    Selenium is a mineral that is essential for sperm production and motility. It also helps protect sperm from oxidative damage, leading to healthier sperm. For women, selenium can improve the quality of the eggs and reduce the risk of miscarriage.

    You can find selenium in foods like Brazil nuts, seafood, and whole grains. However, too much selenium can be toxic, so it is essential to consult with your doctor before taking any supplements.

    7. Omega-3 Fatty Acids

    Omega-3 fatty acids, particularly DHA and EPA, are crucial for reproductive health. They help regulate hormones, improve sperm quality and motility, and increase blood flow to the reproductive organs. For women, omega-3 fatty acids can also help reduce the risk of pregnancy complications like preeclampsia.

    The best sources of omega-3 fatty acids are fatty fish like salmon, sardines, and tuna. You can also take fish oil supplements, but make sure to consult with your doctor first.

    In Conclusion:

    At-home insemination requires a healthy body to increase the chances of a successful pregnancy. Incorporating these essential vitamins and minerals into your diet can help prepare your body for at-home insemination. However, it is important to consult with your doctor before making any changes to your diet or taking any supplements.

    By taking care of your physical health and ensuring that your body has the necessary nutrients, you can increase your chances of a successful at-home insemination and start your journey towards parenthood.

  • At-Home Insemination 101: How to Get Your Body Ready

    Blog Post Title: At-Home Insemination 101: How to Get Your Body Ready

    Are you and your partner looking to start a family through at-home insemination? This method of conception can be a great option for same-sex couples, single individuals, or those struggling with fertility issues. However, before diving into the process, it’s important to make sure your body is ready for the journey ahead. In this blog post, we will discuss the necessary steps to prepare your body for at-home insemination.

    1. Consult with Your Doctor
    Before starting any new fertility journey, it’s crucial to consult with your doctor. They can assess your overall health and make sure you are ready for pregnancy. Your doctor can also provide guidance on any necessary medical tests or supplements to help increase your chances of success with at-home insemination.

    2. Track Your Menstrual Cycle
    Understanding your menstrual cycle is essential for successful at-home insemination. You and your partner should track your cycles using a calendar or a fertility tracking app. This will help you determine when you are ovulating, which is the best time for insemination. Generally, ovulation occurs 14 days before the start of your next period. However, every woman’s body is different, so tracking your cycle will give you a more accurate prediction.

    3. Optimize Your Diet and Lifestyle
    A healthy diet and lifestyle are crucial for fertility and pregnancy. Make sure to consume a well-balanced diet that includes plenty of fruits, vegetables, whole grains, and protein. Avoid processed foods, excessive caffeine, and alcohol, as these can all negatively impact fertility. Additionally, consider incorporating stress-reducing activities such as yoga, meditation, or acupuncture into your routine.

    4. Take Prenatal Vitamins
    Prenatal vitamins are essential for preparing your body for pregnancy. They provide necessary nutrients such as folic acid, iron, and calcium, which are crucial for a healthy pregnancy. It’s recommended to start taking prenatal vitamins at least three months before attempting at-home insemination.

    syringe and container for home insemination kit against a blue background

    At-Home Insemination 101: How to Get Your Body Ready

    5. Consider Using Fertility Supplements
    In addition to prenatal vitamins, there are also specific supplements that can help improve fertility and egg quality. Coenzyme Q10, vitamin D, and omega-3 fatty acids are all known to have positive effects on fertility. However, it’s essential to consult with your doctor before starting any new supplements.

    6. Prepare Your Body for Insemination
    Before the insemination process, there are a few things you can do to prepare your body. First, make sure to empty your bladder and bowels before insemination. This will help reduce any discomfort during the process. It’s also recommended to take a warm bath or use a heating pad on your lower abdomen to relax your muscles and increase blood flow to the area.

    7. Choose the Right Insemination Method
    There are a few different methods of at-home insemination, including cervical cap, syringe, and soft cup. It’s essential to choose the method that is most comfortable and effective for you and your partner. It may take some trial and error to find the best method for your body, so don’t get discouraged if it doesn’t work the first time.

    8. Have Patience and Stay Positive
    At-home insemination may not result in pregnancy on the first try, and that’s okay. It’s essential to have patience and stay positive throughout the process. Keep tracking your cycle and trying during your most fertile window. Remember that it can take several attempts for a successful pregnancy to occur.

    In conclusion, preparing your body for at-home insemination is crucial for a successful pregnancy. Consult with your doctor, track your menstrual cycle, optimize your diet and lifestyle, take prenatal vitamins, and consider using fertility supplements. Additionally, make sure to prepare your body for the insemination process itself and choose the right method for you. With patience and positivity, you and your partner can increase your chances of conceiving through at-home insemination.

    Summary:
    At-home insemination is a popular option for starting a family for same-sex couples, single individuals, and those struggling with fertility issues. However, before attempting this method, it’s crucial to prepare your body for the journey ahead. This blog post covers essential steps to get your body ready for at-home insemination, including consulting with your doctor, tracking your menstrual cycle, optimizing your diet and lifestyle, taking prenatal vitamins, considering fertility supplements, preparing your body for insemination, and having patience and staying positive throughout the process.

  • Preparing Your Body for At-Home Insemination: Tips and Tricks

    Preparing Your Body for At-Home Insemination: Tips and Tricks

    In recent years, the popularity of at-home insemination has increased as a method for starting a family. Whether you are a same-sex couple, single parent, or dealing with fertility issues, at-home insemination can be a convenient and cost-effective option. However, it’s important to know that just like traditional insemination, proper preparation is key to increasing your chances of success. In this blog post, we will discuss some tips and tricks for preparing your body for at-home insemination.

    1. Consult with a Healthcare Provider

    Before starting at-home insemination, it’s crucial to consult with a healthcare provider. They can assess your overall health and provide guidance on the best methods for you. They may also recommend certain tests to ensure that your body is ready for insemination and to rule out any potential health issues that may affect your chances of conceiving.

    2. Track and Monitor Your Ovulation

    Timing is essential when it comes to at-home insemination. Therefore, it’s crucial to track and monitor your ovulation cycle. You can use ovulation predictor kits or track your basal body temperature to determine when you are ovulating. This will help you plan for insemination during your most fertile days, increasing your chances of success.

    3. Prepare Your Body for Optimal Sperm Health

    Sperm health plays a significant role in the success of at-home insemination. To improve sperm health, it’s recommended to avoid smoking, alcohol, and recreational drugs. Maintaining a healthy diet and exercise routine can also positively impact sperm health. Additionally, certain supplements like folic acid, zinc, and vitamin C have been shown to improve sperm quality.

    4. Choose the Right Insemination Method

    At-home insemination kit featuring a syringe and collection cup on a blue background.

    Preparing Your Body for At-Home Insemination: Tips and Tricks

    There are various methods for at-home insemination, including intracervical insemination (ICI) and intrauterine insemination (IUI). ICI involves depositing the sperm near the cervix, while IUI involves placing the sperm directly into the uterus. Depending on your individual needs, your healthcare provider can recommend the best method for you.

    5. Practice Proper Insemination Technique

    It’s essential to follow proper insemination techniques to increase your chances of success. This includes using sterile equipment, washing your hands thoroughly, and following the recommended timing for inserting the sperm. You can also try using an ovulation tracking app to help you keep track of your cycles and remind you of the optimal time for insemination.

    6. Create a Relaxing Environment

    Insemination can be a stressful and emotional process, so it’s crucial to create a relaxing environment for yourself and your partner. This can include playing calming music, dimming the lights, or using aromatherapy. Stress and anxiety can affect hormone levels and potentially interfere with ovulation, so creating a calm and comfortable environment is essential for successful insemination.

    7. Consider Using a Sperm Donor

    For those using at-home insemination as a single parent or same-sex couple, finding the right sperm donor is a crucial step. It’s important to research reputable sperm banks and choose a donor who aligns with your values and preferences. Some sperm banks also offer genetic and health screening to ensure the quality of the sperm.

    8. Stay Positive and Be Patient

    Insemination can be an emotional rollercoaster, with many ups and downs. It’s important to stay positive and be patient throughout the process. Remember that it may take a few attempts before successfully conceiving, and it’s essential to be kind to yourself and your partner during this time.

    In summary, at-home insemination can be an effective option for starting a family, but proper preparation is key. Consulting with a healthcare provider, tracking ovulation, maintaining sperm health, choosing the right method and technique, creating a relaxing environment, and staying positive are all essential steps in preparing your body for at-home insemination. With patience and determination, you can increase your chances of success and fulfill your dream of starting a family.

  • DIY Home Insemination for Women with Fertility Issues

    Blog Post:

    DIY Home Insemination for Women with Fertility Issues

    For many women, starting a family is a dream that they have longed for. However, for some, this dream may come with challenges and obstacles, such as fertility issues. While there are various medical treatments and procedures available to help women with fertility issues conceive, they can often be costly and invasive. This is where DIY home insemination comes in – a more affordable and private option for women struggling with fertility issues. In this blog post, we will explore the process of DIY home insemination and how it can be a viable option for women looking to start a family.

    What is DIY Home Insemination?

    DIY home insemination, also known as at-home insemination, is the process of self-insemination using donor sperm. This method involves using a syringe or a cervical cap to insert sperm into the vagina, similar to how it is done during a medical insemination procedure. However, instead of having a doctor or medical professional do it, the woman or her partner can perform the procedure themselves at home.

    Why Consider DIY Home Insemination?

    There are several reasons why women with fertility issues may consider DIY home insemination. Firstly, it is a more affordable option compared to medical procedures, which can cost thousands of dollars. DIY home insemination can be done without the need for expensive medical equipment or doctor’s visits. Additionally, it can be a more private and intimate experience for couples who may not feel comfortable with the clinical setting of a doctor’s office.

    Preparing for DIY Home Insemination

    Before starting the DIY home insemination process, it is crucial to prepare yourself physically and mentally. It is recommended to consult a doctor or fertility specialist to ensure that self-insemination is a suitable option for you. They can also provide guidance on the best time to inseminate based on your ovulation cycle.

    Next, you will need to choose a donor sperm. This can be obtained from a sperm bank or through a known donor, such as a friend or family member. It is essential to choose a donor who has undergone rigorous testing for sexually transmitted diseases and genetic disorders.

    The Process of DIY Home Insemination

    Step 1: Collecting the Sperm

    The first step is to collect the sperm from the donor. The sperm can be collected through masturbation or using a special sperm collection condom during intercourse. It is crucial to keep the sperm at room temperature and use it within an hour of collection.

    Step 2: Preparing the Insemination Tools

    At-home insemination kit with syringes and collection cups, labeled FSA eligible.

    DIY Home Insemination for Women with Fertility Issues

    Once the sperm is collected, you will need to prepare the insemination tools. This can include a sterile syringe or a cervical cap. It is essential to sterilize these tools before use to avoid any potential infections.

    Step 3: Positioning

    The woman should lie on her back with her hips slightly elevated, either by using pillows or placing a cushion under her buttocks. This position helps the sperm reach the cervix more easily.

    Step 4: Inserting the Sperm

    Using the syringe or cervical cap, the sperm should be inserted into the vagina near the cervix. It is essential to be gentle and take your time during this process to avoid any discomfort.

    Step 5: Resting Period

    After the sperm is inserted, the woman should remain lying down for 15-20 minutes to allow the sperm to swim towards the cervix and increase the chances of conception.

    Step 6: Repeat the Process

    It is recommended to repeat the insemination process for two to three consecutive days to increase the chances of conception.

    Important Things to Consider

    While DIY home insemination may seem like a simple and inexpensive process, there are some important things to keep in mind.

    – DIY home insemination does not guarantee pregnancy. It may take multiple attempts before conception occurs.
    – It is crucial to use sterile equipment and follow proper hygiene practices to avoid any infections.
    – It is essential to have a pre-insemination check-up with a healthcare professional to ensure that self-insemination is a suitable option for you.
    – Using a known donor may involve legal considerations, and it is recommended to consult a lawyer before proceeding.
    – It is essential to have open communication with your partner throughout the process and be emotionally prepared for any possible outcomes.

    In conclusion, DIY home insemination can be a viable option for women with fertility issues who are looking to start a family. It is a more affordable and private option compared to medical procedures, and the process can be done in the comfort of your own home. However, it is crucial to consult a doctor and follow proper hygiene practices to ensure a safe and successful insemination.

    Summary:

    DIY home insemination is a process of self-insemination using donor sperm for women with fertility issues. It is a more affordable and private option compared to medical procedures. The process involves collecting the sperm, preparing the insemination tools, positioning, inserting the sperm, resting, and repeating the process. It is essential to consider important factors such as hygiene, legal considerations, and emotional preparedness before proceeding with DIY home insemination.