Blog Post Title: Home Insemination Myths vs. Facts: A Step-by-Step Guide
Summary:
Many couples or individuals who are trying to conceive may consider home insemination as a viable option. However, there are many myths surrounding this method that may cause confusion or hesitation. In this blog post, we will debunk these myths and provide a step-by-step guide to home insemination.
Myth #1: Home insemination is not as effective as medical procedures.
Fact: Home insemination can be just as effective as medical procedures when done correctly. In fact, studies have shown that the success rates of home insemination are comparable to those of intrauterine insemination (IUI) or even in vitro fertilization (IVF).
Myth #2: Only heterosexual couples can use home insemination.
Fact: Home insemination is not limited to heterosexual couples. Same-sex couples, single individuals, and even those with fertility issues can also use this method to conceive.
Myth #3: Home insemination is dangerous and can lead to infections.
Fact: As long as proper hygiene and safety measures are followed, the risk of infection from home insemination is minimal. It is important to use sterile equipment and follow the recommended steps to reduce the risk of infection.
Myth #4: You need expensive equipment or medical training to perform home insemination.
Fact: Home insemination can be done with basic equipment that is easily accessible and affordable. While medical training is not necessary, it is important to educate yourself on the process and follow the recommended steps for a successful insemination.
Myth #5: Home insemination can only be done with fresh sperm.
Fact: While fresh sperm may have a higher success rate, frozen sperm can also be used for home insemination. It is important to follow the instructions for thawing and handling frozen sperm to maintain its viability.
Step-by-Step Guide to Home Insemination:
Home Insemination Myths vs. Facts: A Step-by-Step Guide
Step 1: Determine your ovulation cycle.
The first step to home insemination is to determine your ovulation cycle. This can be done through tracking your menstrual cycle, using ovulation predictor kits, or monitoring your basal body temperature.
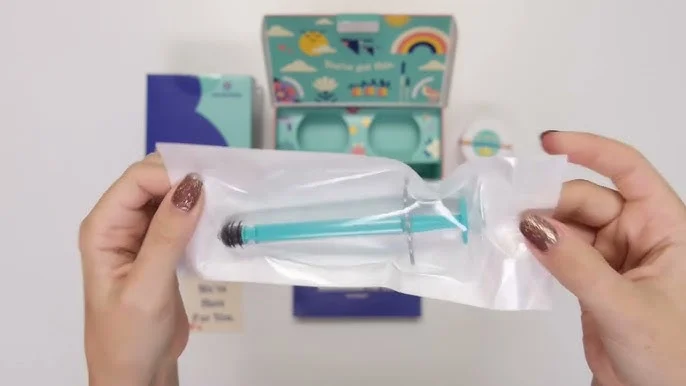
Step 2: Gather supplies.
The necessary supplies for home insemination include a sterile collection cup, a sterile syringe, a sterile container to hold the sperm, and a sterile catheter or soft cup.
Step 3: Collect the sperm.
If using a sperm donor, the sperm can be purchased from a sperm bank or obtained from a known donor. If using a partner, the sperm can be collected in the sterile cup through masturbation.
Step 4: Prepare the sperm.
If using fresh sperm, it is important to let it liquefy for 20-30 minutes before insemination. If using frozen sperm, it should be thawed according to the instructions provided by the sperm bank.
Step 5: Prepare yourself.
Wash your hands thoroughly and use a sterile technique to handle the equipment. It may also be helpful to insert a menstrual cup or soft cup into the vagina to hold the sperm in place.
Step 6: Inseminate.
Using the sterile syringe, draw up the sperm from the collection cup and insert it into the vagina near the cervix. Alternatively, a sterile catheter or soft cup can be used to insert the sperm into the cervix.
Step 7: Stay in a horizontal position.
After insemination, it is recommended to stay in a horizontal position for 15-20 minutes to allow the sperm to reach the cervix.
Step 8: Monitor for ovulation.
Continue to track your ovulation and monitor for any potential pregnancy symptoms.
In conclusion, home insemination is a safe and effective method for conception if done correctly. It is important to educate yourself on the process and follow the recommended steps for a successful insemination. By debunking these common myths and providing a step-by-step guide, we hope to help couples and individuals make informed decisions about their journey to parenthood.
Leave a Reply