Real-Life Stories: A Step-by-Step Guide to Home Insemination
In recent years, more and more individuals and couples are turning to home insemination as a means of starting or expanding their families. Whether it’s due to financial reasons, personal preference, or fertility issues, home insemination offers a convenient and cost-effective alternative to traditional methods. However, the process of home insemination can seem daunting and intimidating, especially for those who are new to the concept. That’s why we’ve created this step-by-step guide to help you navigate the home insemination journey with confidence and ease.
Step 1: Know Your Options
Before diving into the world of home insemination, it’s important to understand the different methods available. The most common methods include artificial insemination with donor sperm (AID), self-insemination with a known donor, and reciprocal IVF. Each method has its own pros and cons, so it’s crucial to research and discuss with your partner which option is best for you.
Step 2: Choose Your Donor
The next step is to decide on a donor. This can be a daunting task, but there are a few options to consider. You can either use a sperm bank to purchase donor sperm, ask a friend or family member to be a known donor, or find a donor through online platforms or support groups. Whichever route you choose, it’s important to thoroughly screen and discuss expectations and boundaries with your donor beforehand.
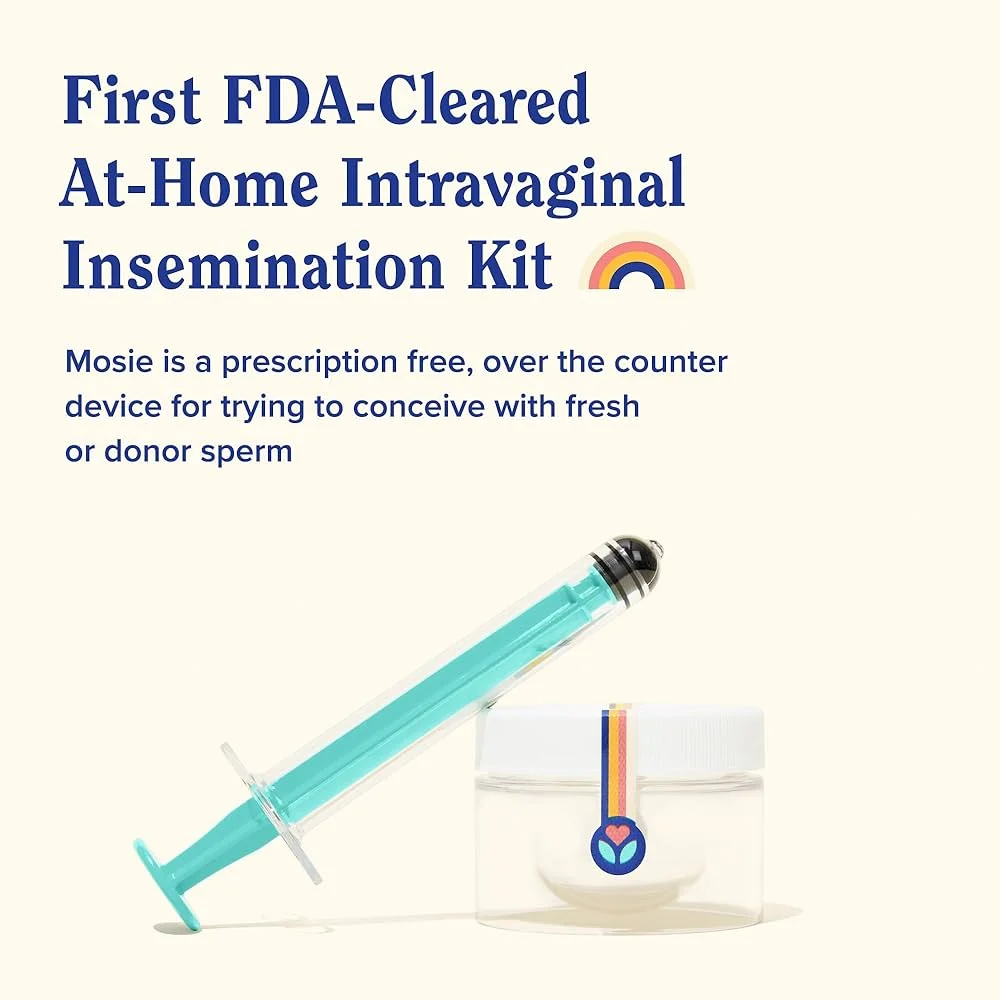
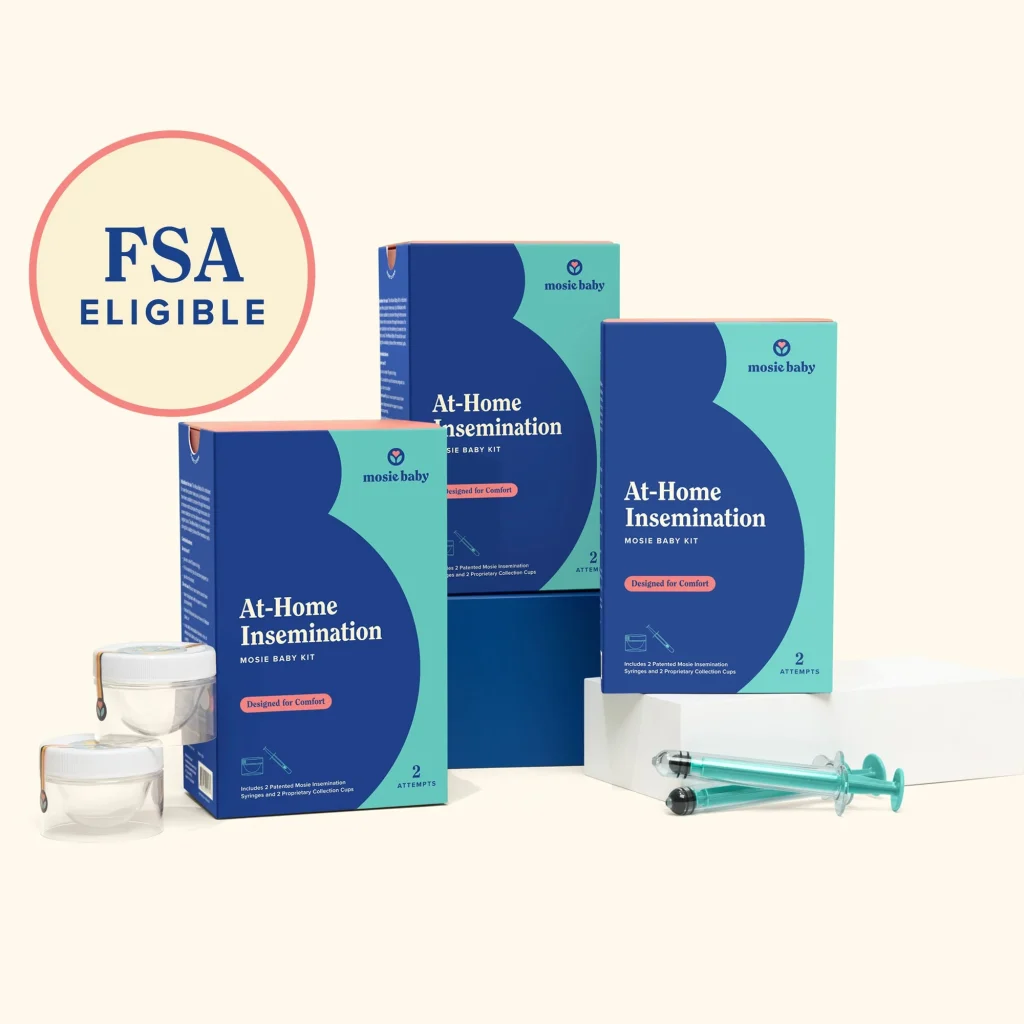
Step 3: Gather Your Supplies
Once you have chosen your method and donor, it’s time to gather all the necessary supplies. This includes a sterile collection cup, a syringe, a speculum, and a home insemination kit (which can be purchased online or at a fertility clinic). It’s important to make sure all your supplies are sterile to avoid any potential infections.
Step 4: Track Your Ovulation
Timing is crucial when it comes to home insemination. It’s important to track your ovulation to increase your chances of success. This can be done using ovulation predictor kits, tracking your basal body temperature, or monitoring your cervical mucus. Knowing when you are ovulating will help you plan the insemination at the most optimal time.
Step 5: Prepare for the Insemination
On the day of the insemination, make sure to have a comfortable and private space set up. It’s important to relax and be in a calm state of mind. Before the insemination, make sure to wash your hands and sterilize all the equipment. You can also use a lubricant to make the process more comfortable.

Real-Life Stories: A Step-by-Step Guide to Home Insemination
Step 6: Perform the Insemination
Now, it’s time for the insemination process. The first step is to have the donor collect their sperm sample in the sterile cup. Then, using the syringe, carefully draw up the sperm sample. Next, insert the speculum into the vagina and slowly inject the sperm into the cervix. It’s important to keep the sperm warm and close to body temperature throughout the process.
Step 7: Rest and Relax
After the insemination, it’s recommended to rest for at least 15-20 minutes with your legs elevated to help the sperm travel towards the cervix. This is also a good time to reflect and visualize a successful pregnancy.
Step 8: Repeat If Necessary
Home insemination is not a one-time process, and it may take multiple attempts to achieve a successful pregnancy. If you don’t get pregnant on the first try, don’t get discouraged. It’s important to keep trying and adjust your methods if needed.
Step 9: Follow-Up and Pregnancy Test
After the insemination, make sure to follow up with your doctor for any necessary tests or check-ups. It’s also recommended to take a pregnancy test around two weeks after the insemination to confirm if the process was successful.
Real-Life Stories
To provide a deeper understanding of the home insemination process, we’ve gathered real-life stories from individuals who have successfully started their families through home insemination. These stories highlight the diversity and uniqueness of each journey, and offer valuable insights and advice for those considering home insemination.
Summary:
Home insemination is a popular option for those looking to start or expand their families. This step-by-step guide covers the different methods of home insemination, choosing a donor, gathering supplies, tracking ovulation, preparing for the insemination, and the insemination process itself. It also emphasizes the importance of rest and relaxation, and the potential for multiple attempts. Additionally, real-life stories provide personal experiences and advice for anyone considering home insemination.