Tag: artificial insemination

  • Conceiving at Home: A Step-by-Step Guide to Insemination

    Conceiving at Home: A Step-by-Step Guide to Insemination

    The journey to parenthood can be a challenging and emotional one, especially for those who are struggling with infertility or are part of the LGBTQ+ community. Insemination, also known as artificial insemination, is a popular method for conceiving at home and can be an affordable and accessible option for many couples and individuals. In this blog post, we will provide a step-by-step guide to insemination, including the different types, the tools and supplies needed, and tips for success.

    What is Insemination?

    Insemination is the process of placing sperm into the female reproductive system in order to fertilize an egg. This can be done using various methods, including intrauterine insemination (IUI) and intracervical insemination (ICI). IUI involves placing sperm directly into the uterus, while ICI involves placing sperm at the opening of the cervix. Both methods can be done at home with the help of a donor or partner.

    Step 1: Choose the Right Donor

    The first step in the insemination process is choosing the right donor for you. This can be a known donor, such as a friend or family member, or an anonymous donor from a sperm bank. It is important to thoroughly research and consider all options before making a decision. Some things to consider when choosing a donor include their medical history, genetic testing, and personal preferences.

    Step 2: Understand Your Cycle

    In order to increase your chances of success, it is important to have a good understanding of your menstrual cycle. This will help you determine the best time to inseminate, as sperm can survive in the female reproductive system for up to 5 days. Tracking your cycle and using ovulation predictor kits can help you pinpoint your most fertile days.

    Step 3: Gather Supplies

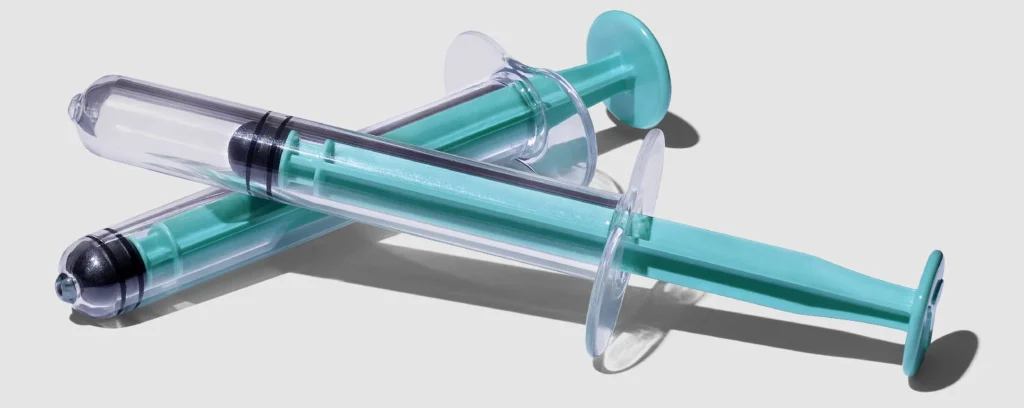
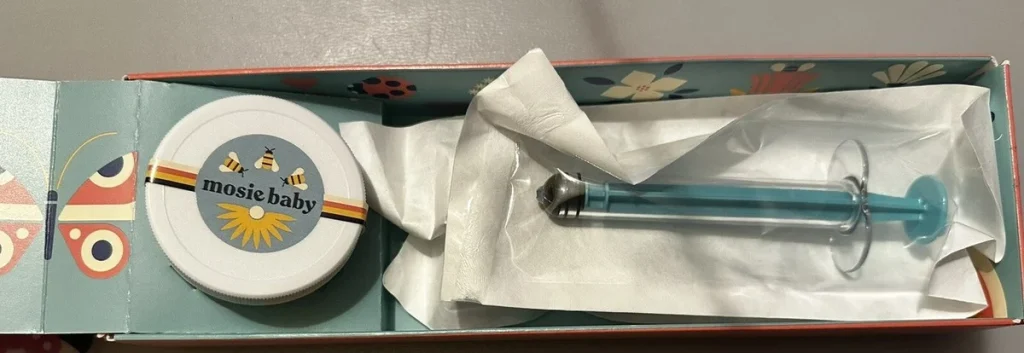
    Insemination can be done with simple tools and supplies that are easily accessible. These may include a sterile cup or syringe to collect and transfer the sperm, a speculum to help locate the cervix, and a soft cup or menstrual cup to hold the sperm in place after insemination.

    Mosie Baby at-home insemination kit featuring a syringe and a container, presented in a decorative box.

    Conceiving at Home: A Step-by-Step Guide to Insemination

    Step 4: Prepare the Sperm

    If using a sperm bank, the sperm will already be prepared and ready for use. However, if using a known donor, it is important to prepare the sperm before insemination. This may involve collecting the sperm in a sterile cup and then using a syringe to transfer it to the insemination device.

    Step 5: Inseminate

    Once the sperm has been prepared and the female partner is in a comfortable position, it is time to inseminate. Using a speculum, the cervix can be located and the sperm can be transferred to the opening of the cervix using a syringe or other insemination device. It is important to remain in this position for 15-30 minutes to allow the sperm to reach the egg.

    Step 6: Relax and Wait

    After insemination, it is important to relax and allow the sperm to do its work. This may involve taking a warm bath or laying in a comfortable position. It is also recommended to avoid any strenuous activities or exercise for the rest of the day.

    Tips for Success

    – Inseminate during your most fertile days, typically around ovulation
    – Use multiple insemination devices to increase the chances of sperm reaching the egg
    – Consider using a fertility-friendly lubricant to help the sperm reach the egg
    – Keep yourself and your partner relaxed and stress-free during the process
    – Consider tracking your basal body temperature and cervical mucus to help determine your most fertile days

    Insemination can be an effective and accessible option for those looking to conceive at home. However, it is important to keep in mind that it may take multiple attempts before a successful pregnancy occurs. It is also recommended to consult with a healthcare provider for personalized guidance and support throughout the process.

    In conclusion, insemination can be a viable option for those looking to conceive at home. By following these steps and tips, you can increase your chances of success and take a step closer to starting or expanding your family.

  • Creating Your Own Miracle: A Step-by-Step Guide to Home Insemination

    Creating Your Own Miracle: A Step-by-Step Guide to Home Insemination

    For many couples struggling with infertility, the option of home insemination can bring new hope. It is a simple and affordable method that allows couples to take control of their fertility journey and potentially conceive a child in the comfort of their own home. In this blog post, we will provide a step-by-step guide to home insemination, outlining everything you need to know and do to increase your chances of success.

    Step 1: Understand the Basics of Home Insemination

    Before embarking on the home insemination process, it is essential to understand the basics. Home insemination, also known as artificial insemination, is a technique where sperm is placed into the reproductive tract of a female in order to facilitate fertilization. This can be done with fresh or frozen sperm, and it can be performed at home using a variety of methods.

    Step 2: Gather Your Supplies

    The next step is to gather all the necessary supplies for the home insemination process. These include a sterile collection cup, a sterile syringe, a sterile container, a timer or clock, and ovulation predictor kits (OPKs). You may also need a speculum, which is a tool used to hold the vagina open during the insemination process.

    Step 3: Timing Is Everything

    Timing is crucial when it comes to home insemination. It is essential to track your ovulation cycle and determine the best time to inseminate. This can be done using OPKs, which detect the surge of luteinizing hormone (LH) in your urine, signaling that ovulation is about to occur. It is recommended to inseminate within 24 hours of a positive OPK result, as sperm can survive in the reproductive tract for up to five days.

    Step 4: Prepare the Sperm

    If you are using frozen sperm, it is important to thaw it according to the instructions provided by the sperm bank. Once thawed, the sperm should be kept at room temperature until ready for use. If you are using fresh sperm, it should be collected on the day of insemination and kept at room temperature until ready for use.

    Two transparent syringes with teal accents positioned diagonally on a light gray background.

    Creating Your Own Miracle: A Step-by-Step Guide to Home Insemination

    Step 5: Prepare the Insemination Site

    Before beginning the insemination process, it is crucial to prepare the insemination site. This can be done by lying on your back with your hips slightly elevated. You can also use pillows to prop up your hips and make the process more comfortable. It is also recommended to empty your bladder before beginning the insemination process.

    Step 6: Insert the Sperm

    Using the sterile syringe, carefully draw up the sperm and insert it into the vagina. The sperm should be placed as close to the cervix as possible, which is the entrance to the uterus. It is recommended to use a speculum to hold the vagina open during this process, making it easier to get the sperm to the correct location.

    Step 7: Rest and Relax

    After the insemination is complete, it is essential to rest and relax for at least 10-15 minutes. This allows the sperm to have enough time to reach the egg and increase the chances of fertilization. Some couples even choose to stay lying down for up to an hour to ensure the best possible outcome.

    Step 8: Monitor Symptoms and Take a Pregnancy Test

    After the insemination, it is important to monitor your symptoms and take a pregnancy test at the appropriate time. If you experience any early pregnancy symptoms, such as nausea, breast tenderness, or fatigue, it may be a good sign that the insemination was successful. It is recommended to take a pregnancy test two weeks after the insemination to get an accurate result.

    Additional Tips for Success:

    – Stay hydrated: Drinking plenty of water can help thin out cervical mucus, making it easier for sperm to reach the egg.
    – Consider using a fertility-friendly lubricant: Some lubricants can hinder sperm movement, so it is important to choose one that is sperm-friendly or use none at all.
    – Have patience: It may take a few tries before successfully conceiving, so it is essential to keep a positive mindset and not get discouraged.

    In conclusion, home insemination can be a viable option for couples struggling with infertility. With proper planning and execution, it can increase the chances of conceiving a child in the comfort of your own home. Remember to always consult with a medical professional before beginning any fertility treatments.

  • DIY Home Insemination: Overcoming Obstacles and Challenges

    DIY Home Insemination: Overcoming Obstacles and Challenges

    For many couples and individuals, the dream of starting a family is a deeply personal and important one. However, for those who struggle with fertility issues or those in the LGBTQ+ community, traditional methods of conception may not be an option. This is where DIY home insemination comes into play. With advancements in technology and a growing acceptance of non-traditional family structures, more and more people are turning to DIY home insemination as a way to overcome obstacles and challenges on their journey to parenthood.

    What is DIY Home Insemination?

    DIY home insemination, also known as artificial insemination at home, is a method of conception where sperm is inserted into the vagina or cervix without medical intervention. This can be done using a variety of techniques, including using a needleless syringe, a cervical cap, or a menstrual cup. The goal is to place the sperm as close to the cervix as possible to increase the chances of fertilization.

    Why Choose DIY Home Insemination?

    There are many reasons why someone may choose DIY home insemination over traditional methods of conception. For some, it may be due to financial constraints, as the cost of fertility treatments and medical procedures can be prohibitively expensive. Others may choose DIY home insemination for privacy reasons, as the process can be done in the comfort and privacy of one’s own home. Additionally, DIY home insemination allows for more control over the process, as individuals can choose their own sperm donor and timing of insemination.

    Overcoming Obstacles and Challenges

    While DIY home insemination may offer a more accessible and private option for conception, it is not without its obstacles and challenges. One of the main obstacles is obtaining sperm from a donor. For heterosexual couples, this may involve finding a willing and trustworthy sperm donor, while for same-sex couples or individuals, it may involve purchasing donor sperm from a sperm bank. In either case, it can be a difficult and emotional process to find the right donor.

    Hands holding a syringe and a small container against a blue background.

    DIY Home Insemination: Overcoming Obstacles and Challenges

    Another challenge is the preparation and timing of insemination. Unlike traditional methods of conception where timing is closely monitored by medical professionals, DIY home insemination requires individuals to track their ovulation and time the insemination accordingly. This can be a stressful and time-consuming process, but proper timing is crucial for successful conception.

    Safety and Sterility

    One of the biggest concerns with DIY home insemination is safety and sterility. Unlike medical procedures that take place in a sterile environment, home insemination carries a higher risk of infection if proper precautions are not taken. It is essential to make sure that all equipment used is clean and sterile to avoid any potential complications.

    Additionally, it is crucial to ensure that the sperm used is from a healthy and screened donor to avoid any potential health risks. This is where purchasing donor sperm from a reputable sperm bank can offer peace of mind, as they thoroughly screen and test all donors before making their sperm available for purchase.

    The Emotional Journey

    Aside from the physical challenges of DIY home insemination, the emotional journey can also be a challenging aspect. Conception can be a rollercoaster of emotions, and the process of DIY home insemination can amplify those emotions. The waiting game between insemination and finding out if it was successful can be an emotional rollercoaster, and the disappointment that comes with negative results can be difficult to handle.

    Furthermore, for those who are using DIY home insemination as a means of starting a family, there may be societal and personal challenges that come with non-traditional family structures. It is essential to have a strong support system in place to help navigate these challenges and provide emotional support throughout the journey.

    In conclusion, DIY home insemination can be a viable option for couples and individuals looking to start a family. It offers a more accessible, private, and controlled method of conception, but it is not without its obstacles and challenges. From finding a donor to timing insemination and dealing with the emotional journey, DIY home insemination requires careful consideration and preparation. However, with the right resources and support, individuals and couples can overcome these obstacles and achieve their dream of parenthood through DIY home insemination.

    SEO metadata: