Friday, January 2

Latest news


fertility


menstrual cycle


reproductive health


home insemination


women's health


conception


pregnancy


ovulation


infertility


self-care


hormones


menstruation


at-home insemination


support
Browse by topic

Stories for you

See all latest

Blog

  • The Importance of Communication in Home Insemination: A Step-by-Step Guide

    Summary:

    Home insemination is a method of conception that involves the placement of sperm into the female reproductive tract, typically done without the assistance of a medical professional. While this may seem like a daunting process, communication is key to ensure a successful and safe home insemination experience. In this step-by-step guide, we will discuss the importance of communication and how to effectively communicate with your partner during the home insemination process. We will also cover the necessary preparations, techniques, and potential complications to be aware of when considering home insemination.

    Importance of Communication in Home Insemination:

    1. Establishing Consent and Boundaries:
    Before beginning the home insemination process, it is crucial to have open and honest communication with your partner about their willingness to participate and what their boundaries are. This includes discussing the level of involvement they want in the process, the use of donor sperm, and any potential concerns or fears they may have. This ensures that both partners are on the same page and feel comfortable throughout the process.

    2. Sharing Information:
    Effective communication also involves sharing important information about the home insemination process. This includes discussing the ovulation cycle, tracking ovulation, and understanding the best time for insemination. It is also important to discuss any medical conditions or medications that may affect fertility and the potential risks and benefits of home insemination.

    3. Choosing a Donor:
    If using donor sperm for home insemination, it is essential to communicate with your partner about the selection process. This involves discussing the criteria for choosing a donor, such as physical characteristics, medical history, and personal preferences. It is vital to have a clear understanding of what both partners are looking for in a donor to avoid any potential conflicts or misunderstandings.

    4. Preparing for Insemination:
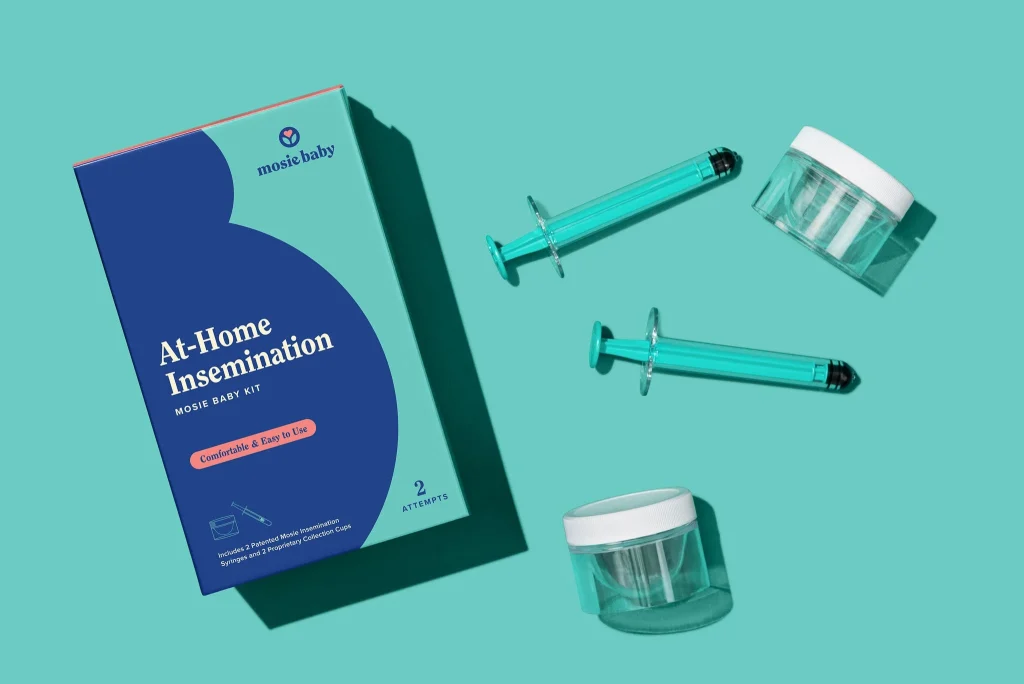
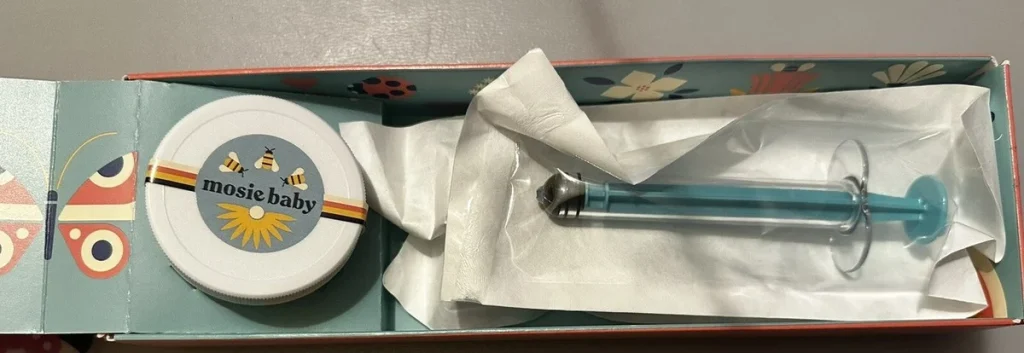
    Communication is crucial when preparing for insemination. This includes discussing the necessary supplies, such as sterile syringes and cups, and the proper techniques for handling and storing the sperm. It is also important to have a clear plan in case of any unexpected issues, such as the sperm not arriving on time or the need for additional supplies.

    Mosie kit featuring two syringes and a small container, all on a white background.

    The Importance of Communication in Home Insemination: A Step-by-Step Guide

    5. Communication During Insemination:
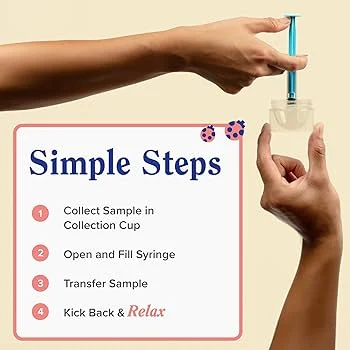
    During the insemination process, it is essential to maintain open communication with your partner. This includes discussing any discomfort or pain and ensuring that the process is going smoothly. It is also crucial to follow the instructions carefully and communicate any concerns or questions that may arise.

    6. Post-Insemination Communication:
    After the insemination process, it is vital to have a conversation with your partner about any potential symptoms or side effects they may experience. It is also important to discuss the next steps, such as taking a pregnancy test or scheduling a follow-up with a healthcare provider.

    Potential Complications:

    While home insemination can be a safe and effective method of conception, there are some potential complications that may arise. It is crucial to communicate with your partner about these potential risks and make informed decisions together. These include:

    1. Infection:
    If proper hygiene and sterile techniques are not followed, there is a risk of infection during the home insemination process. It is essential to discuss the importance of cleanliness and follow the instructions carefully to avoid any potential infections.

    2. Allergic Reactions:
    Some individuals may have allergies to certain materials used in the home insemination process, such as latex or spermicide. It is crucial to communicate any known allergies with your partner and choose alternative materials if necessary.

    3. Emotional Challenges:
    Home insemination can be an emotionally challenging process for both partners. It is important to have open communication and support each other throughout the experience. If any emotional challenges arise, it is essential to discuss them with your partner and seek support if needed.

    In conclusion, effective communication is key to a successful and safe home insemination experience. It helps establish consent and boundaries, share important information, choose a donor, prepare for insemination, and handle any potential complications. By maintaining open and honest communication with your partner, you can ensure a smooth and positive home insemination journey.

  • Creating a Home Insemination Plan: A Step-by-Step Guide

    Creating a Home Insemination Plan: A Step-by-Step Guide

    In recent years, there has been an increasing number of individuals and couples choosing to conceive through home insemination. This method allows for a more private and intimate conception process, as well as giving individuals the freedom to choose their preferred donor. However, it is important to have a well-thought-out plan in place to ensure a successful home insemination. In this blog post, we will provide a step-by-step guide on how to create a home insemination plan.

    Step 1: Determine Your Fertility Window
    The first step in creating a home insemination plan is to determine your fertility window. This is the timeframe during which you are most likely to conceive. For individuals with regular menstrual cycles, this usually falls between days 10-17. However, it is important to track your ovulation through methods like ovulation predictor kits or basal body temperature charting to ensure accuracy.

    Step 2: Choose a Donor
    One of the advantages of home insemination is the ability to choose your own donor. This can be a known donor, such as a friend or family member, or a sperm donor from a reputable sperm bank. It is important to consider factors such as medical history, physical characteristics, and personal values when selecting a donor.

    Step 3: Gather Supplies
    To perform a successful home insemination, you will need to gather the necessary supplies. These may include a sterile specimen cup, a sterile syringe, ovulation predictor kits, and a fertility-friendly lubricant. It is also important to have a clean and comfortable space for the insemination process.

    A person using a syringe from an at-home insemination kit on a wooden table.

    Creating a Home Insemination Plan: A Step-by-Step Guide

    Step 4: Prepare the Sperm
    If using a sperm donor from a sperm bank, the sperm will arrive frozen and will need to be thawed according to the instructions provided. For known donors, it is important to discuss and agree upon the method of collecting and delivering the sperm. Remember to handle the sperm with care and avoid extreme temperatures.

    Step 5: Perform the Insemination
    On the day of ovulation, it is time to perform the insemination. Begin by checking the ovulation predictor kit to confirm ovulation. Then, use the sterile syringe to draw up the sperm and insert it into the vagina, aiming towards the cervix. It is recommended to remain lying down for at least 15-20 minutes after the insemination to allow the sperm to reach the cervix.

    Step 6: Track and Monitor
    After the insemination, it is important to track and monitor your symptoms and signs of ovulation. This may include changes in cervical mucus, basal body temperature, or ovulation pain. It is also recommended to take a pregnancy test after two weeks to confirm if conception has occurred.

    Step 7: Consider Alternative Methods
    If the first attempt at home insemination is unsuccessful, do not be disheartened. It may take a few tries before achieving a successful pregnancy. However, if after several attempts, home insemination is still not successful, it may be time to consider alternative methods such as intrauterine insemination (IUI) or in vitro fertilization (IVF).

    In conclusion, creating a home insemination plan is a crucial step in the conception process for those choosing to conceive at home. By following these steps and seeking guidance from a healthcare professional, you can increase your chances of a successful pregnancy through home insemination.

    Summary:
    Home insemination has become a popular choice for individuals and couples looking to conceive. To ensure success, it is important to have a well-planned home insemination process. This involves determining your fertility window, choosing a donor, gathering supplies, preparing the sperm, performing the insemination, tracking and monitoring, and considering alternative methods if needed. By following these steps, you can increase your chances of a successful home insemination.

  • The Financial Side of Home Insemination: A Step-by-Step Guide

    Blog post:

    The decision to start a family is a big step, and for some couples, traditional methods of conception may not be an option. This is where home insemination comes in – a process where sperm is inserted into the female reproductive tract at home, instead of a medical facility. Not only is home insemination a more intimate and private option, but it can also be a more cost-effective option for those on a budget. In this blog post, we will walk you through the financial side of home insemination and provide a step-by-step guide for those considering this method of conception.

    Step 1: Research and Understanding

    The first step to any financial decision is to do your research and understand the process. Home insemination involves purchasing a sperm donor kit or using fresh sperm from a known donor. It is important to understand the different options available and their associated costs. Sperm donor kits can range from $100 to $500, while using fresh sperm from a known donor may have minimal costs. However, it is important to consider the legal implications and risks of using a known donor. Consulting with a fertility specialist or joining online support groups can also provide valuable insights and advice.

    Step 2: Create a Budget

    Once you have a good understanding of the process and options available, it’s time to create a budget. This should include the cost of sperm donor kits, fertility products, and any additional medical expenses such as fertility tests or fertility medication. It’s important to be realistic and factor in unexpected costs, as well as any potential multiple attempts that may be needed. This budget will also help you determine if home insemination is a feasible option for you.

    Step 3: Sperm Donor Kits

    Sperm donor kits are a popular option for home insemination and come with everything you need for the process. These kits typically cost between $100 to $500, depending on the brand and the number of vials included. It’s important to carefully read the details and instructions included in the kit, as some may require additional supplies or medical procedures, which can add to the overall cost.

    Step 4: Fertility Products

    At-home insemination kit packaging featuring syringes and collection cups, labeled for comfort and ease of use.

    The Financial Side of Home Insemination: A Step-by-Step Guide

    Along with sperm donor kits, there are also other fertility products that can be used to increase the chances of conception. These products can range from ovulation predictor kits to fertility-friendly lubricants. While they are not necessary for home insemination, they can be helpful in the process and may add to the overall cost. It’s important to carefully consider which products you may need and budget accordingly.

    Step 5: Medical Expenses

    While home insemination can be a more affordable option compared to medical procedures, it’s important to consider any potential medical expenses that may arise. This includes fertility tests, fertility medication, and any other medical procedures that may be needed. It’s important to consult with a fertility specialist to determine if any medical procedures are necessary and to budget for them accordingly.

    Step 6: Insurance Coverage

    It’s important to check your insurance coverage to see if any of the costs associated with home insemination are covered. While most insurance plans do not cover fertility treatments, some may cover the cost of fertility tests or medications. It’s important to contact your insurance provider to understand what is covered and what is not.

    Step 7: Alternative Payment Options

    If the cost of home insemination is still out of reach, there are alternative payment options available. Some sperm banks offer financing plans or discounts for multiple vials. Crowdfunding platforms such as GoFundMe or YouCaring can also be used to raise funds for home insemination. It’s important to carefully consider all options and weigh the risks and benefits before making a decision.

    In conclusion, home insemination can be a more affordable option for couples or individuals looking to start a family. However, it’s important to do your research, create a budget, and carefully consider all the costs associated with the process. Consulting with a fertility specialist and joining online support groups can also provide valuable insights and support. With careful planning and budgeting, home insemination can be a viable option for those looking to become parents.

    Summary:

    Home insemination is a process where sperm is inserted into the female reproductive tract at home, instead of a medical facility. It can be a more intimate and cost-effective option for those looking to start a family. However, it’s important to do thorough research, create a budget, and consider all the costs associated with the process, such as sperm donor kits, fertility products, and potential medical expenses. Consulting with a fertility specialist and considering alternative payment options can also be helpful. With careful planning and budgeting, home insemination can be a feasible option for those looking to become parents.

  • The Role of Support in Home Insemination: A Step-by-Step Guide

    Blog Post Title: The Role of Support in Home Insemination: A Step-by-Step Guide

    Summary:

    Home insemination is a method used by many couples and individuals to conceive a child in the comfort and privacy of their own home. While it may seem like a daunting process, having the right support and guidance can make all the difference. In this blog post, we will discuss the importance of support in home insemination and provide a step-by-step guide to help make the process as smooth as possible.

    The first step in home insemination is to have a clear understanding of the process and the necessary preparations. This is where support plays a crucial role. Whether it is through online support groups, forums, or seeking advice from a healthcare professional, having a support system can provide valuable information and guidance to help you make informed decisions.

    The next important aspect of support in home insemination is having a partner or a trusted friend to help with the process. This individual can provide emotional support and assist with the insemination process. It is also essential to have open communication with your partner or support person to ensure that everyone is on the same page and comfortable with the process.

    Home fertility kit featuring a syringe and collection cup with instructions for at-home insemination.

    The Role of Support in Home Insemination: A Step-by-Step Guide

    Once you have gathered all the necessary information and have a support system in place, the next step is to prepare for home insemination. This involves purchasing a home insemination kit, which typically includes a syringe, sperm-friendly lubricant, and ovulation prediction kits. It is crucial to follow the instructions carefully and ensure that all equipment is sterile to avoid any complications.

    Timing is crucial in home insemination, and having support during this stage can be beneficial. You can track your ovulation using an ovulation prediction kit or by monitoring your basal body temperature. Having a partner or support person to help with these tasks can make the process less stressful and more accurate.

    When it comes to the actual insemination process, support is essential in providing emotional and physical comfort. It is recommended to have the insemination in a relaxed environment, and having a supportive partner or friend can help create a calm and comfortable atmosphere. It is also essential to have a positive mindset and be patient, as conceiving may take several attempts.

    After the insemination, it is essential to take care of yourself and have a support system in place. The two-week wait until you can take a pregnancy test can be emotionally challenging, and having someone to talk to and lean on can make a significant difference. Remember to take care of your physical and emotional well-being during this time.

    In the event of a successful pregnancy, support continues to play a crucial role. It is essential to have a healthcare provider who can guide you through the pregnancy and provide necessary support and care. You can also join online support groups for individuals who have conceived through home insemination, where you can share your experiences and seek advice.

    In conclusion, support is a vital aspect of home insemination, from the initial preparations to the two-week wait and beyond. Having a support system can provide valuable information, emotional comfort, and physical assistance, making the process less daunting and more successful. Remember to take care of yourself and have someone to lean on during this journey.

  • Maximizing Fertility: A Step-by-Step Guide to Home Insemination

    Maximizing Fertility: A Step-by-Step Guide to Home Insemination

    For many couples struggling with infertility, the options for starting a family can seem limited and daunting. However, with advancements in technology and medical procedures, there are now more options than ever before. One option that has gained popularity in recent years is home insemination. This method allows couples to try to conceive in the comfort and privacy of their own home. In this blog post, we will discuss the basics of home insemination and provide a step-by-step guide to help you maximize your chances of success.

    What is Home Insemination?

    Home insemination, also known as artificial insemination, is the process of placing sperm into the female reproductive tract in order to facilitate fertilization. This method is most commonly used by couples who are unable to conceive naturally due to male fertility issues or same-sex couples who wish to start a family. Home insemination can be done with fresh sperm from a known donor or purchased from a sperm bank.

    Step 1: Determine Your Fertile Window

    The first step in maximizing your chances of success with home insemination is to determine your fertile window. This is the time during your menstrual cycle when you are most likely to conceive. In a typical 28-day cycle, this is usually around days 12-16. However, every woman’s cycle is different, so it is important to track your menstrual cycle and monitor your ovulation using methods such as basal body temperature or ovulation predictor kits.

    Step 2: Prepare Sperm

    If you are using fresh sperm from a known donor, it is important to have a discussion about their health and fertility history. It is recommended to have the donor undergo a semen analysis to ensure the sperm is of good quality. If you are purchasing sperm from a sperm bank, make sure to do your research and choose a reputable bank.

    Step 3: Prepare Your Body

    Preparing your body for home insemination is crucial for increasing your chances of success. This includes maintaining a healthy diet and exercise routine, reducing stress, and avoiding alcohol and tobacco. It is also recommended to take a prenatal vitamin to ensure your body is getting all the necessary nutrients for a healthy pregnancy.

    Step 4: Gather Supplies

    two teal syringes lying on a white background, designed for at-home insemination use

    Maximizing Fertility: A Step-by-Step Guide to Home Insemination

    Before beginning the insemination process, make sure you have all the necessary supplies. This may include a sterile syringe or needleless syringe, a soft cup or menstrual cup, a timer, and any lubricants recommended by your doctor. It is important to use only sterile and medical-grade supplies to avoid any potential infections.

    Step 5: Insemination Process

    The actual insemination process is relatively simple and can be done in the comfort of your own home. Begin by having the sperm donor ejaculate into a sterile cup or container. If using fresh sperm, it is important to let it liquefy for 20-30 minutes before proceeding. Once the sperm is ready, use a sterile syringe or needleless syringe to collect the sperm and gently insert it into the vagina. Some couples may also choose to use a soft cup or menstrual cup to hold the sperm closer to the cervix. Set a timer for 30 minutes to allow the sperm to reach the cervix and then remove the cup or syringe.

    Step 6: Rest and Relax

    After the insemination process, it is important to rest and relax for at least 15-20 minutes. This will allow the sperm to swim towards the cervix and increase the chances of fertilization. Some couples may choose to elevate their hips or use a pillow under their lower back to help the sperm travel towards the cervix.

    Step 7: Post-Insemination Care

    After resting, it is important to take care of your body to increase the chances of conception. Avoid any strenuous activities or exercise and continue to eat a healthy diet. It is also recommended to avoid douching or using any vaginal products for at least 24 hours after insemination.

    Step 8: Take a Pregnancy Test

    After two weeks, take a home pregnancy test to see if the insemination was successful. If the test is positive, schedule an appointment with your doctor to confirm the pregnancy and begin prenatal care. If the test is negative, it is recommended to wait a few days and take another test before scheduling an appointment with your doctor.

    Summary:

    Home insemination is a popular and effective method for couples struggling with infertility. By determining your fertile window, preparing your body, gathering necessary supplies, and following a step-by-step guide, you can maximize your chances of success. Remember to rest and take care of your body after the insemination process and take a pregnancy test after two weeks. With patience and perseverance, home insemination can be a viable option for starting a family.

  • The Benefits of Home Insemination: A Step-by-Step Guide

    Blog Post Title: The Benefits of Home Insemination: A Step-by-Step Guide

    Summary:

    Home insemination, also known as self-insemination or self-impregnation, is the process of using a syringe or a special kit to deposit sperm into the vagina in order to achieve pregnancy. This method can be used by both heterosexual and same-sex couples, as well as single individuals. While traditionally, insemination was only done in a medical setting, advancements in technology and the desire for more control over the process have made home insemination a popular and viable option for many couples. In this blog post, we will discuss the benefits of home insemination and provide a step-by-step guide for those considering this method for conception.

    1. Cost-effective and Convenient
    One of the primary benefits of home insemination is its cost-effectiveness. Fertility treatments and medical procedures can be expensive, making it difficult for some couples to afford. Home insemination eliminates the need for costly medical procedures, making it a more affordable option for those trying to conceive. Additionally, home insemination can be done in the comfort and privacy of one’s own home, eliminating the need for multiple trips to a doctor’s office.

    2. More Control over the Process
    Home insemination allows couples to have more control over the entire process. They can choose the timing and frequency of insemination, which can increase the chances of conception. This method also allows couples to use fresh sperm from a known donor, which may be preferred over frozen sperm from a sperm bank. Having more control over the process can also help reduce the stress and anxiety that often comes with trying to conceive.

    3. Less Invasive and Less Time-Consuming
    Compared to other assisted reproductive technologies, home insemination is a non-invasive and less time-consuming method. It does not require any medications or injections, and the process itself only takes a few minutes. This can be a relief for those who are uncomfortable with invasive procedures or who have busy schedules and can’t commit to frequent doctor’s appointments.

    4. Suitable for Various Situations
    Home insemination is a suitable option for various situations, including same-sex couples, single individuals, and couples with fertility issues. It also allows couples to try for pregnancy in the comfort of their own home without the pressure and scrutiny of a medical setting. This can be particularly beneficial for those who have experienced previous fertility struggles or traumatic experiences in a medical setting.

    5. Easy and Straightforward Process
    The process of home insemination is easy and straightforward. With the help of a syringe or a home insemination kit, sperm can be deposited into the vagina near the cervix. This can be done by the couple themselves or with the help of a friend or family member. The process does not require any special skills or training, making it accessible to a wider range of individuals.

    hands holding a syringe and container with text promoting Mosie Baby's support for pregnancy assistance

    The Benefits of Home Insemination: A Step-by-Step Guide

    Step-by-Step Guide to Home Insemination:

    Step 1: Determine Your Fertility Window
    The first step in home insemination is to determine your fertility window, which is the time in your menstrual cycle when you are most likely to conceive. This typically falls between days 10-17 of a 28-day cycle. However, it can vary based on the length of your cycle and ovulation patterns. Tracking your menstrual cycle and using ovulation predictor kits can help pinpoint your fertility window.

    Step 2: Prepare the Sperm
    If using fresh sperm from a known donor, make sure to have it collected and ready for insemination. If using frozen sperm from a sperm bank, follow the instructions provided by the bank for thawing and preparing the sperm.

    Step 3: Prepare the Insemination Kit
    If using a home insemination kit, follow the instructions provided by the manufacturer to prepare the syringe and catheter. If using a syringe, make sure it is clean and sterile.

    Step 4: Positioning
    For successful insemination, it is important to be in a comfortable and relaxed position. This can be lying down with your hips elevated on a pillow or standing with one leg propped up on a chair or bed.

    Step 5: Insert the Catheter or Syringe
    Using the syringe or catheter, slowly and gently insert the sperm into the vagina near the cervix. Make sure to avoid touching the cervix, as this can cause discomfort.

    Step 6: Rest
    After insemination, it is recommended to lie down for 15-20 minutes to allow the sperm to swim up to the cervix.

    Step 7: Repeat if Desired
    If you are using fresh sperm, you can repeat the process for a few consecutive days to increase the chances of conception.

    In conclusion, home insemination offers many benefits for couples and individuals looking to conceive. It is a cost-effective, convenient, and less invasive option that allows for more control over the process. With a simple and straightforward process, home insemination can be a viable option for many couples and individuals on their journey to parenthood.

  • Overcoming Obstacles: A Step-by-Step Guide to Home Insemination

    Title: Overcoming Obstacles: A Step-by-Step Guide to Home Insemination

    Summary: Home insemination is a popular method for individuals and couples looking to start a family. It involves using donor sperm to fertilize the egg, and can be done in the comfort of your own home. However, there are several obstacles that you may face when attempting home insemination, such as finding a suitable donor, understanding the process, and dealing with legal and emotional considerations. In this blog post, we will provide a step-by-step guide to help you overcome these obstacles and successfully complete a home insemination.

    Step 1: Finding a Suitable Donor
    The first step in home insemination is finding a suitable donor. There are several options available, including known donors (such as a friend or family member), anonymous donors, and sperm banks. Each option has its own pros and cons, so it’s important to carefully consider which one is right for you. Some factors to consider include the donor’s health and medical history, genetic testing, and legal implications.

    Step 2: Understanding the Process
    Once you have chosen a donor, it’s important to understand the home insemination process. This involves tracking your ovulation cycle, preparing the sperm for insemination, and knowing the best time to inseminate. It’s also important to have a clear understanding of the legal and ethical considerations involved in home insemination, such as parental rights and responsibilities.

    Mosie Baby at-home insemination kit box featuring instructions and details for two attempts.

    Overcoming Obstacles: A Step-by-Step Guide to Home Insemination

    Step 3: Preparing for Insemination
    Before attempting insemination, it’s important to prepare your body for the process. This includes maintaining a healthy diet, reducing stress, and avoiding substances that can affect fertility. It’s also important to have all necessary supplies on hand, such as syringes, specimen cups, and ovulation kits.

    Step 4: Insemination Process
    The actual insemination process involves inserting the sperm into the vagina using a syringe or cup. It’s important to follow the instructions carefully and to remain in a relaxed position for at least 20 minutes after insemination to increase the chances of success. It may take several attempts before achieving a successful pregnancy, so it’s important to be patient and persistent.

    Step 5: Aftercare and Pregnancy Testing
    After insemination, it’s important to take care of yourself to increase the chances of pregnancy. This includes avoiding strenuous activities, getting enough rest, and taking prenatal vitamins. It’s also important to monitor your body for any changes and to take a pregnancy test after the recommended time period to determine if the insemination was successful.

    Step 6: Dealing with Legal and Emotional Considerations
    Home insemination can bring about a range of legal and emotional considerations. It’s important to have a clear understanding of the legal implications, including parental rights and responsibilities, and to have open and honest communication with all parties involved. Additionally, home insemination can be emotionally challenging, so it’s important to have a support system in place and to seek professional help if needed.

    In conclusion, home insemination can be a challenging but rewarding journey. By following these steps and being well-informed and prepared, you can overcome the obstacles and successfully complete a home insemination. Remember to always prioritize your health and well-being, and to seek professional help if needed.

  • The Role of Nutrition in Home Insemination: A Step-by-Step Guide

    Blog Post:

    Home insemination is becoming an increasingly popular method for individuals and couples who are trying to conceive. Whether it is due to fertility issues, personal preferences, or financial reasons, many people are turning to home insemination as a viable option for starting or expanding their families.

    One crucial aspect of home insemination that is often overlooked is nutrition. The role of nutrition in the success of home insemination cannot be emphasized enough. It is essential to understand how proper nutrition can positively impact fertility and increase the chances of a successful home insemination.

    In this blog post, we will discuss the steps involved in home insemination and how nutrition plays a vital role in each of these steps. Let’s dive in!

    Step 1: Preparing the body for insemination

    The first step in home insemination is preparing the body for the process. This includes making sure that both the sperm donor and the recipient have a healthy and balanced diet. A diet rich in essential vitamins, minerals, and other nutrients is crucial for reproductive health.

    For the sperm donor, it is essential to consume foods that are high in zinc, vitamin C, and folate. These nutrients help in sperm production and motility, making them more viable for insemination. Some examples of foods that are high in these nutrients are oysters, nuts, citrus fruits, and leafy greens.

    For the recipient, a healthy diet is equally important. It is recommended to consume foods that are high in iron, calcium, and folic acid. Iron helps in the production of red blood cells and promotes a healthy womb environment, while calcium is essential for strong and healthy bones. Folic acid, on the other hand, is crucial for fetal development and reduces the risk of birth defects. Foods that are high in these nutrients include lean meats, dairy products, and green leafy vegetables.

    Step 2: Timing is everything

    Timing is crucial when it comes to home insemination. The recipient must track their ovulation cycle to determine the most fertile days for insemination. This is where proper nutrition comes into play. Certain foods can help regulate hormones and promote ovulation, increasing the chances of conception.

    Foods that contain omega-3 fatty acids, such as salmon, flaxseeds, and walnuts, can help regulate hormone levels and promote ovulation. Additionally, foods high in vitamin B6, such as chickpeas, bananas, and avocados, can also aid in regulating hormones and promoting ovulation.

    at-home insemination kit with syringes and collection containers on a teal background

    The Role of Nutrition in Home Insemination: A Step-by-Step Guide

    Step 3: Creating a conducive environment for insemination

    Once the body is prepared and the timing is right, the next step is creating a conducive environment for insemination. This involves making sure that both the sperm and the reproductive tract are in optimal condition.

    For the sperm donor, it is crucial to avoid substances that can harm sperm quality, such as alcohol, tobacco, and drugs. It is also recommended to consume foods that are high in antioxidants, such as berries, dark chocolate, and green tea. These antioxidants help protect sperm from damage and increase their chances of reaching and fertilizing the egg.

    For the recipient, it is essential to maintain a healthy and balanced pH level in the reproductive tract. An acidic environment can harm sperm and reduce the chances of conception. Consuming foods that are alkaline, such as leafy greens, cucumber, and watermelon, can help maintain a healthy pH level.

    Step 4: Staying hydrated

    Staying hydrated is crucial for both the sperm donor and the recipient during the home insemination process. Drinking enough water can help improve the quality of sperm and cervical mucus, making it easier for sperm to reach the egg.

    It is recommended to drink at least eight glasses of water a day, and even more during the fertile window. Additionally, consuming foods with high water content, such as fruits and vegetables, can also help in staying hydrated.

    Step 5: Post-insemination nutrition

    After the insemination process, it is essential to continue with a healthy and balanced diet. The first few weeks after insemination are crucial for fetal development, and proper nutrition is vital for a healthy pregnancy.

    Foods that are high in protein, iron, and folate are essential during this time. These include lean meats, leafy greens, and whole grains. Additionally, it is recommended to take prenatal vitamins to ensure that all essential nutrients are being consumed.

    Summary:

    In summary, nutrition plays a crucial role in the success of home insemination. It is essential to prepare the body for insemination by consuming a healthy and balanced diet, rich in essential nutrients. Timing is also vital, and certain foods can help regulate hormones and promote ovulation. Creating a conducive environment for insemination and staying hydrated are also crucial for a successful home insemination. Finally, post-insemination nutrition is essential for fetal development and a healthy pregnancy.

  • Real-Life Stories: A Step-by-Step Guide to Home Insemination

    Real-Life Stories: A Step-by-Step Guide to Home Insemination

    In recent years, more and more individuals and couples are turning to home insemination as a means of starting or expanding their families. Whether it’s due to financial reasons, personal preference, or fertility issues, home insemination offers a convenient and cost-effective alternative to traditional methods. However, the process of home insemination can seem daunting and intimidating, especially for those who are new to the concept. That’s why we’ve created this step-by-step guide to help you navigate the home insemination journey with confidence and ease.

    Step 1: Know Your Options

    Before diving into the world of home insemination, it’s important to understand the different methods available. The most common methods include artificial insemination with donor sperm (AID), self-insemination with a known donor, and reciprocal IVF. Each method has its own pros and cons, so it’s crucial to research and discuss with your partner which option is best for you.

    Step 2: Choose Your Donor

    The next step is to decide on a donor. This can be a daunting task, but there are a few options to consider. You can either use a sperm bank to purchase donor sperm, ask a friend or family member to be a known donor, or find a donor through online platforms or support groups. Whichever route you choose, it’s important to thoroughly screen and discuss expectations and boundaries with your donor beforehand.

    Step 3: Gather Your Supplies

    Once you have chosen your method and donor, it’s time to gather all the necessary supplies. This includes a sterile collection cup, a syringe, a speculum, and a home insemination kit (which can be purchased online or at a fertility clinic). It’s important to make sure all your supplies are sterile to avoid any potential infections.

    Step 4: Track Your Ovulation

    Timing is crucial when it comes to home insemination. It’s important to track your ovulation to increase your chances of success. This can be done using ovulation predictor kits, tracking your basal body temperature, or monitoring your cervical mucus. Knowing when you are ovulating will help you plan the insemination at the most optimal time.

    Step 5: Prepare for the Insemination

    On the day of the insemination, make sure to have a comfortable and private space set up. It’s important to relax and be in a calm state of mind. Before the insemination, make sure to wash your hands and sterilize all the equipment. You can also use a lubricant to make the process more comfortable.

    mosie baby syringe kit with instructions and packaging on a textured surface.

    Real-Life Stories: A Step-by-Step Guide to Home Insemination

    Step 6: Perform the Insemination

    Now, it’s time for the insemination process. The first step is to have the donor collect their sperm sample in the sterile cup. Then, using the syringe, carefully draw up the sperm sample. Next, insert the speculum into the vagina and slowly inject the sperm into the cervix. It’s important to keep the sperm warm and close to body temperature throughout the process.

    Step 7: Rest and Relax

    After the insemination, it’s recommended to rest for at least 15-20 minutes with your legs elevated to help the sperm travel towards the cervix. This is also a good time to reflect and visualize a successful pregnancy.

    Step 8: Repeat If Necessary

    Home insemination is not a one-time process, and it may take multiple attempts to achieve a successful pregnancy. If you don’t get pregnant on the first try, don’t get discouraged. It’s important to keep trying and adjust your methods if needed.

    Step 9: Follow-Up and Pregnancy Test

    After the insemination, make sure to follow up with your doctor for any necessary tests or check-ups. It’s also recommended to take a pregnancy test around two weeks after the insemination to confirm if the process was successful.

    Real-Life Stories

    To provide a deeper understanding of the home insemination process, we’ve gathered real-life stories from individuals who have successfully started their families through home insemination. These stories highlight the diversity and uniqueness of each journey, and offer valuable insights and advice for those considering home insemination.

    Summary:

    Home insemination is a popular option for those looking to start or expand their families. This step-by-step guide covers the different methods of home insemination, choosing a donor, gathering supplies, tracking ovulation, preparing for the insemination, and the insemination process itself. It also emphasizes the importance of rest and relaxation, and the potential for multiple attempts. Additionally, real-life stories provide personal experiences and advice for anyone considering home insemination.

  • The Emotional Journey of Home Insemination: A Step-by-Step Guide

    The Emotional Journey of Home Insemination: A Step-by-Step Guide

    For many couples, the journey to starting a family can be filled with emotional ups and downs. This is especially true for couples who have chosen to use home insemination as their method of conception. While it may seem like a daunting task, home insemination can be a viable and rewarding option for those looking to start or expand their family. In this blog post, we will take you through the emotional journey of home insemination, providing a step-by-step guide to help you navigate this process.

    Step 1: Making the Decision

    The first step in the emotional journey of home insemination is making the decision to pursue this method of conception. This can be a difficult decision for some, as there are a variety of factors to consider. Some couples may have struggled with fertility issues, while others may be in a same-sex relationship. Whatever the reason may be, it’s important to take the time to discuss and weigh all options before making a final decision.

    Step 2: Understanding the Process

    Once the decision has been made to pursue home insemination, it’s important to understand the process and what it entails. This can help alleviate some anxiety or fears that may arise. Home insemination involves using a syringe or insemination kit to deposit semen into the vagina, close to the cervix, during the woman’s fertile window. It’s important to track ovulation and follow proper hygiene and safety precautions when performing home insemination.

    Step 3: Finding a Donor

    Choosing a donor can be a challenging and emotional step in the home insemination journey. Some couples may choose a known donor, such as a friend or family member, while others may opt for a sperm bank. Regardless of the choice, it’s important to have open and honest communication with the donor and ensure that all parties are comfortable with the arrangement.

    Mosie Baby kit for at-home insemination with syringes and collection cups on a teal background.

    The Emotional Journey of Home Insemination: A Step-by-Step Guide

    Step 4: Dealing with Emotions

    As with any method of conception, home insemination can bring up a range of emotions. Some couples may feel excitement and hope, while others may experience fear and anxiety. It’s important to acknowledge and address these emotions, whether it’s through talking to a therapist or sharing with a support group. It’s also essential to have a strong support system in place to help navigate the emotional rollercoaster that comes with trying to conceive.

    Step 5: Celebrating the Journey

    While the journey to home insemination may have its challenges, it’s important to celebrate the milestones and successes along the way. This can include tracking ovulation, successfully performing home insemination, or receiving a positive pregnancy test. These small victories can help boost morale and keep the focus on the end goal – starting a family.

    Step 6: Dealing with Setbacks

    Unfortunately, not every attempt at home insemination will result in a pregnancy. Dealing with setbacks and negative pregnancy tests can be emotionally taxing, but it’s important to remember that it’s all part of the journey. It’s essential to give yourself time to grieve and process these emotions, but also to remember that there is always hope for the next cycle.

    Step 7: Preparing for Parenthood

    As the home insemination journey progresses, it’s important to start preparing for parenthood. This can include making lifestyle changes, creating a budget, and setting up a support system. This step can bring up a mix of emotions, from excitement to nerves, but it’s also a time to bond with your partner and look forward to the future.

    In summary, the emotional journey of home insemination can be a challenging but rewarding experience. It’s important to make a well-informed decision, understand the process, find a donor, and have a strong support system in place. Dealing with emotions, celebrating milestones, and preparing for parenthood are all essential steps in this journey. While there may be setbacks along the way, it’s important to stay positive and keep the end goal in mind – starting a family.