Friday, January 2

Latest news


fertility


menstrual cycle


reproductive health


home insemination


women's health


conception


pregnancy


ovulation


infertility


self-care


hormones


menstruation


at-home insemination


support
Browse by topic

Stories for you

See all latest

Blog

  • The Role of Timing in Home Insemination: A Step-by-Step Guide

    Blog Post:

    Home insemination, also known as self-insemination, is becoming an increasingly popular method for couples who are trying to conceive. It offers a more intimate and affordable alternative to traditional medical procedures such as intrauterine insemination (IUI) or in vitro fertilization (IVF). However, unlike these medical procedures, timing is crucial when it comes to home insemination. In this blog post, we will discuss the role of timing in home insemination and provide a step-by-step guide on how to successfully perform the procedure at home.

    Step 1: Understanding Your Menstrual Cycle

    Before attempting home insemination, it is important to have a good understanding of your menstrual cycle. This includes knowing the length of your cycle and when you ovulate. Ovulation is the process in which an egg is released from the ovary and can be fertilized by sperm. Typically, ovulation occurs around day 14 of a 28-day menstrual cycle, but this can vary from person to person.

    There are several ways to track your menstrual cycle and determine when you are ovulating. These include using an ovulation predictor kit, tracking your basal body temperature, and monitoring changes in your cervical mucus. It is important to choose the method that works best for you and to track your cycle for a few months to get a better understanding of your body’s patterns.

    Step 2: Preparing for Home Insemination

    Once you have a good understanding of your menstrual cycle, it is time to prepare for home insemination. The first step is to ensure that you and your partner are both in good health. This includes having regular check-ups and getting tested for sexually transmitted infections (STIs). It is also important to maintain a healthy diet and lifestyle, as this can improve your chances of conception.

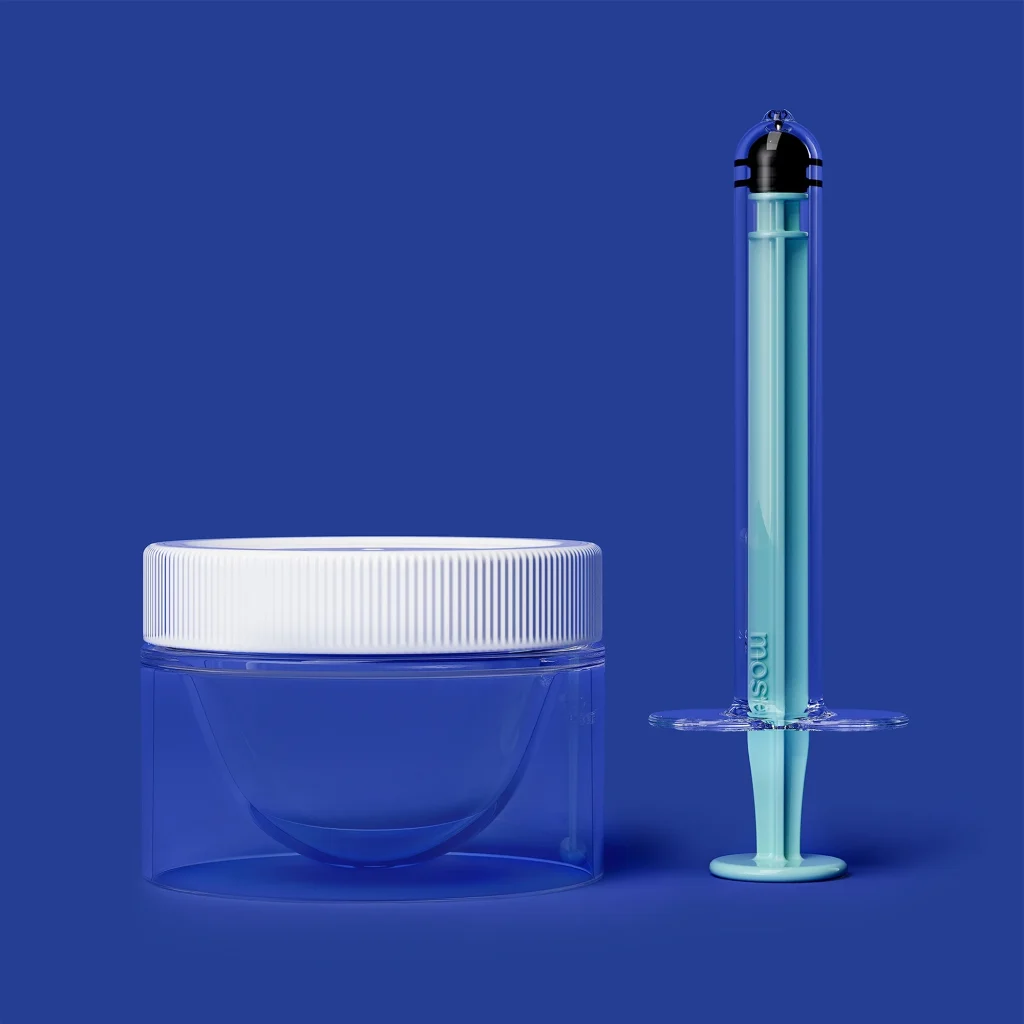
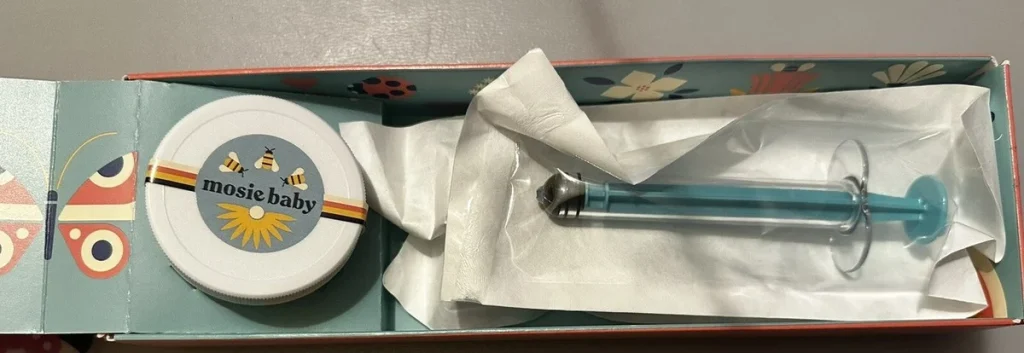
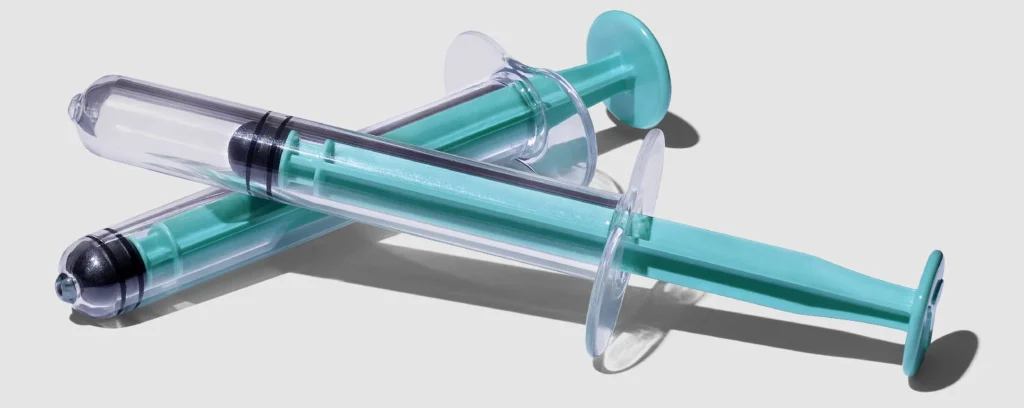
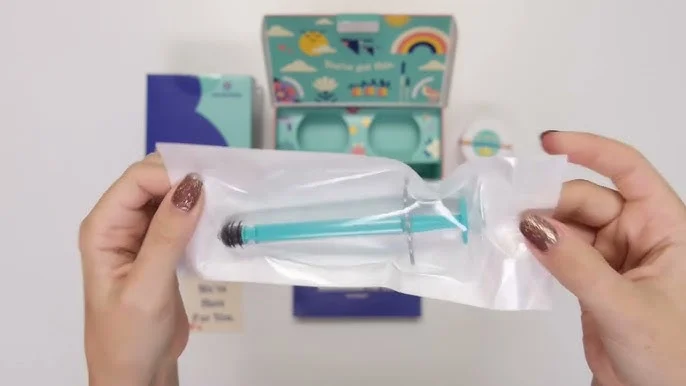
    Next, you will need to purchase a home insemination kit. These kits are easily available online and contain all the necessary tools for the procedure, including a syringe, a cervical cap, and pregnancy tests. It is important to choose a kit that is specifically designed for home insemination and has good reviews from other users.

    Step 3: Timing is Key

    Timing is crucial when it comes to home insemination. It is recommended to perform the procedure around the time of ovulation to increase the chances of fertilization. This is usually within a window of 24-36 hours before ovulation and up to 12 hours after.

    To determine the best time for home insemination, you can use the methods mentioned in step 1 or use an ovulation calculator. This will help you pinpoint the most fertile days of your cycle and plan accordingly.

    at-home insemination kit with syringes and containers on a white background, featuring a holiday gift promotion.

    The Role of Timing in Home Insemination: A Step-by-Step Guide

    Step 4: Preparing the Sperm

    Before starting the procedure, it is important to prepare the sperm. If using a sperm donor, make sure to follow the instructions provided by the sperm bank. If using your partner’s sperm, it is recommended to abstain from ejaculation for 2-3 days before the procedure to ensure a higher sperm count.

    Once the sperm is ready, it can be collected in a sterile container and kept at room temperature until it is time for insemination.

    Step 5: Performing the Insemination

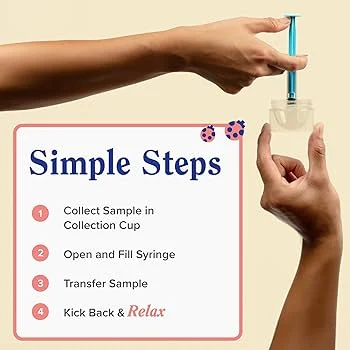
    Now that everything is prepared, it is time to perform the insemination. First, wash your hands thoroughly and make sure the syringe and cervical cap are clean. Next, fill the syringe with the collected sperm and attach the cervical cap to the end.

    Position yourself comfortably, either lying down with your hips elevated or standing with one foot on a chair. Gently insert the cervical cap into the vagina, making sure it reaches the cervix. Slowly push the plunger to release the sperm into the cervix.

    After insemination, keep the cervical cap in place for at least 6 hours to allow the sperm to travel towards the egg. You can then remove the cap and discard it, making sure not to spill any of the sperm.

    Step 6: The Two-Week Wait

    After the insemination, it is important to relax and allow your body to do its work. The two-week wait refers to the time between insemination and when you can take a pregnancy test. During this time, you may experience some symptoms such as cramping, spotting, or breast tenderness, which are all normal and may indicate that implantation has occurred.

    It is important to note that home insemination does not guarantee pregnancy. It may take a few attempts before successfully conceiving, and if you are not successful after a few tries, it may be time to consult a fertility specialist.

    In summary, home insemination can be a successful method for couples trying to conceive, but timing is crucial. Understanding your menstrual cycle, preparing for the procedure, and performing it at the right time can greatly increase your chances of conception. It is also important to remember to stay relaxed and be patient during the two-week wait.

    SEO metadata:

  • Navigating the World of Home Insemination: A Step-by-Step Guide

    Navigating the World of Home Insemination: A Step-by-Step Guide

    In recent years, more and more people are turning to home insemination as a means of starting or growing their families. Whether it is due to fertility issues, same-sex partnerships, or personal choice, home insemination offers a convenient and private option for conception. However, navigating the world of home insemination can seem overwhelming and intimidating for those who are new to the process. In this blog post, we will provide a step-by-step guide to help you understand and navigate this method of conception.

    Step 1: Understand the Basics of Home Insemination

    Before diving into the process, it is essential to understand the basics of home insemination. Home insemination involves placing sperm into the vagina or cervix in hopes of fertilizing an egg. It can be done through artificial insemination, where sperm is placed into the vagina using a syringe, or through natural insemination, where intercourse is used to deposit sperm into the vagina. It is important to note that home insemination does not guarantee pregnancy and should be discussed with a medical professional beforehand.

    Step 2: Choose Your Method of Insemination

    As mentioned, there are two methods of home insemination: artificial insemination and natural insemination. Artificial insemination is a more controlled and sterile method, making it a popular choice for those with fertility issues or same-sex partnerships. On the other hand, natural insemination is a more intimate and romantic option but does come with some health risks, such as sexually transmitted infections. It is crucial to weigh the pros and cons of each method before deciding which one is right for you.

    Step 3: Gather Your Supplies

    Once you have decided on the method of insemination, it is time to gather your supplies. For artificial insemination, you will need a syringe, sterile container, and sperm. Sperm can be purchased from a sperm bank or obtained from a known donor. For natural insemination, you will only need sperm, which can be obtained from a known donor or through intercourse.

    At-home insemination kit featuring a syringe and collection cup on a blue background.

    Navigating the World of Home Insemination: A Step-by-Step Guide

    Step 4: Track Your Ovulation

    Timing is crucial when it comes to home insemination. It is essential to track your ovulation to increase the chances of conception. You can use an ovulation predictor kit, which can be purchased at most drugstores, or track your basal body temperature to determine when you are ovulating. This step is crucial for both artificial and natural insemination.

    Step 5: Prepare for Insemination

    Before starting the insemination process, it is essential to prepare yourself and your environment. Make sure you are relaxed and comfortable, as stress can hinder conception. Ensure that your supplies are clean and sterile, and that you have a comfortable position for insemination. For artificial insemination, you may want to use a pillow to elevate your hips to help the sperm reach the cervix.

    Step 6: Complete the Insemination Process

    For artificial insemination, the process involves inserting a syringe filled with sperm into the vagina or placing it near the cervix. It is essential to follow the instructions provided by the sperm bank or medical professional carefully. For natural insemination, intercourse is used to deposit the sperm into the vagina. It is recommended to stay lying down for 15-20 minutes after the insemination process to allow the sperm to travel to the cervix.

    Step 7: Wait and Test for Pregnancy

    After completing the insemination, all you can do is wait and see if conception occurs. It is normal to experience some spotting and cramping after the insemination process, so do not be alarmed. If you do not get pregnant on your first try, do not get discouraged. It may take multiple attempts before achieving pregnancy. You can test for pregnancy about two weeks after the insemination process using a home pregnancy test.

    In summary, home insemination can be a viable option for those looking to start or expand their family. By understanding the basics, choosing the right method, tracking ovulation, and following the proper steps, you can navigate the world of home insemination successfully. Remember to always consult with a medical professional and be patient throughout the process.

  • The Key to Successful Home Insemination: A Step-by-Step Guide

    Blog Post: The Key to Successful Home Insemination: A Step-by-Step Guide

    Insemination is the process of introducing sperm into the female reproductive tract for the purpose of fertilization. While traditionally done in a clinical setting, more and more couples are turning to home insemination as a more affordable and convenient option. However, many people are still unsure about the process and its success rate. In this blog post, we will guide you through the step-by-step process of home insemination and provide you with tips to increase your chances of success.

    Step 1: Understanding Your Fertility

    Before starting the home insemination process, it is important to understand your fertility. This includes tracking your menstrual cycle, monitoring ovulation, and knowing when you are most fertile. This information can be obtained through various methods such as tracking basal body temperature, using ovulation predictor kits or fertility apps. Knowing your fertility window will increase the chances of successful insemination.

    Step 2: Choosing a Donor

    The next step is to choose a sperm donor. There are various options available such as using a known donor, purchasing sperm from a sperm bank or using a donor from a fertility clinic. When choosing a donor, it is important to consider factors such as medical history, genetic testing, and personal preferences. It is also crucial to have open and honest communication with your partner about the type of donor you both feel comfortable with.

    Step 3: Preparing for Insemination

    Once you have chosen a donor, it is important to prepare for the insemination process. This includes creating a comfortable and private environment, having all the necessary supplies such as a sterile cup, a syringe, and a cervical cap or menstrual cup. It is also recommended to have a support person present, whether it’s your partner or a trusted friend.

    Step 4: Collecting the Sperm

    hands holding a syringe above a collection cup with instructions for using a home insemination kit

    The Key to Successful Home Insemination: A Step-by-Step Guide

    The next step is to collect the sperm. If using a known donor, this can be done through intercourse. If using donor sperm, it can be collected in a sterile cup and then transferred into a syringe for insemination. It is important to follow all safety precautions to ensure the sperm remains viable.

    Step 5: Insemination Process

    Now it’s time for the actual insemination. The most common method is to use a syringe to transfer the sperm into the vagina, close to the cervix. Another option is to use a cervical cap or menstrual cup. These devices can be inserted into the vagina and used to collect and hold the sperm near the cervix. The sperm should be retained for at least 6-8 hours to increase the chances of fertilization.

    Step 6: After Insemination

    After the insemination process, it is important to relax and stay in a lying position for at least 20 minutes. This will give the sperm enough time to reach the cervix and improve the chances of fertilization. It is also recommended to elevate your hips using a pillow to keep the sperm near the cervix.

    Tips for Successful Home Insemination

    – Time your insemination with your ovulation window for the best chance of fertilization.
    – Use fresh sperm, preferably collected within an hour of insemination.
    – Keep the sperm at a consistent temperature, preferably at room temperature.
    – Avoid using lubricants during the insemination process as they can harm the sperm.
    – Stay hydrated to improve the quality of cervical mucus.
    – Consider using fertility supplements such as folic acid and Coenzyme Q10 to boost fertility.
    – Stay positive and relaxed throughout the process.

    In conclusion, home insemination can be a successful and affordable option for couples looking to conceive. With proper planning, understanding fertility, and following the steps and tips mentioned in this guide, you can increase your chances of successful home insemination. Remember to stay patient, and if you do not conceive in the first attempt, do not get discouraged. Keep trying and seek professional help if needed.

    Summary:

    Home insemination is a popular alternative to traditional clinical insemination for couples trying to conceive. Understanding your fertility, choosing a donor, preparing for insemination, and following proper techniques can increase your chances of success. Tips such as timing your insemination, using fresh sperm, and staying relaxed can also improve the chances of fertilization.

  • DIY Baby-Making: A Step-by-Step Guide to Home Insemination

    Summary:

    In recent years, there has been a growing trend towards alternative methods of conception, with many couples turning to DIY methods for achieving pregnancy. One such method is home insemination, which involves using basic household items and the help of a willing donor to achieve fertilization. While it may seem daunting at first, home insemination can be a cost-effective and intimate way for couples to start a family. In this blog post, we will provide a step-by-step guide to DIY baby-making through home insemination, including tips, precautions, and helpful resources.

    Step 1: Understand the Basics of Home Insemination

    The first step in DIY baby-making is to understand the basics of home insemination. This method involves depositing sperm into the vagina near the cervix, where it can swim up to the fallopian tubes and fertilize an egg. It is important to note that home insemination does not guarantee pregnancy and should not be used as a replacement for medical fertility treatments. However, it can be an effective option for couples who are unable to conceive through traditional methods.

    Step 2: Choose a Donor

    The next step is to choose a donor. This can be a partner, friend, or anonymous donor. It is important to select someone who is healthy and willing to undergo testing for sexually transmitted diseases. It is also recommended to have a legal agreement in place to protect all parties involved. If using an anonymous donor, it is best to use a reputable sperm bank to ensure the safety and quality of the sperm.

    Step 3: Gather Supplies

    Before attempting home insemination, it is important to gather all necessary supplies. These include a sterile container to collect the sperm, a syringe or needle-less medicine dropper, a sterile cup to hold the sperm for insemination, and a timer. It is also important to have a clean and private space for the insemination process.

    Step 4: Prepare for Insemination

    instructions and warnings for using the Mosie Baby at-home insemination kit

    DIY Baby-Making: A Step-by-Step Guide to Home Insemination

    On the day of ovulation, the woman should prepare for insemination by lying down with her hips elevated on a pillow. This will help the sperm travel towards the cervix. It is also recommended to use a natural lubricant, such as coconut oil, to aid in the process. The donor should collect the sperm in the sterile container and deliver it to the woman within 30 minutes.

    Step 5: Perform the Insemination

    Using the sterile cup, the sperm can be loaded into the syringe or dropper. The woman can then insert the syringe or dropper into her vagina, near the cervix, and release the sperm. It is important to remain lying down for at least 20-30 minutes to allow the sperm to travel towards the fallopian tubes.

    Step 6: Repeat the Process

    Home insemination may not be successful on the first try, so it is recommended to repeat the process for several days in a row during the woman’s fertile window. This will increase the chances of fertilization. It is also important to track ovulation and time insemination accordingly for maximum effectiveness.

    Precautions and Tips for DIY Baby-Making

    While home insemination can be a simple and intimate experience, there are some precautions and tips to keep in mind. It is important to use sterile equipment to prevent infections and to have the donor undergo STD testing to ensure the safety of both parties. It is also recommended to use fresh sperm, as frozen sperm may decrease the chances of pregnancy. Additionally, tracking ovulation and timing insemination accordingly is crucial for success.

    Helpful Resources

    For those interested in DIY baby-making through home insemination, there are many helpful resources available. Online communities, such as “The Stork and I,” provide support and information for those using home insemination. There are also books, such as “The Ultimate Guide to Pregnancy for Lesbians,” that provide detailed information and tips for DIY baby-making. It is also recommended to consult with a fertility specialist or doctor for personalized advice and guidance.

    In conclusion, DIY baby-making through home insemination can be a viable option for couples looking to start a family. It is important to understand the basics of home insemination, choose a healthy donor, gather necessary supplies, prepare for insemination, and repeat the process for several days. With proper precautions and resources, home insemination can be a successful and intimate way to achieve pregnancy.

  • Conceiving at Home: A Step-by-Step Guide to Insemination

    Conceiving at Home: A Step-by-Step Guide to Insemination

    The journey to parenthood can be a challenging and emotional one, especially for those who are struggling with infertility or are part of the LGBTQ+ community. Insemination, also known as artificial insemination, is a popular method for conceiving at home and can be an affordable and accessible option for many couples and individuals. In this blog post, we will provide a step-by-step guide to insemination, including the different types, the tools and supplies needed, and tips for success.

    What is Insemination?

    Insemination is the process of placing sperm into the female reproductive system in order to fertilize an egg. This can be done using various methods, including intrauterine insemination (IUI) and intracervical insemination (ICI). IUI involves placing sperm directly into the uterus, while ICI involves placing sperm at the opening of the cervix. Both methods can be done at home with the help of a donor or partner.

    Step 1: Choose the Right Donor

    The first step in the insemination process is choosing the right donor for you. This can be a known donor, such as a friend or family member, or an anonymous donor from a sperm bank. It is important to thoroughly research and consider all options before making a decision. Some things to consider when choosing a donor include their medical history, genetic testing, and personal preferences.

    Step 2: Understand Your Cycle

    In order to increase your chances of success, it is important to have a good understanding of your menstrual cycle. This will help you determine the best time to inseminate, as sperm can survive in the female reproductive system for up to 5 days. Tracking your cycle and using ovulation predictor kits can help you pinpoint your most fertile days.

    Step 3: Gather Supplies

    Insemination can be done with simple tools and supplies that are easily accessible. These may include a sterile cup or syringe to collect and transfer the sperm, a speculum to help locate the cervix, and a soft cup or menstrual cup to hold the sperm in place after insemination.

    Mosie Baby at-home insemination kit featuring a syringe and a container, presented in a decorative box.

    Conceiving at Home: A Step-by-Step Guide to Insemination

    Step 4: Prepare the Sperm

    If using a sperm bank, the sperm will already be prepared and ready for use. However, if using a known donor, it is important to prepare the sperm before insemination. This may involve collecting the sperm in a sterile cup and then using a syringe to transfer it to the insemination device.

    Step 5: Inseminate

    Once the sperm has been prepared and the female partner is in a comfortable position, it is time to inseminate. Using a speculum, the cervix can be located and the sperm can be transferred to the opening of the cervix using a syringe or other insemination device. It is important to remain in this position for 15-30 minutes to allow the sperm to reach the egg.

    Step 6: Relax and Wait

    After insemination, it is important to relax and allow the sperm to do its work. This may involve taking a warm bath or laying in a comfortable position. It is also recommended to avoid any strenuous activities or exercise for the rest of the day.

    Tips for Success

    – Inseminate during your most fertile days, typically around ovulation
    – Use multiple insemination devices to increase the chances of sperm reaching the egg
    – Consider using a fertility-friendly lubricant to help the sperm reach the egg
    – Keep yourself and your partner relaxed and stress-free during the process
    – Consider tracking your basal body temperature and cervical mucus to help determine your most fertile days

    Insemination can be an effective and accessible option for those looking to conceive at home. However, it is important to keep in mind that it may take multiple attempts before a successful pregnancy occurs. It is also recommended to consult with a healthcare provider for personalized guidance and support throughout the process.

    In conclusion, insemination can be a viable option for those looking to conceive at home. By following these steps and tips, you can increase your chances of success and take a step closer to starting or expanding your family.

  • Breaking Down the Process: A Step-by-Step Guide to Home Insemination

    Blog Post Title: Breaking Down the Process: A Step-by-Step Guide to Home Insemination

    Summary:

    Home insemination is a method of assisted reproduction that allows couples or individuals to attempt pregnancy in the comfort of their own home. This process involves the collection of semen from a male partner or donor and the placement of the sperm into the female partner’s reproductive tract. While it may seem like a daunting process, home insemination can be a convenient and affordable option for those looking to start or expand their family. In this step-by-step guide, we will break down the process of home insemination and provide tips and advice for a successful attempt.

    Step 1: Understand the Risks and Benefits
    As with any medical procedure, it is important to understand the potential risks and benefits of home insemination. While this method has a high success rate for couples with fertility issues, there is also a risk of infection or injury if proper precautions are not taken. It is crucial to consult with a healthcare professional before attempting home insemination and to follow all safety protocols.

    Step 2: Choose a Donor
    If you are using donor sperm, the first step is to choose a donor. This can be done through a sperm bank or by finding a known donor. It is important to consider the donor’s health history, as well as their physical and emotional characteristics. Additionally, it is important to have a legal contract in place if using a known donor to avoid any potential legal issues in the future.

    comparison of standard and Mosie syringe barrels for at-home insemination, highlighting design features

    Breaking Down the Process: A Step-by-Step Guide to Home Insemination

    Step 3: Preparing the Sperm
    If using a sperm bank, the sperm will already be prepared and ready for insemination. However, if using a known donor, it is important to properly collect and prepare the sperm. The donor should abstain from ejaculation for 2-5 days prior to collection to ensure a higher sperm count. The sperm should then be collected in a sterile container and kept at room temperature until insemination.

    Step 4: Preparing the Female Partner
    Before insemination, the female partner should track her ovulation cycle. This can be done through ovulation predictor kits, tracking basal body temperature, or by monitoring cervical mucus changes. It is important to time the insemination as close to ovulation as possible to increase the chances of pregnancy.

    Step 5: Insemination
    There are two main methods of home insemination: the vaginal insemination method and the cervical cap method. The vaginal insemination method involves using a sterile syringe or needleless syringe to place the sperm into the vagina. The cervical cap method involves using a soft cup or cervical cap to hold the sperm near the cervix for a longer period of time. Whichever method is chosen, it is important to remain lying down for at least 20 minutes to allow the sperm to travel to the cervix.

    Step 6: Follow-Up
    After the insemination, it is important to monitor for any potential side effects or complications. If successful, pregnancy symptoms may start to appear within a few weeks. If unsuccessful, it is important to take a break and consult with a healthcare professional before attempting another insemination.

    Tips for a Successful Home Insemination:
    1. Stay relaxed and take your time during the process.
    2. Use sterile equipment and follow safety protocols.
    3. Consider using a fertility-friendly lubricant to aid in the process.
    4. Keep track of ovulation and time the insemination accordingly.
    5. Have patience and try multiple attempts if necessary.

    In conclusion, home insemination can be a safe and effective method for couples or individuals looking to conceive. By following these steps and tips, you can increase your chances of a successful home insemination. However, it is important to always consult with a healthcare professional before attempting any medical procedure.

  • The Importance of Preparation: A Step-by-Step Guide to Home Insemination

    Summary:

    Home insemination is a method of conception that involves using sperm from a donor to artificially inseminate oneself or a partner at home. This process requires careful preparation to ensure the best chance of success. In this blog post, we will discuss the importance of preparation for home insemination and provide a step-by-step guide to help you through the process.

    The first and most crucial step in preparing for home insemination is to choose a donor. There are various options for acquiring donor sperm, such as using a sperm bank, finding a known donor, or using a sperm donation website. It is essential to research and consider all options carefully to find a reliable and safe donor.

    Once you have chosen a donor, the next step is to prepare the necessary materials for the insemination process. This includes obtaining a sterile collection cup, a syringe or insemination kit, and a sterile container for the sperm. It is crucial to use sterile equipment to prevent any potential infections or complications.

    hands holding a teal syringe and a clear container against a blue background

    The Importance of Preparation: A Step-by-Step Guide to Home Insemination

    Before performing the insemination, it is essential to track your ovulation cycle. This can be done through various methods, such as using ovulation predictor kits or tracking your basal body temperature. Knowing when you are ovulating will increase the chances of successful insemination.

    When it comes to the actual insemination process, it is crucial to follow the instructions carefully and maintain a sterile environment. The sperm needs to be inserted into the vagina as close to the cervix as possible to increase the chances of fertilization. It is recommended to lie down for at least 20 minutes after the insemination to allow the sperm to travel towards the cervix.

    After the insemination, it is essential to take care of yourself and your body. This includes avoiding strenuous activities, getting enough rest, and eating a healthy diet. It is also crucial to track any symptoms or changes in your body as they may indicate a potential pregnancy.

    In case the first insemination does not result in pregnancy, it is essential to be patient and not get discouraged. It may take multiple attempts before a successful pregnancy occurs. It is also recommended to consult with a fertility specialist in case of repeated unsuccessful attempts.

    In conclusion, home insemination is a viable option for conception, but it requires thorough preparation. Choosing a reliable donor, obtaining sterile equipment, tracking ovulation, and following the instructions carefully are all essential steps in the process. Taking care of yourself after the insemination and being patient in case of unsuccessful attempts are also crucial. Proper preparation and following the necessary steps can increase the chances of a successful home insemination.

  • Creating Your Own Miracle: A Step-by-Step Guide to Home Insemination

    Creating Your Own Miracle: A Step-by-Step Guide to Home Insemination

    For many couples struggling with infertility, the option of home insemination can bring new hope. It is a simple and affordable method that allows couples to take control of their fertility journey and potentially conceive a child in the comfort of their own home. In this blog post, we will provide a step-by-step guide to home insemination, outlining everything you need to know and do to increase your chances of success.

    Step 1: Understand the Basics of Home Insemination

    Before embarking on the home insemination process, it is essential to understand the basics. Home insemination, also known as artificial insemination, is a technique where sperm is placed into the reproductive tract of a female in order to facilitate fertilization. This can be done with fresh or frozen sperm, and it can be performed at home using a variety of methods.

    Step 2: Gather Your Supplies

    The next step is to gather all the necessary supplies for the home insemination process. These include a sterile collection cup, a sterile syringe, a sterile container, a timer or clock, and ovulation predictor kits (OPKs). You may also need a speculum, which is a tool used to hold the vagina open during the insemination process.

    Step 3: Timing Is Everything

    Timing is crucial when it comes to home insemination. It is essential to track your ovulation cycle and determine the best time to inseminate. This can be done using OPKs, which detect the surge of luteinizing hormone (LH) in your urine, signaling that ovulation is about to occur. It is recommended to inseminate within 24 hours of a positive OPK result, as sperm can survive in the reproductive tract for up to five days.

    Step 4: Prepare the Sperm

    If you are using frozen sperm, it is important to thaw it according to the instructions provided by the sperm bank. Once thawed, the sperm should be kept at room temperature until ready for use. If you are using fresh sperm, it should be collected on the day of insemination and kept at room temperature until ready for use.

    Two transparent syringes with teal accents positioned diagonally on a light gray background.

    Creating Your Own Miracle: A Step-by-Step Guide to Home Insemination

    Step 5: Prepare the Insemination Site

    Before beginning the insemination process, it is crucial to prepare the insemination site. This can be done by lying on your back with your hips slightly elevated. You can also use pillows to prop up your hips and make the process more comfortable. It is also recommended to empty your bladder before beginning the insemination process.

    Step 6: Insert the Sperm

    Using the sterile syringe, carefully draw up the sperm and insert it into the vagina. The sperm should be placed as close to the cervix as possible, which is the entrance to the uterus. It is recommended to use a speculum to hold the vagina open during this process, making it easier to get the sperm to the correct location.

    Step 7: Rest and Relax

    After the insemination is complete, it is essential to rest and relax for at least 10-15 minutes. This allows the sperm to have enough time to reach the egg and increase the chances of fertilization. Some couples even choose to stay lying down for up to an hour to ensure the best possible outcome.

    Step 8: Monitor Symptoms and Take a Pregnancy Test

    After the insemination, it is important to monitor your symptoms and take a pregnancy test at the appropriate time. If you experience any early pregnancy symptoms, such as nausea, breast tenderness, or fatigue, it may be a good sign that the insemination was successful. It is recommended to take a pregnancy test two weeks after the insemination to get an accurate result.

    Additional Tips for Success:

    – Stay hydrated: Drinking plenty of water can help thin out cervical mucus, making it easier for sperm to reach the egg.
    – Consider using a fertility-friendly lubricant: Some lubricants can hinder sperm movement, so it is important to choose one that is sperm-friendly or use none at all.
    – Have patience: It may take a few tries before successfully conceiving, so it is essential to keep a positive mindset and not get discouraged.

    In conclusion, home insemination can be a viable option for couples struggling with infertility. With proper planning and execution, it can increase the chances of conceiving a child in the comfort of your own home. Remember to always consult with a medical professional before beginning any fertility treatments.

  • The Science of Home Insemination: A Step-by-Step Guide

    Blog Post Title: The Science of Home Insemination: A Step-by-Step Guide

    Summary:

    Home insemination has become a popular option for individuals and couples looking to start a family. It is a simple and cost-effective method that can be done in the comfort of your own home. However, it is important to understand the science behind home insemination to increase the chances of success. In this step-by-step guide, we will dive into the science of home insemination and provide you with all the information you need to know.

    The Basics of Home Insemination:

    Home insemination involves the insertion of sperm into the cervix or uterus in order to fertilize an egg. This process mimics the natural process of conception and can be done using a variety of methods such as a syringe, cervical cap, or insemination kit. The key to success is timing, as the sperm needs to be inserted at the right time in order to have a chance to fertilize the egg.

    Understanding Ovulation:

    The first step in home insemination is to track ovulation. Ovulation is the process in which a mature egg is released from the ovary, and it is essential for conception to occur. There are several methods for tracking ovulation, including using ovulation predictor kits, tracking basal body temperature, and monitoring changes in cervical mucus. By understanding your cycle and when ovulation is likely to occur, you can increase the chances of successful home insemination.

    Preparing the Sperm:

    Before starting the process of home insemination, it is important to prepare the sperm. This can be done using a sperm donor or by collecting semen from a partner. It is crucial to ensure that the sperm is of good quality and has a high enough concentration to increase the chances of fertilization. It is also recommended to perform a sperm analysis to determine the quality of the sperm.

    hands holding a teal syringe in packaging, with a colorful kit box and other items in the background

    The Science of Home Insemination: A Step-by-Step Guide

    The Insemination Process:

    Once you have determined the timing and prepared the sperm, it is time to begin the insemination process. The most common method is using a syringe, which involves drawing up the sperm into a syringe and then inserting it into the cervix. It is important to make sure the sperm is inserted as close to the cervix as possible to increase the chances of fertilization. Another option is using a cervical cap, which is a small silicone cup that is placed over the cervix and filled with sperm. This method allows the sperm to be in direct contact with the cervix for a longer period of time.

    Tips for Success:

    There are several factors that can affect the success of home insemination. To increase the chances of success, it is important to have a healthy lifestyle, avoid alcohol and nicotine, and maintain a healthy weight. It is also recommended to use a sperm-friendly lubricant, as regular lubricants can be harmful to sperm. Additionally, practicing good hygiene and using sterile equipment is crucial to avoid any potential infections.

    Possible Risks and Complications:

    As with any medical procedure, there are potential risks and complications associated with home insemination. These include infection, allergic reactions, and the possibility of multiple pregnancies. It is important to thoroughly research and understand the potential risks before proceeding with home insemination.

    Possible Alternatives:

    While home insemination is a popular option, there are other alternative methods for conception. These include intrauterine insemination (IUI) and in vitro fertilization (IVF). It is important to consult with a medical professional to determine the best option for your specific situation.

    Conclusion:

    Home insemination is a viable option for individuals and couples looking to start a family. By understanding the science behind it and following the proper steps, the chances of success can be greatly increased. It is important to be well-informed and consult with a healthcare professional before embarking on the journey of home insemination.

  • Maximizing Your Chances of Success: A Step-by-Step Guide to Home Insemination

    Summary:

    Insemination can be a daunting and expensive process, especially for those who are unable to conceive naturally. However, with advancements in technology and medical procedures, home insemination has become a viable option for many couples and individuals. Home insemination is a process where sperm is placed into the reproductive tract through the use of a syringe, instead of through traditional methods such as intercourse or intrauterine insemination (IUI). This option is not only cost-effective, but it also allows for more privacy and control over the insemination process.

    While home insemination may seem like a simple process, it is important to understand the steps and precautions needed to maximize your chances of success. In this step-by-step guide, we will discuss everything you need to know about home insemination and how to increase your chances of conceiving.

    Step 1: Consult with a Fertility Specialist

    Before embarking on the home insemination process, it is crucial to consult with a fertility specialist. They can help determine if home insemination is the right option for you and provide guidance on the best methods to use. They can also check for any underlying fertility issues that may affect your chances of conception and offer solutions or treatments to improve your fertility.

    Step 2: Choose a Donor

    Choosing a donor is a significant decision in the home insemination process. You can either use a known donor, such as a friend or family member, or purchase donor sperm from a sperm bank. If using a known donor, it is important to have them undergo medical and genetic testing to ensure the health and quality of their sperm. If purchasing from a sperm bank, be sure to research and choose a reputable one.

    Step 3: Track Your Ovulation

    Timing is crucial in home insemination, as sperm can only survive for a limited time inside the female reproductive tract. Tracking your ovulation can help determine the best time for insemination, as sperm can survive for up to five days in fertile cervical mucus. There are various methods for tracking ovulation, such as using ovulation predictor kits, taking basal body temperature readings, or monitoring changes in cervical mucus.

    Step 4: Prepare the Sperm

    hands holding a syringe above a collection cup with instructions for using a home insemination kit

    Maximizing Your Chances of Success: A Step-by-Step Guide to Home Insemination

    Before the actual insemination process, it is important to properly prepare the sperm. If using donor sperm from a sperm bank, it will come in a frozen state and must be thawed according to instructions. If using fresh sperm from a known donor, it should be collected in a sterile container and kept at room temperature until ready for use. It is also recommended to have the sperm sample checked for motility and quality before insemination.

    Step 5: Prepare the Insemination Kit

    The insemination kit is essential for a successful home insemination. It typically includes a sterile syringe, a speculum, a sterile cup, and lubricant. It is important to follow the instructions carefully and to maintain a sterile environment to avoid any potential infections or complications.

    Step 6: Perform the Insemination

    Once the sperm and insemination kit are prepared, it is time to perform the actual insemination. The process typically involves inserting the sperm into the vagina through the use of a syringe or a soft cup. It is important to follow the instructions and remain in a horizontal position for at least 20 minutes to allow the sperm to travel to the cervix and increase the chances of fertilization.

    Step 7: Stay Healthy and Stress-Free

    After the insemination process, it is crucial to maintain a healthy lifestyle and reduce stress levels. Eating a balanced diet, staying hydrated, and getting enough rest can all contribute to a healthy reproductive system. Stress can also have a negative impact on fertility, so it is important to practice relaxation techniques and find ways to manage stress levels.

    Step 8: Take a Pregnancy Test

    After about two weeks, it is recommended to take a pregnancy test to determine if the insemination was successful. If the test is positive, congratulations! If not, it is important to remain positive and try again in the next cycle.

    In conclusion, home insemination can be an effective and affordable option for those looking to conceive. By following these steps and taking the necessary precautions, you can maximize your chances of success and embark on the journey to parenthood. Remember, it is important to consult with a fertility specialist and to stay healthy and stress-free throughout the process.