Tag: sperm donation

  • Overcoming Obstacles: A Step-by-Step Guide to Home Insemination

    Title: Overcoming Obstacles: A Step-by-Step Guide to Home Insemination

    Summary: Home insemination is a popular method for individuals and couples looking to start a family. It involves using donor sperm to fertilize the egg, and can be done in the comfort of your own home. However, there are several obstacles that you may face when attempting home insemination, such as finding a suitable donor, understanding the process, and dealing with legal and emotional considerations. In this blog post, we will provide a step-by-step guide to help you overcome these obstacles and successfully complete a home insemination.

    Step 1: Finding a Suitable Donor
    The first step in home insemination is finding a suitable donor. There are several options available, including known donors (such as a friend or family member), anonymous donors, and sperm banks. Each option has its own pros and cons, so it’s important to carefully consider which one is right for you. Some factors to consider include the donor’s health and medical history, genetic testing, and legal implications.

    Step 2: Understanding the Process
    Once you have chosen a donor, it’s important to understand the home insemination process. This involves tracking your ovulation cycle, preparing the sperm for insemination, and knowing the best time to inseminate. It’s also important to have a clear understanding of the legal and ethical considerations involved in home insemination, such as parental rights and responsibilities.

    Mosie Baby at-home insemination kit box featuring instructions and details for two attempts.

    Overcoming Obstacles: A Step-by-Step Guide to Home Insemination

    Step 3: Preparing for Insemination
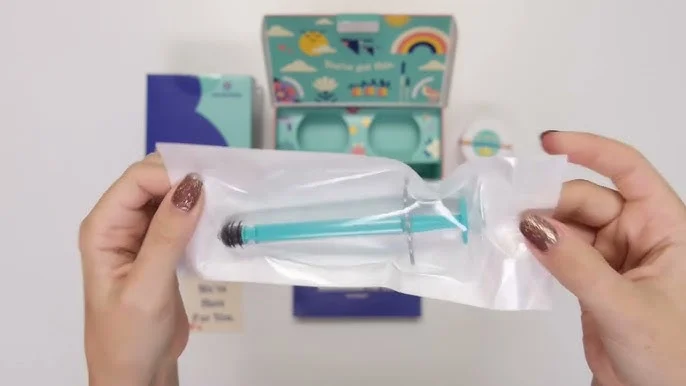
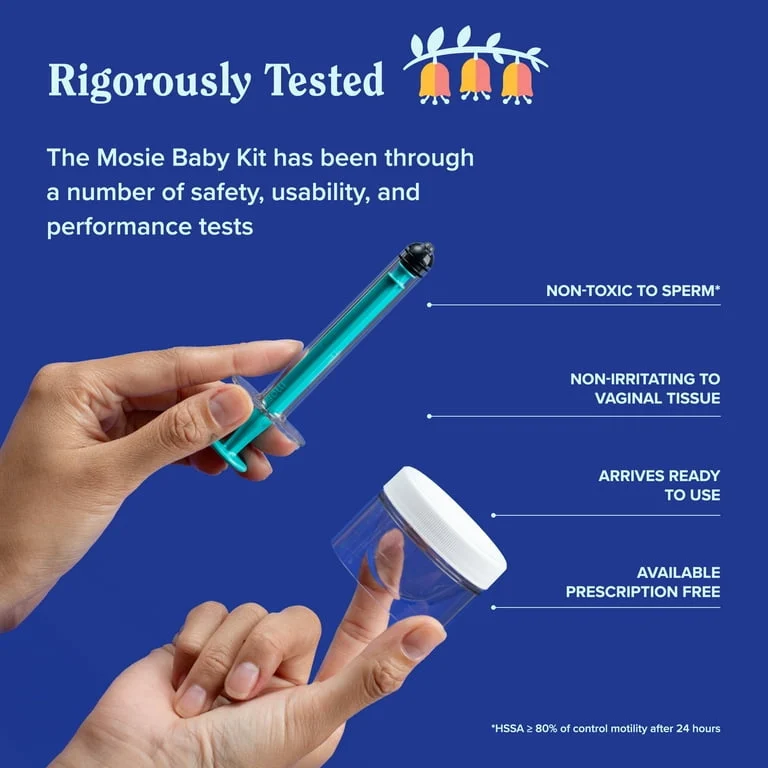
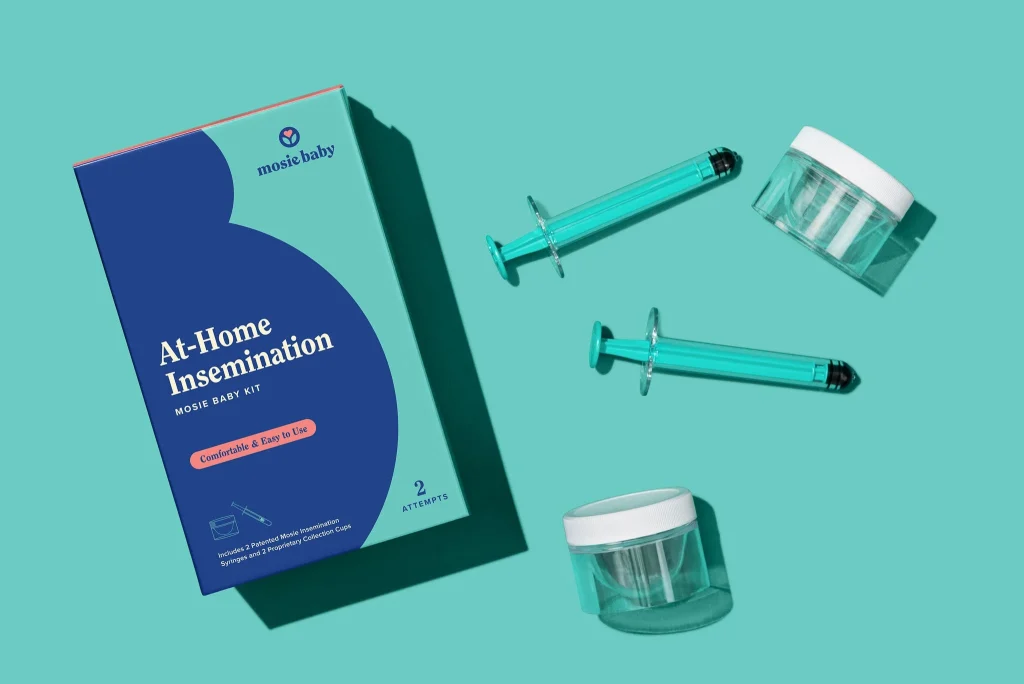
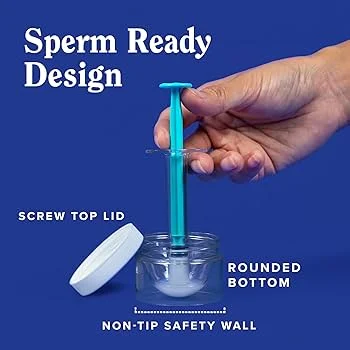
    Before attempting insemination, it’s important to prepare your body for the process. This includes maintaining a healthy diet, reducing stress, and avoiding substances that can affect fertility. It’s also important to have all necessary supplies on hand, such as syringes, specimen cups, and ovulation kits.

    Step 4: Insemination Process
    The actual insemination process involves inserting the sperm into the vagina using a syringe or cup. It’s important to follow the instructions carefully and to remain in a relaxed position for at least 20 minutes after insemination to increase the chances of success. It may take several attempts before achieving a successful pregnancy, so it’s important to be patient and persistent.

    Step 5: Aftercare and Pregnancy Testing
    After insemination, it’s important to take care of yourself to increase the chances of pregnancy. This includes avoiding strenuous activities, getting enough rest, and taking prenatal vitamins. It’s also important to monitor your body for any changes and to take a pregnancy test after the recommended time period to determine if the insemination was successful.

    Step 6: Dealing with Legal and Emotional Considerations
    Home insemination can bring about a range of legal and emotional considerations. It’s important to have a clear understanding of the legal implications, including parental rights and responsibilities, and to have open and honest communication with all parties involved. Additionally, home insemination can be emotionally challenging, so it’s important to have a support system in place and to seek professional help if needed.

    In conclusion, home insemination can be a challenging but rewarding journey. By following these steps and being well-informed and prepared, you can overcome the obstacles and successfully complete a home insemination. Remember to always prioritize your health and well-being, and to seek professional help if needed.

  • Home Insemination Myths vs. Facts: A Step-by-Step Guide

    Blog Post Title: Home Insemination Myths vs. Facts: A Step-by-Step Guide

    Summary:

    Many couples or individuals who are trying to conceive may consider home insemination as a viable option. However, there are many myths surrounding this method that may cause confusion or hesitation. In this blog post, we will debunk these myths and provide a step-by-step guide to home insemination.

    Myth #1: Home insemination is not as effective as medical procedures.
    Fact: Home insemination can be just as effective as medical procedures when done correctly. In fact, studies have shown that the success rates of home insemination are comparable to those of intrauterine insemination (IUI) or even in vitro fertilization (IVF).

    Myth #2: Only heterosexual couples can use home insemination.
    Fact: Home insemination is not limited to heterosexual couples. Same-sex couples, single individuals, and even those with fertility issues can also use this method to conceive.

    Myth #3: Home insemination is dangerous and can lead to infections.
    Fact: As long as proper hygiene and safety measures are followed, the risk of infection from home insemination is minimal. It is important to use sterile equipment and follow the recommended steps to reduce the risk of infection.

    Myth #4: You need expensive equipment or medical training to perform home insemination.
    Fact: Home insemination can be done with basic equipment that is easily accessible and affordable. While medical training is not necessary, it is important to educate yourself on the process and follow the recommended steps for a successful insemination.

    Myth #5: Home insemination can only be done with fresh sperm.
    Fact: While fresh sperm may have a higher success rate, frozen sperm can also be used for home insemination. It is important to follow the instructions for thawing and handling frozen sperm to maintain its viability.

    Step-by-Step Guide to Home Insemination:

    hands holding a teal syringe in packaging, with a colorful kit box and other items in the background

    Home Insemination Myths vs. Facts: A Step-by-Step Guide

    Step 1: Determine your ovulation cycle.
    The first step to home insemination is to determine your ovulation cycle. This can be done through tracking your menstrual cycle, using ovulation predictor kits, or monitoring your basal body temperature.

    Step 2: Gather supplies.
    The necessary supplies for home insemination include a sterile collection cup, a sterile syringe, a sterile container to hold the sperm, and a sterile catheter or soft cup.

    Step 3: Collect the sperm.
    If using a sperm donor, the sperm can be purchased from a sperm bank or obtained from a known donor. If using a partner, the sperm can be collected in the sterile cup through masturbation.

    Step 4: Prepare the sperm.
    If using fresh sperm, it is important to let it liquefy for 20-30 minutes before insemination. If using frozen sperm, it should be thawed according to the instructions provided by the sperm bank.

    Step 5: Prepare yourself.
    Wash your hands thoroughly and use a sterile technique to handle the equipment. It may also be helpful to insert a menstrual cup or soft cup into the vagina to hold the sperm in place.

    Step 6: Inseminate.
    Using the sterile syringe, draw up the sperm from the collection cup and insert it into the vagina near the cervix. Alternatively, a sterile catheter or soft cup can be used to insert the sperm into the cervix.

    Step 7: Stay in a horizontal position.
    After insemination, it is recommended to stay in a horizontal position for 15-20 minutes to allow the sperm to reach the cervix.

    Step 8: Monitor for ovulation.
    Continue to track your ovulation and monitor for any potential pregnancy symptoms.

    In conclusion, home insemination is a safe and effective method for conception if done correctly. It is important to educate yourself on the process and follow the recommended steps for a successful insemination. By debunking these common myths and providing a step-by-step guide, we hope to help couples and individuals make informed decisions about their journey to parenthood.

  • Breaking Down the Process: A Step-by-Step Guide to Home Insemination

    Blog Post Title: Breaking Down the Process: A Step-by-Step Guide to Home Insemination

    Summary:

    Home insemination is a method of assisted reproduction that allows couples or individuals to attempt pregnancy in the comfort of their own home. This process involves the collection of semen from a male partner or donor and the placement of the sperm into the female partner’s reproductive tract. While it may seem like a daunting process, home insemination can be a convenient and affordable option for those looking to start or expand their family. In this step-by-step guide, we will break down the process of home insemination and provide tips and advice for a successful attempt.

    Step 1: Understand the Risks and Benefits
    As with any medical procedure, it is important to understand the potential risks and benefits of home insemination. While this method has a high success rate for couples with fertility issues, there is also a risk of infection or injury if proper precautions are not taken. It is crucial to consult with a healthcare professional before attempting home insemination and to follow all safety protocols.

    Step 2: Choose a Donor
    If you are using donor sperm, the first step is to choose a donor. This can be done through a sperm bank or by finding a known donor. It is important to consider the donor’s health history, as well as their physical and emotional characteristics. Additionally, it is important to have a legal contract in place if using a known donor to avoid any potential legal issues in the future.

    comparison of standard and Mosie syringe barrels for at-home insemination, highlighting design features

    Breaking Down the Process: A Step-by-Step Guide to Home Insemination

    Step 3: Preparing the Sperm
    If using a sperm bank, the sperm will already be prepared and ready for insemination. However, if using a known donor, it is important to properly collect and prepare the sperm. The donor should abstain from ejaculation for 2-5 days prior to collection to ensure a higher sperm count. The sperm should then be collected in a sterile container and kept at room temperature until insemination.

    Step 4: Preparing the Female Partner
    Before insemination, the female partner should track her ovulation cycle. This can be done through ovulation predictor kits, tracking basal body temperature, or by monitoring cervical mucus changes. It is important to time the insemination as close to ovulation as possible to increase the chances of pregnancy.

    Step 5: Insemination
    There are two main methods of home insemination: the vaginal insemination method and the cervical cap method. The vaginal insemination method involves using a sterile syringe or needleless syringe to place the sperm into the vagina. The cervical cap method involves using a soft cup or cervical cap to hold the sperm near the cervix for a longer period of time. Whichever method is chosen, it is important to remain lying down for at least 20 minutes to allow the sperm to travel to the cervix.

    Step 6: Follow-Up
    After the insemination, it is important to monitor for any potential side effects or complications. If successful, pregnancy symptoms may start to appear within a few weeks. If unsuccessful, it is important to take a break and consult with a healthcare professional before attempting another insemination.

    Tips for a Successful Home Insemination:
    1. Stay relaxed and take your time during the process.
    2. Use sterile equipment and follow safety protocols.
    3. Consider using a fertility-friendly lubricant to aid in the process.
    4. Keep track of ovulation and time the insemination accordingly.
    5. Have patience and try multiple attempts if necessary.

    In conclusion, home insemination can be a safe and effective method for couples or individuals looking to conceive. By following these steps and tips, you can increase your chances of a successful home insemination. However, it is important to always consult with a healthcare professional before attempting any medical procedure.

  • From Conception to Birth: A Step-by-Step Guide to Home Insemination

    From Conception to Birth: A Step-by-Step Guide to Home Insemination

    For many couples, the journey to parenthood can be a long and difficult one. Traditional methods of conception may not be an option for some, such as same-sex couples or those struggling with fertility issues. This is where home insemination comes in as a viable option. It involves the process of placing sperm into the vagina or cervix in order to fertilize the egg and achieve pregnancy. In this blog post, we will provide a step-by-step guide to home insemination, from preparing for the procedure to tracking your fertility and taking care of yourself during pregnancy.

    Step 1: Preparing for Home Insemination
    Before beginning the process of home insemination, it is important to have a discussion with your partner about your decision. It is also recommended to consult with a doctor or fertility specialist to ensure that you are both healthy and able to conceive. Once you have made the decision to proceed with home insemination, you will need to gather the necessary supplies, such as a sterile syringe, ovulation predictor kit, and a fertility-friendly lubricant. It is also important to track your ovulation cycle in order to increase your chances of success.

    Step 2: Collecting and Preparing the Sperm
    The next step in home insemination is to obtain the sperm. This can be done through a known donor or through a sperm bank. If using a known donor, it is important to have them undergo testing to ensure that they are free of any sexually transmitted infections. A sperm bank will have already screened and tested the sperm, making it a safer option. Once you have the sperm, it will need to be collected and placed into a sterile cup. If using frozen sperm, it will need to be thawed according to the instructions provided by the sperm bank.

    Mosie Baby Kit with syringe and container, highlighting safety and usability features on a blue background.

    From Conception to Birth: A Step-by-Step Guide to Home Insemination

    Step 3: Insemination Process
    The actual insemination process is relatively simple and can be done in the comfort of your own home. The woman will need to lie down with her hips elevated, either with a pillow or by propping them up on a wall. The sperm can then be drawn up into the syringe and inserted into the vagina or cervix. It is important to remain in this position for at least 20 minutes to allow the sperm to travel towards the egg. After the 20 minutes, the woman can resume her normal activities.

    Step 4: Tracking Ovulation and Taking Care of Yourself
    After the insemination process, it is important to continue tracking your ovulation cycle in order to know when to take a pregnancy test. It is recommended to wait at least two weeks before taking a test, as it can take this long for a pregnancy to be detected. During this time, it is important to take care of yourself by eating a healthy diet, reducing stress, and avoiding alcohol and tobacco. It is also recommended to take a prenatal vitamin to ensure that you are getting the necessary nutrients for a healthy pregnancy.

    Step 5: Pregnancy and Beyond
    If the home insemination is successful, congratulations! You are now on your way to parenthood. It is important to continue taking care of yourself during pregnancy by attending regular prenatal appointments, following a healthy diet, and staying active. It is also important to communicate with your doctor about any concerns or questions you may have. Once your little one arrives, be sure to continue taking care of yourself and your baby by following your doctor’s recommendations for postpartum care.

    In conclusion, home insemination can be a viable option for couples looking to conceive. It is a simple and intimate process that can be done in the comfort of your own home. By following these steps and taking care of yourself during pregnancy, you can increase your chances of a successful outcome and welcome a new addition to your family.

  • Taking Charge of Your Fertility: A Step-by-Step Guide to Home Insemination

    Summary:

    Taking Charge of Your Fertility: A Step-by-Step Guide to Home Insemination is a comprehensive guide for individuals or couples who are looking to conceive using home insemination methods. This blog post will cover the basics of home insemination, including the benefits and risks, the different methods available, and the step-by-step process of how to perform it at home. We will also discuss important factors to consider before starting the process and provide tips for success.

    Home insemination is becoming an increasingly popular option for those who are trying to conceive. It is a cost-effective and convenient method that can be done in the comfort of your own home. It also allows for more control and privacy compared to traditional methods of insemination. However, it is important to understand the process and follow proper precautions to increase the chances of success.

    Benefits and Risks of Home Insemination:

    There are several benefits to home insemination, including cost, convenience, and control. Traditional methods of insemination, such as intrauterine insemination (IUI), can cost thousands of dollars and may not be covered by insurance. Home insemination, on the other hand, can be done for a fraction of the cost. It also allows for more flexibility in terms of timing and location, as appointments at fertility clinics can be difficult to schedule.

    Another advantage of home insemination is that it gives individuals or couples more control over the process. They can choose the donor, the timing, and the method of insemination. This can be especially beneficial for those who want to have a more intimate and personal experience. However, it is important to note that home insemination does come with some risks, including the potential for infection and the possibility of not being successful.

    Methods of Home Insemination:

    There are three main methods of home insemination: intracervical insemination (ICI), intravaginal insemination (IVI), and intratubal insemination (ITI). ICI involves inserting the sperm into the cervix using a syringe or a cervical cap. IVI is similar, but the sperm is placed higher in the vagina. ITI, also known as “self-insemination,” involves inserting the sperm into the uterus using a special syringe or catheter.

    The method chosen will depend on personal preference, as well as any fertility issues or medical conditions that may affect the success of each method. It is important to consult with a healthcare professional to determine the best method for your individual situation.

    Step-by-Step Guide to Home Insemination:

    Before beginning the home insemination process, it is important to do some research and gather all necessary supplies. These may include a syringe, cervical cap, or catheter, as well as a sperm collection cup or vial. It is important to ensure that all equipment is sterile and free of any contaminants.

    hands using a syringe to extract contents from a clear container, showcasing a home insemination kit.

    Taking Charge of Your Fertility: A Step-by-Step Guide to Home Insemination

    Step 1: Track your menstrual cycle – It is important to track your menstrual cycle to determine the best time for insemination. This can be done using a fertility tracker app, ovulation predictor kits, or by tracking your basal body temperature.

    Step 2: Collect sperm – If using a sperm donor, it is important to obtain the sperm and have it tested for any potential diseases or genetic conditions.

    Step 3: Prepare the sperm – Depending on the method of insemination, the sperm may need to be washed and prepared before use.

    Step 4: Prepare yourself – It is important to wash your hands thoroughly and get into a comfortable position before beginning the insemination process.

    Step 5: Insert the sperm – Using the chosen method, carefully insert the sperm into the desired location, whether it be the cervix, vagina, or uterus.

    Step 6: Rest and wait – After insemination, it is recommended to rest for at least 30 minutes to allow the sperm to reach the cervix. It is also important to remain lying down for a few hours after insemination to increase the chances of success.

    Tips for Success:

    While home insemination can be a successful method for conception, there are some tips that can increase the chances of success. These include:

    – Using high-quality sperm from a reputable sperm bank or donor.
    – Timing insemination with ovulation.
    – Keeping sperm at room temperature before use.
    – Using a fertility-friendly lubricant.
    – Staying relaxed and stress-free during the process.

    It is also important to have realistic expectations and understand that home insemination may not be successful on the first try. It may take several attempts before achieving a positive result.

    In conclusion, Taking Charge of Your Fertility: A Step-by-Step Guide to Home Insemination provides a detailed overview of the process, benefits and risks, methods, and tips for success. It is important to consult with a healthcare professional and do thorough research before beginning the process. With proper preparation and precautions, home insemination can be a successful option for those looking to start or expand their family.

  • The Ins and Outs of Home Insemination: A Step-by-Step Guide

    Title: The Ins and Outs of Home Insemination: A Step-by-Step Guide

    Home insemination is a method of assisted reproduction that involves using sperm from a donor to fertilize an egg in the comfort of your own home. This process can be an alternative to traditional methods of conception, such as artificial insemination or in vitro fertilization, and can be a more affordable and intimate option for couples or individuals looking to start a family. In this blog post, we will take a closer look at the ins and outs of home insemination, including the steps involved, potential risks and benefits, and how to make the process as safe and successful as possible.

    Step 1: Understand the Process and Its Requirements

    Before embarking on the home insemination journey, it is crucial to understand the process and its requirements. Home insemination involves collecting sperm from a donor and using a syringe or other device to place it into the vagina or cervix. This process aims to mimic the natural process of fertilization, where sperm travels through the cervix and into the uterus to reach the egg.

    To begin, you will need to determine if you are a suitable candidate for home insemination. This method is most commonly used by same-sex couples, single women, and couples with male fertility issues. However, it is essential to consult with a fertility specialist to discuss your options and ensure that home insemination is a safe and viable option for you.

    Step 2: Choose a Donor and Obtain Sperm

    One of the most crucial steps in home insemination is selecting a donor and obtaining sperm. The donor can be a known or anonymous donor, and it is essential to consider the legal and emotional implications of each option. For known donors, it is crucial to have a detailed legal agreement in place to protect all parties involved. Anonymous donors can be found through sperm banks or online sperm donation platforms.

    Once you have chosen a donor, you will need to obtain sperm. If using a sperm bank, the sperm will be shipped to your home in a frozen state, and you will need to follow the instructions provided for thawing. If using a known donor, you will need to arrange for the collection of fresh sperm on the day of insemination.

    Step 3: Prepare for Insemination

    hands holding a teal syringe and a clear container against a blue background

    The Ins and Outs of Home Insemination: A Step-by-Step Guide

    Before insemination, it is essential to prepare both physically and emotionally. This process can be stressful and emotionally draining, so it is crucial to create a relaxing and comfortable environment. It is also recommended to abstain from intercourse for 2-5 days before insemination to ensure a higher concentration of sperm.

    Step 4: Perform the Insemination

    The actual insemination process is relatively straightforward and can be done in the comfort of your own home. First, you will need to use a syringe or other device to collect the sperm from the collection cup or thawed vial. Next, you or your partner will lie on your back with your hips elevated, and using the syringe, gently insert the sperm into the vagina or cervix. It is essential to remain in this position for 15-30 minutes to allow the sperm to travel to the cervix and uterus.

    Step 5: Rest and Monitor for Pregnancy

    After the insemination, it is recommended to rest for at least 30 minutes and avoid any vigorous activities for the next 24 hours. The sperm will need time to travel to the egg, and it is crucial to give them the best chance of reaching their destination. You will also need to monitor for any early pregnancy symptoms, such as implantation bleeding, cramping, and breast tenderness. It is essential to take a pregnancy test two weeks after insemination to confirm if the process was successful.

    Potential Risks and Benefits

    As with any medical procedure, there are potential risks and benefits to consider before undergoing home insemination. Some of the benefits include a more intimate and affordable option for conception, as well as the ability to use a known donor. However, there are also risks involved, such as the possibility of infection or complications from using fresh sperm and the emotional implications of using a known donor.

    To minimize these risks, it is crucial to follow all safety protocols, including using sterile equipment and obtaining sperm from a reputable source. It is also essential to have a support system in place and to consult with a fertility specialist throughout the process.

    In conclusion, home insemination can be a viable option for couples or individuals looking to start a family. By understanding the process, selecting a suitable donor, preparing for insemination, and monitoring for pregnancy, you can increase the chances of a successful outcome. However, it is crucial to consult with a fertility specialist and have a support system in place to ensure a safe and positive experience.

  • The Ultimate Guide to Home Insemination: Step-by-Step Instructions

    Summary:

    Home insemination is a process that allows individuals or couples to conceive a child in the comfort and privacy of their own home. This option is often chosen by those who are facing fertility issues, same-sex couples, or single individuals who want to start a family. However, the process can seem daunting and overwhelming for those who are new to it. In this ultimate guide to home insemination, we will provide step-by-step instructions on how to successfully perform this procedure at home.

    Step 1: Understand the Risks and Benefits

    Before jumping into the process of home insemination, it is important to understand the potential risks and benefits. Home insemination is a safe and effective method for conceiving a child, but it does come with some risks such as the possibility of infection or failure to conceive. On the other hand, the benefits include privacy, convenience, and cost-effectiveness compared to other fertility treatments.

    Step 2: Choose a Donor

    The next step is to choose a donor. This can either be a known donor, such as a friend or family member, or an anonymous donor from a sperm bank. It is important to consider factors such as health history, physical characteristics, and compatibility with your values and beliefs when selecting a donor.

    Step 3: Gather Supplies

    Once you have chosen a donor, it is time to gather all the necessary supplies. These include a sterile collection cup, ovulation predictor kits, a syringe, and a sterile container to hold the sperm. It is important to ensure that all the supplies are sterile to avoid any potential infections.

    Step 4: Track Your Ovulation

    Tracking your ovulation is crucial in the home insemination process. This can be done through various methods such as tracking your menstrual cycle, using ovulation predictor kits, or monitoring your basal body temperature. Knowing when you are ovulating will increase the chances of successful insemination.

    Mosie Baby kit for at-home insemination with syringes and collection cups on a teal background.

    The Ultimate Guide to Home Insemination: Step-by-Step Instructions

    Step 5: Collect the Sperm

    Once you have determined your ovulation window, it is time to collect the sperm from the donor. If using a known donor, make sure he follows the appropriate guidelines for collection and storage of the sperm. If using a sperm bank, the sperm will be shipped to your home in a frozen state.

    Step 6: Prepare for Insemination

    Before starting the insemination process, make sure to wash your hands thoroughly and sanitize all the supplies. The donor should also wash his hands and genitals before collecting the sperm. The sperm should then be transferred into the sterile container and kept at room temperature.

    Step 7: Perform the Insemination

    Using a syringe, carefully draw the sperm from the sterile container and insert it into your vagina. The best position for insemination is lying down with your hips elevated. Gently insert the syringe as far as possible and slowly release the sperm. Remain in this position for 15-20 minutes to allow the sperm to reach the cervix.

    Step 8: Monitor and Repeat

    After the insemination, it is important to monitor your body for any changes or signs of ovulation. If successful, you may experience symptoms such as increased vaginal discharge, cramping, or spotting. If you do not conceive, you can repeat the process during your next ovulation window.

    Step 9: Take a Pregnancy Test

    About two weeks after insemination, you can take a home pregnancy test to determine if you have successfully conceived. If the test is positive, congratulations! If not, you can repeat the process until you achieve a successful pregnancy.

    In conclusion, home insemination is a viable and safe option for those who want to conceive a child in the comfort of their own home. By following these step-by-step instructions, you can increase your chances of successful insemination and start your journey towards parenthood.

  • DIY Home Insemination: Overcoming Obstacles and Challenges

    DIY Home Insemination: Overcoming Obstacles and Challenges

    For many couples and individuals, the dream of starting a family is a deeply personal and important one. However, for those who struggle with fertility issues or those in the LGBTQ+ community, traditional methods of conception may not be an option. This is where DIY home insemination comes into play. With advancements in technology and a growing acceptance of non-traditional family structures, more and more people are turning to DIY home insemination as a way to overcome obstacles and challenges on their journey to parenthood.

    What is DIY Home Insemination?

    DIY home insemination, also known as artificial insemination at home, is a method of conception where sperm is inserted into the vagina or cervix without medical intervention. This can be done using a variety of techniques, including using a needleless syringe, a cervical cap, or a menstrual cup. The goal is to place the sperm as close to the cervix as possible to increase the chances of fertilization.

    Why Choose DIY Home Insemination?

    There are many reasons why someone may choose DIY home insemination over traditional methods of conception. For some, it may be due to financial constraints, as the cost of fertility treatments and medical procedures can be prohibitively expensive. Others may choose DIY home insemination for privacy reasons, as the process can be done in the comfort and privacy of one’s own home. Additionally, DIY home insemination allows for more control over the process, as individuals can choose their own sperm donor and timing of insemination.

    Overcoming Obstacles and Challenges

    While DIY home insemination may offer a more accessible and private option for conception, it is not without its obstacles and challenges. One of the main obstacles is obtaining sperm from a donor. For heterosexual couples, this may involve finding a willing and trustworthy sperm donor, while for same-sex couples or individuals, it may involve purchasing donor sperm from a sperm bank. In either case, it can be a difficult and emotional process to find the right donor.

    Hands holding a syringe and a small container against a blue background.

    DIY Home Insemination: Overcoming Obstacles and Challenges

    Another challenge is the preparation and timing of insemination. Unlike traditional methods of conception where timing is closely monitored by medical professionals, DIY home insemination requires individuals to track their ovulation and time the insemination accordingly. This can be a stressful and time-consuming process, but proper timing is crucial for successful conception.

    Safety and Sterility

    One of the biggest concerns with DIY home insemination is safety and sterility. Unlike medical procedures that take place in a sterile environment, home insemination carries a higher risk of infection if proper precautions are not taken. It is essential to make sure that all equipment used is clean and sterile to avoid any potential complications.

    Additionally, it is crucial to ensure that the sperm used is from a healthy and screened donor to avoid any potential health risks. This is where purchasing donor sperm from a reputable sperm bank can offer peace of mind, as they thoroughly screen and test all donors before making their sperm available for purchase.

    The Emotional Journey

    Aside from the physical challenges of DIY home insemination, the emotional journey can also be a challenging aspect. Conception can be a rollercoaster of emotions, and the process of DIY home insemination can amplify those emotions. The waiting game between insemination and finding out if it was successful can be an emotional rollercoaster, and the disappointment that comes with negative results can be difficult to handle.

    Furthermore, for those who are using DIY home insemination as a means of starting a family, there may be societal and personal challenges that come with non-traditional family structures. It is essential to have a strong support system in place to help navigate these challenges and provide emotional support throughout the journey.

    In conclusion, DIY home insemination can be a viable option for couples and individuals looking to start a family. It offers a more accessible, private, and controlled method of conception, but it is not without its obstacles and challenges. From finding a donor to timing insemination and dealing with the emotional journey, DIY home insemination requires careful consideration and preparation. However, with the right resources and support, individuals and couples can overcome these obstacles and achieve their dream of parenthood through DIY home insemination.

    SEO metadata:

  • The Role of Sperm Donors in DIY Home Insemination

    Blog Post Title: The Role of Sperm Donors in DIY Home Insemination: Everything You Need to Know

    Introduction:
    In recent years, the use of DIY home insemination has become a popular option for couples and individuals looking to start a family. This method involves using a donor’s sperm to inseminate oneself at home, without the assistance of a medical professional. While there are various ways to obtain donor sperm, the use of sperm donors plays a crucial role in this process. In this blog post, we will delve into the role of sperm donors in DIY home insemination, including their importance, the process of finding a donor, and legal considerations.

    The Importance of Sperm Donors in DIY Home Insemination:
    Sperm donors are an essential part of the DIY home insemination process as they provide the necessary sperm for conception. Without a donor, this method would not be possible. Sperm donors can be individuals who are known to the recipient or anonymous donors from sperm banks. They can also be directed donors, where the donor and recipient have a mutual agreement for sperm donation. Sperm donors play a vital role in helping individuals and couples achieve their dreams of starting a family through DIY home insemination.

    Finding a Sperm Donor for DIY Home Insemination:
    Finding a sperm donor for DIY home insemination can be a challenging and overwhelming process. The first step is to decide whether to use a known donor or an anonymous donor from a sperm bank. Known donors are typically someone the recipient knows personally, such as a friend or family member. This option may provide a sense of comfort and familiarity, but it also comes with its challenges, such as potential legal and emotional complications. On the other hand, anonymous donors from sperm banks provide a more straightforward and regulated process, but the recipient may not have a personal connection with the donor.

    hands holding a syringe and container with text promoting Mosie Baby's support for pregnancy assistance

    The Role of Sperm Donors in DIY Home Insemination

    Once the type of donor has been decided, the next step is to find a suitable donor. This can be done through online platforms or sperm banks. When choosing a donor, it is crucial to consider factors such as physical characteristics, medical history, and personal values. It is also essential to ensure that the donor is willing to undergo medical and genetic testing to ensure the health and safety of the recipient and potential child.

    Legal Considerations:
    When using a sperm donor for DIY home insemination, it is crucial to consider the legal implications. The laws and regulations surrounding sperm donation vary from country to country and even within different states. Therefore, it is essential to research and understand the laws in your specific location. In some cases, using a known donor may require a legal agreement to protect both parties involved. For anonymous donors, most sperm banks provide legal contracts to protect the rights and responsibilities of the donor, recipient, and potential child.

    The DIY Home Insemination Process:
    Once a suitable sperm donor has been chosen, the next step is the actual insemination process. This process involves obtaining the sperm sample from the donor and using a syringe or insemination kit to inseminate oneself. It is crucial to ensure that all equipment used is sterile and that the process is done in a clean and safe environment. Following the insemination, it is essential to track ovulation and follow up with a pregnancy test to determine if the insemination was successful.

    Summary:
    DIY home insemination is a popular option for individuals and couples looking to start a family. Sperm donors play a vital role in this process, providing the necessary sperm for conception. Finding a donor can be a challenging process, and it is crucial to consider factors such as type of donor, physical characteristics, and legal implications. The actual insemination process involves using sterile equipment and tracking ovulation to increase the chances of a successful pregnancy.

  • The Ultimate Guide to DIY Home Insemination

    The Ultimate Guide to DIY Home Insemination: A Step-by-Step Process for Starting Your Family

    Are you and your partner considering starting a family but are unable to conceive naturally? Or perhaps you are a single person who wants to become a parent? In either case, home insemination may be a viable option for you. Many couples and individuals have successfully used DIY home insemination as an affordable and convenient way to start their families. In this ultimate guide, we will walk you through everything you need to know about DIY home insemination, from the basics to the step-by-step process.

    What is Home Insemination?

    Home insemination is the process of manually inserting sperm into the vagina in hopes of achieving pregnancy. It is commonly used by same-sex couples, single individuals, or couples with fertility issues. The process can be done at home with minimal equipment and is often more affordable than other fertility treatments.

    Step 1: Understanding Ovulation

    The first step in home insemination is understanding ovulation. Ovulation is the process in which a mature egg is released from the ovary and is available for fertilization. For home insemination to be successful, it is crucial to determine when you are ovulating. There are several methods to track ovulation, such as using ovulation predictor kits, tracking basal body temperature, or monitoring cervical mucus changes.

    Step 2: Collecting Sperm

    The next step is to collect the sperm that will be used for insemination. There are a few options for obtaining sperm, including using a sperm donor or asking a male friend to donate. It is essential to discuss the legal and emotional implications of using a sperm donor or a known donor beforehand. Another option is to purchase pre-packaged donor sperm from a sperm bank. Whichever method you choose, make sure to follow proper safety precautions, such as using sterile containers and avoiding exposure to air or extreme temperatures.

    Step 3: Preparing the Sperm

    syringe kit with a screw top lid and non-tip safety wall, designed for sperm insemination.

    The Ultimate Guide to DIY Home Insemination

    Once the sperm is collected, it needs to be prepared for insemination. The most crucial step in preparing the sperm is to keep it at the correct temperature. Sperm is sensitive to temperature changes, so it is best to keep it at room temperature before use. You can also warm the sperm by holding the container between your hands for a few minutes.

    Step 4: Inserting the Sperm

    Now comes the actual insemination process. The most common method for home insemination is to use a syringe without a needle. Fill the syringe with the prepared sperm and gently insert it into the vagina, aiming towards the cervix. It is recommended to remain lying down for 15 to 20 minutes after insemination to increase the chances of sperm reaching the cervix.

    Step 5: Monitoring and Waiting

    After insemination, it is essential to monitor your body for any changes and keep track of any potential pregnancy symptoms. It is also crucial to relax and give your body time to do its job. It takes about 6-10 days for a fertilized egg to implant in the uterus and for pregnancy hormones to be detected in a pregnancy test. If you do not get a positive result, you can repeat the process in your next ovulation cycle.

    Tips for Successful Home Insemination

    – Always use sterile equipment and follow proper safety precautions.
    – Track ovulation accurately to increase the chances of success.
    – Consider using a fertility-friendly lubricant to make the process more comfortable.
    – Keep sperm at the correct temperature and avoid exposure to air or extreme temperatures.
    – Remain lying down for 15-20 minutes after insemination to increase sperm’s chances of reaching the cervix.
    – Stay relaxed and positive throughout the process.

    Conclusion

    DIY home insemination can be a successful and affordable option for starting a family. By understanding the process and following the steps carefully, you can increase your chances of success. Remember to consult with a medical professional if you have any concerns or difficulties. With patience, preparation, and proper timing, you can achieve your dream of becoming a parent through home insemination.

    In summary, DIY home insemination is the process of manually inserting sperm into the vagina to achieve pregnancy. The first step is to track ovulation accurately, followed by collecting and preparing the sperm. The actual insemination is done using a syringe without a needle, and it is crucial to remain lying down for 15-20 minutes after the process. By following safety precautions and tips for success, you can increase your chances of achieving pregnancy through home insemination.